Create Approvers and Approver Groups
Use the processes outlined here to create approvers and assemble groups for approving questionnaires, either based on individual participant or the entire questionnaire.
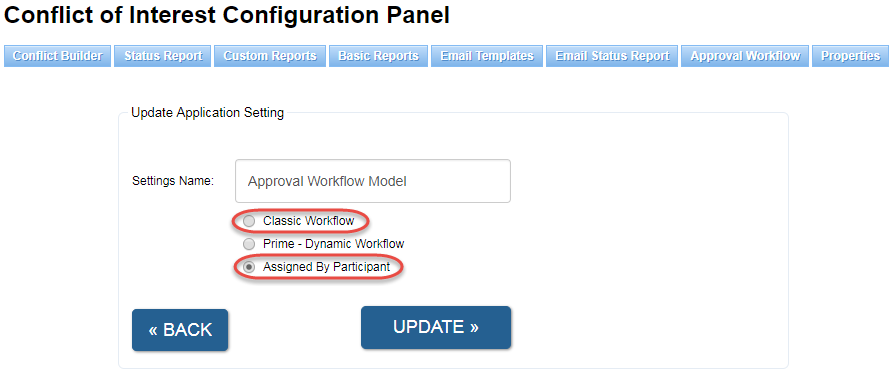
Note: Some of the steps outlined here depend directly on what approval workflow method you chose in the Config Panel. There will be references made to Classic Workflow (Manual Approval or one/two approver groups per questionnaire) and Assigned by Participant (Different approver groups for each participant)
Click here to see where to find these configuration options
Step-by-step guide
Show Me How to Create a New Approver
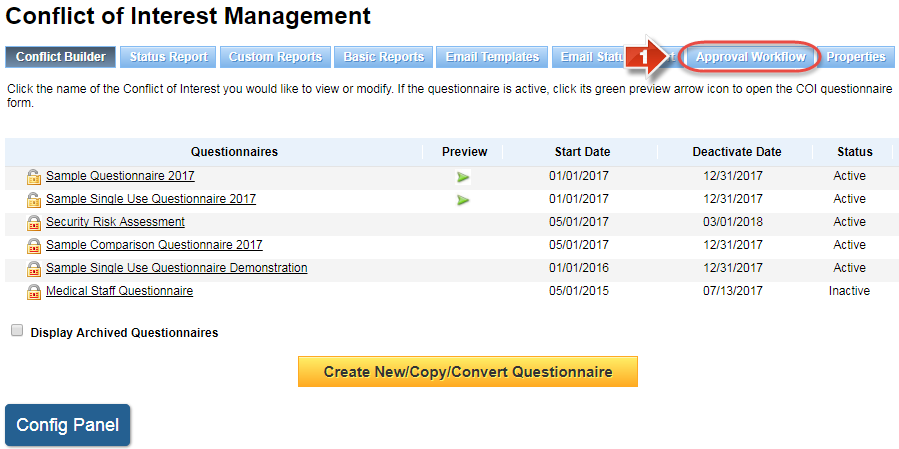
- Click the 'Approval Workflow' tab
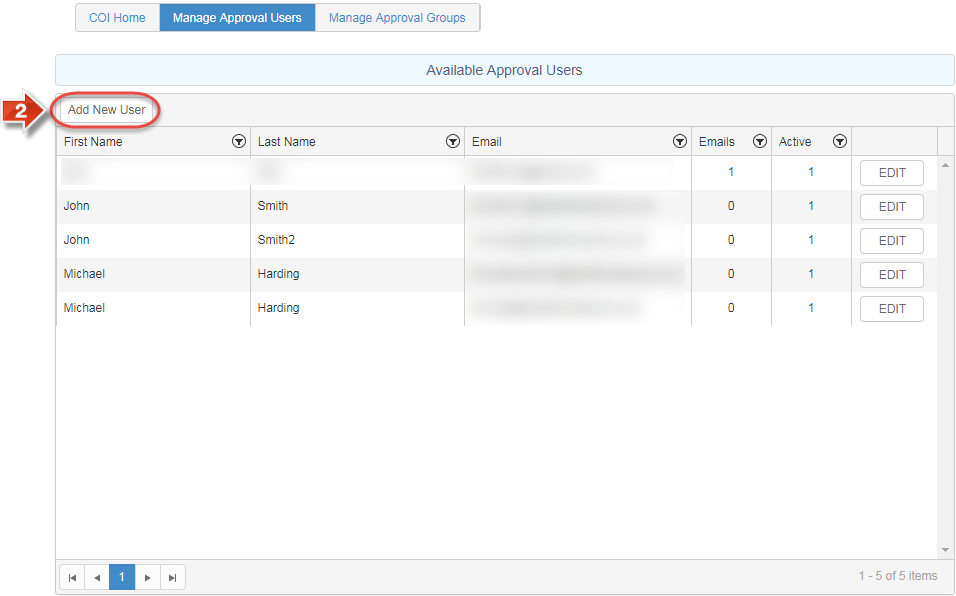
- Click the 'Add New User' button
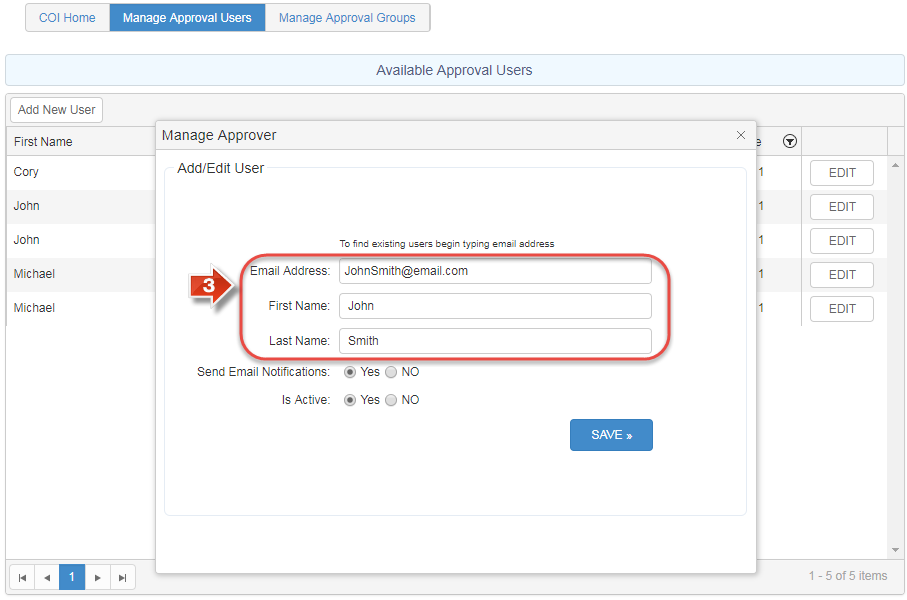
- Enter the 'Email Address' 'First Name' and 'Last Name' of the approver (If the Email address is already being used, you will instead be prompted to edit the existing user that has that Email address)
Why do I get a pop-up while entering an Email address?
If the Email address you are entering pops up before you complete it, then there is already an approver in the system using the Email address you are entering. Selecting the Email address will populate that approver's information in this window and allow you to make changes as if you had clicked the 'Edit' button for that approver.
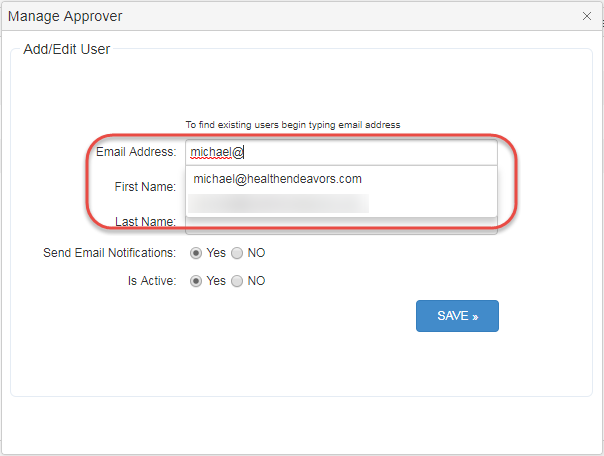
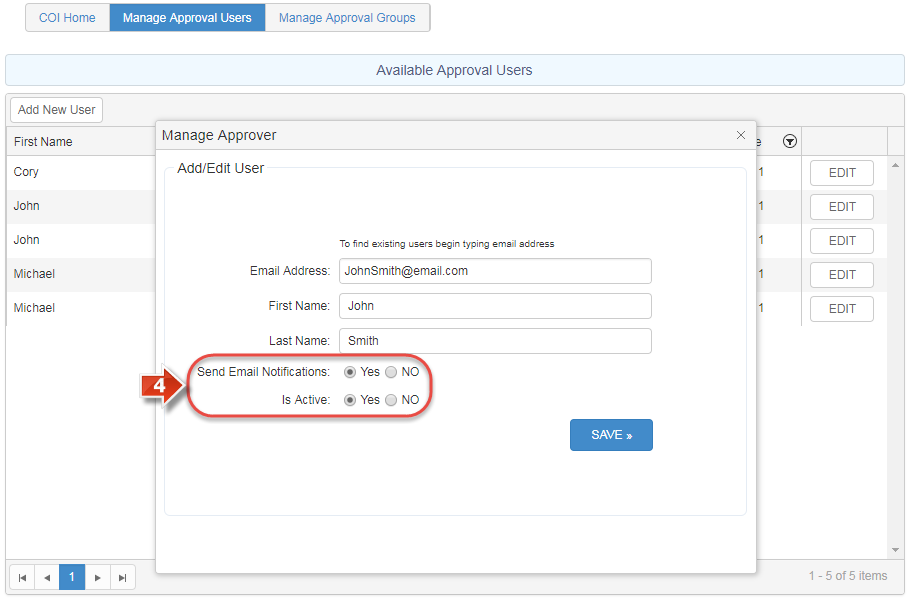
- If the approver should get Emails when a participant submits their questionnaire for review, leave 'Send Email Notifications' set to Yes ('Is Active' should always be set to Yes when adding an approver, and should only be set to No to deactivate the approver)
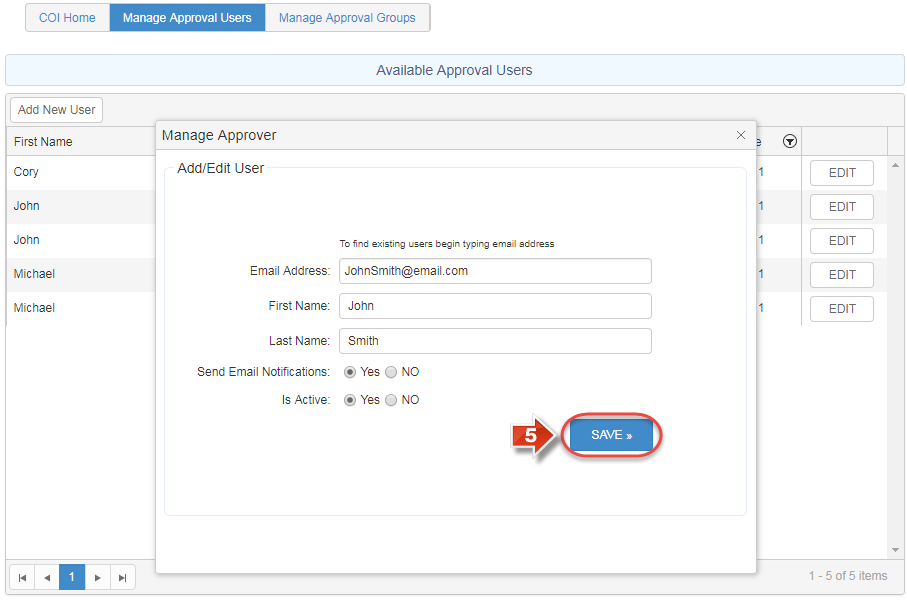
- Click the 'Save' button to create the approver
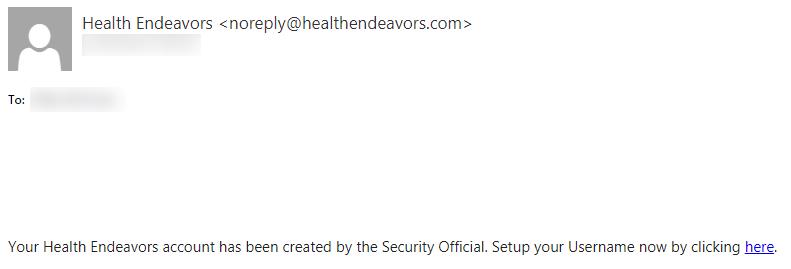
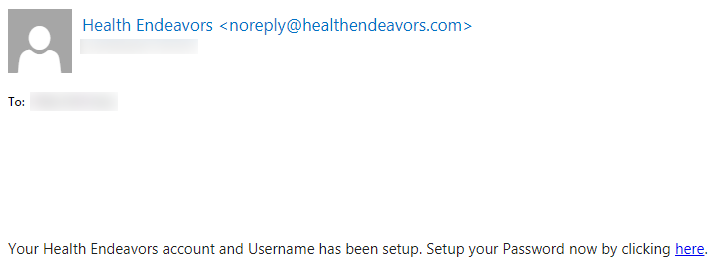
- At this point, the approver will get a registration Email to become a user in the system, and may register a Username and Password for logging in as an approver (This is not required if the approver is only going to approve participants via Email, or if the approver is already a user in the system)
Set Up Username Email Example
Set Up Password Email Example
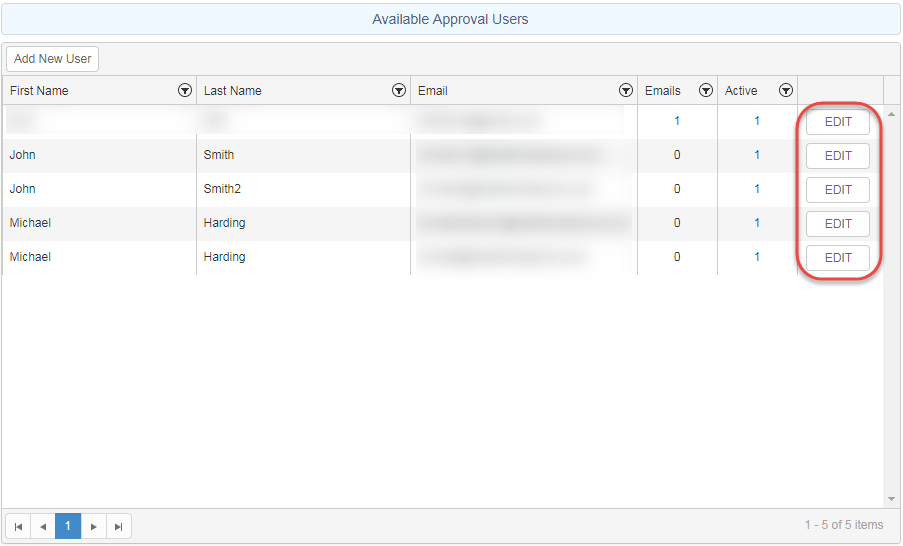
- If you ever need to re-configure or remove an approver, find the approver in the list and click the 'Edit' button
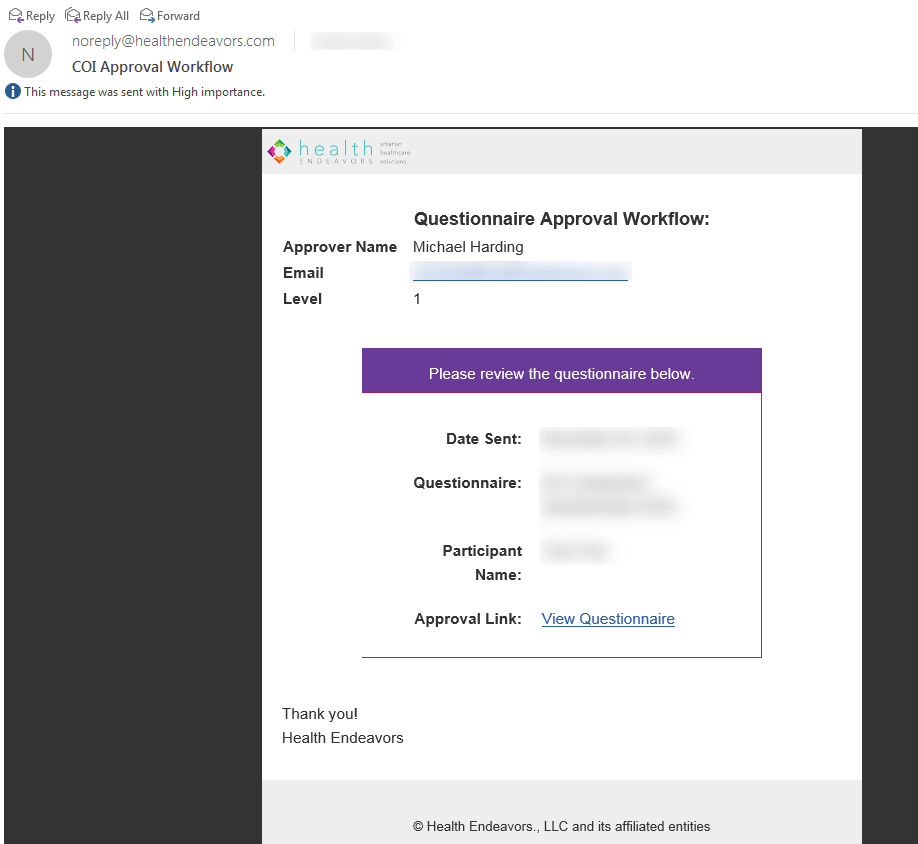
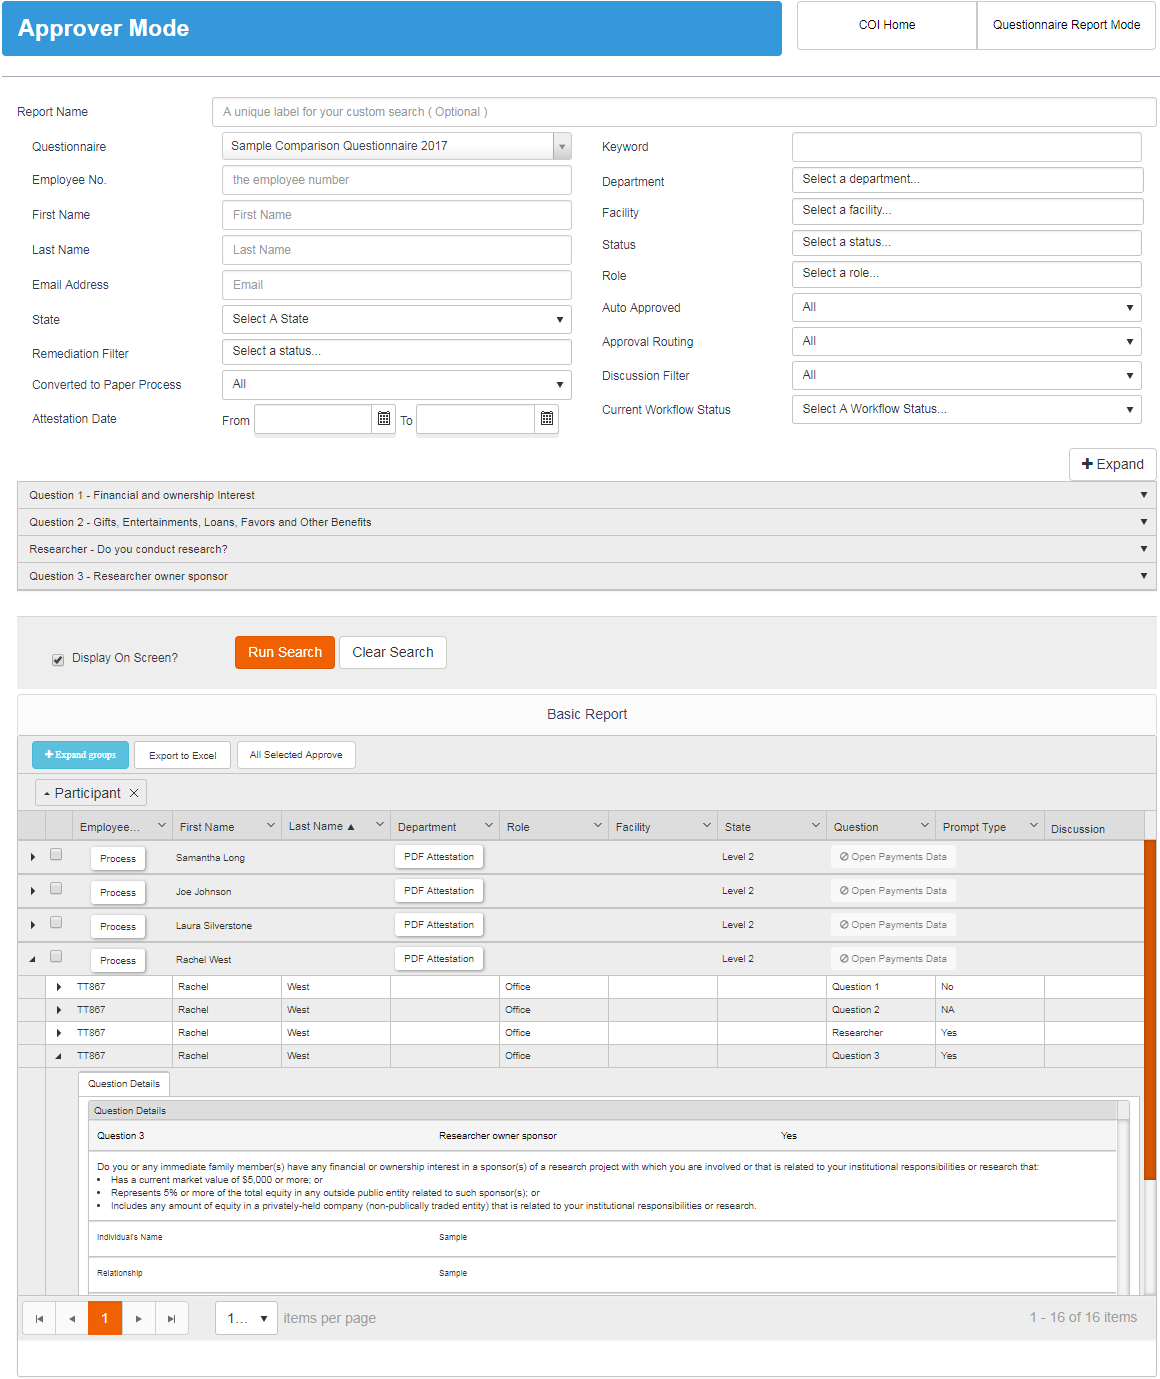
- After the approver is created, they may either follow a link directly from an approval workflow Email (Classic Workflow) or click the 'Custom Reports' tab to access the approver dashboard (Assigned by Participant workflow)
Classic Workflow Email Example
Approver Dashboard Example
Show Me How to Create a New Approval Group
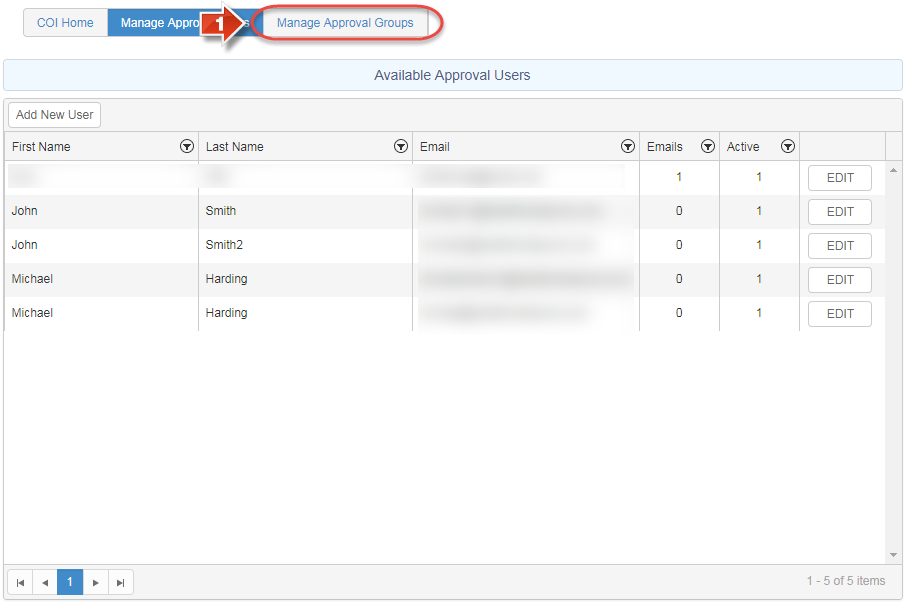
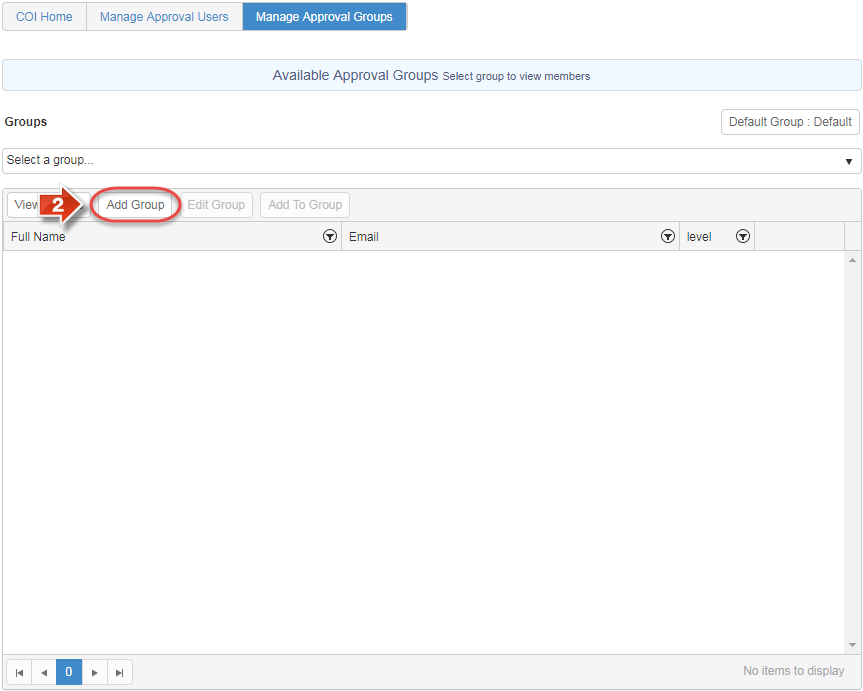
- From the Approval Workflow page, click the 'Manage Approval Groups' tab
- Click the 'Add Group' button
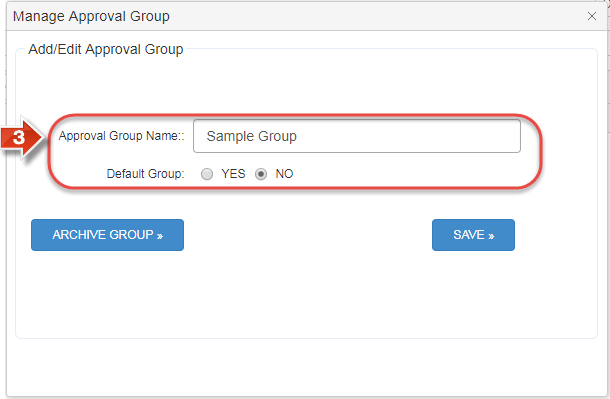
- Fill in the 'Group Name' field and indicate whether or not you wish for this to be the default group (Assigned by Participant Only. A default group receives a participant's approval workflow if no other group is assigned to that participant)
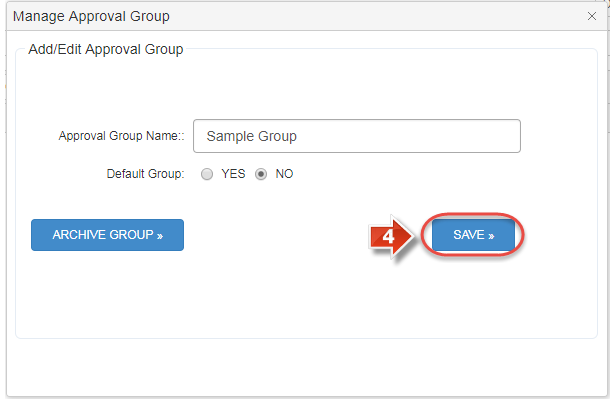
- Click the 'Save' button to create the new group
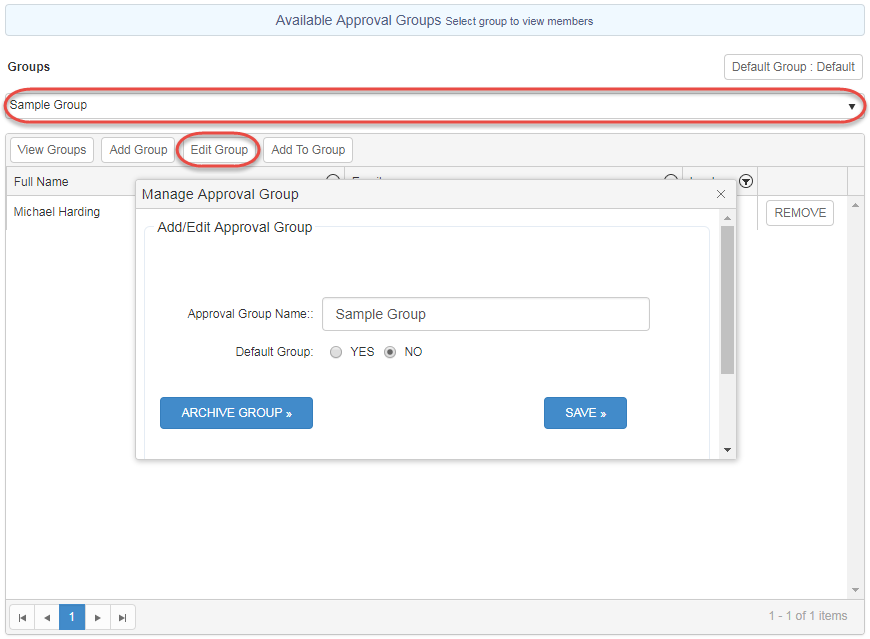
- Once the group is created, you may select the group from the 'Groups' dropdown menu and click the 'Edit Group' button to make changes or archive the group
Show Me How to Add an Approver to an Approval Group
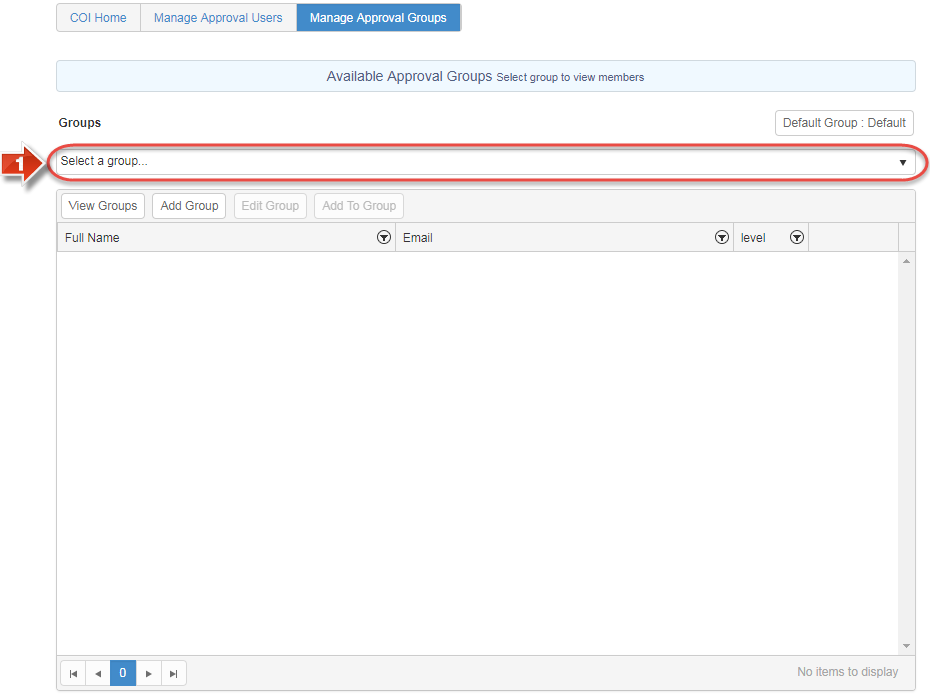
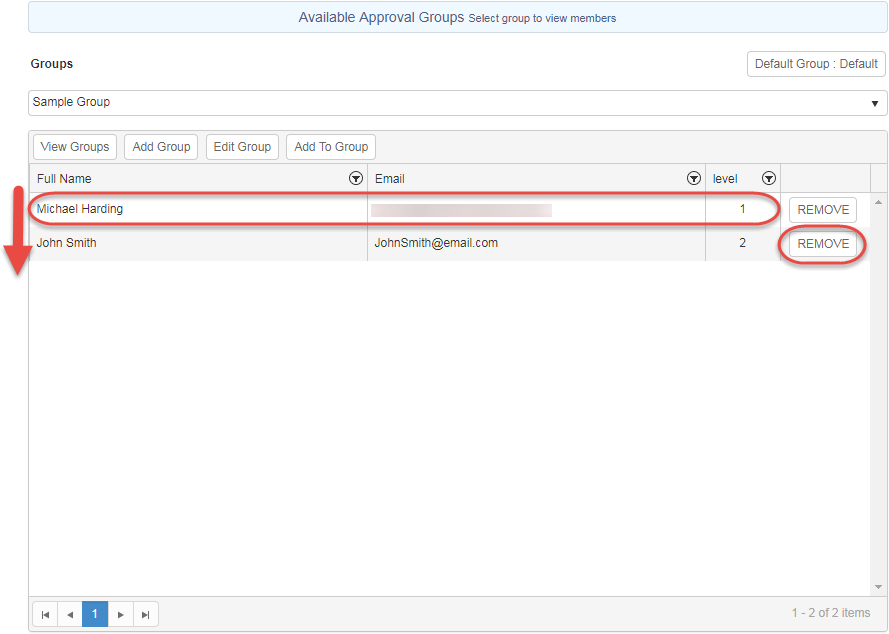
- On the Manage Approval Groups page, select the approval group from the 'Groups' dropdown
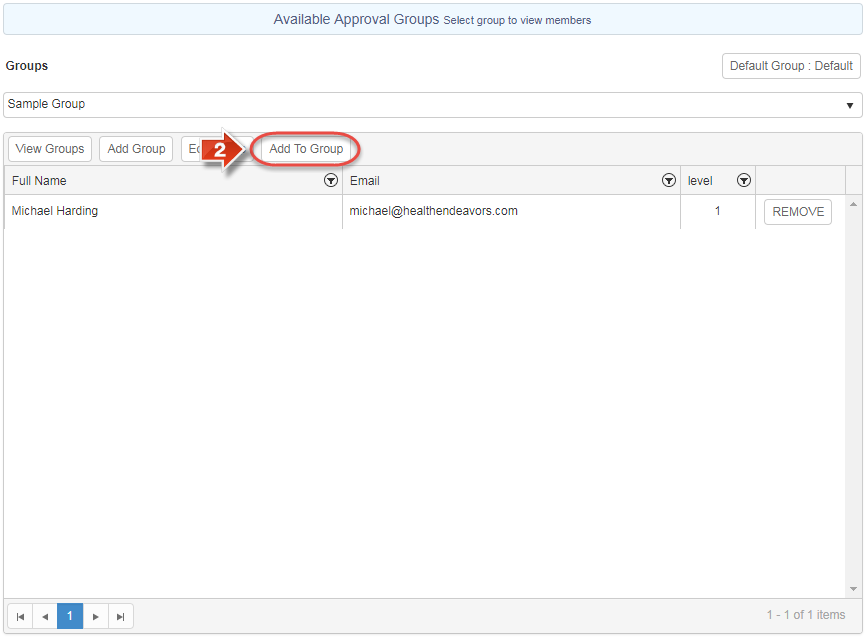
- Click the 'Add to Group' button
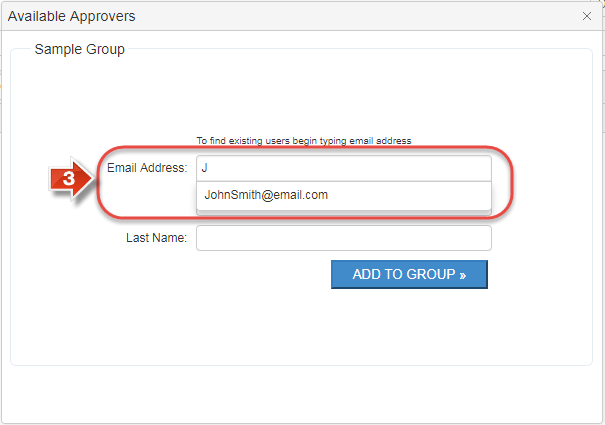
- Begin to enter the Email address of the approver you want to add, then select the matching result from the pop-up selection menu
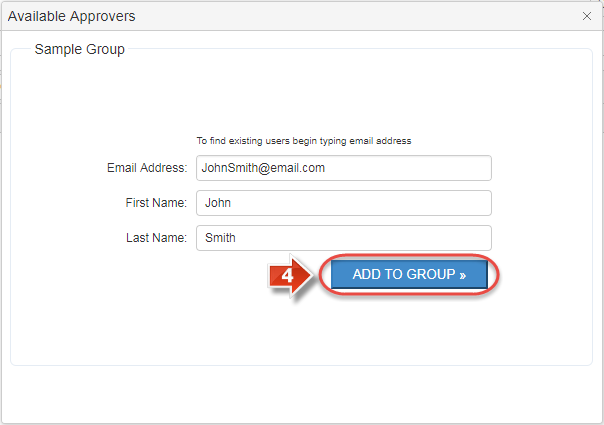
- The rest of the information is filled in based on the entry you selected. Click the 'Add to Group' button to finish adding this approver
- After approver(s) are added to the approval group, you may click the 'Remove' button to take approvers out of the group or click and drag an approver entry to re-order the levels for approvers
Related articles
-
Page:
-
Page:
-
Page:
-
Page:
-
Page:
