Set up Auto Approval Logic
Use this process from start to finish to set up auto approval logic on a questionnaire.
Step-by-step guide
To set up auto approval logic, perform the following steps:
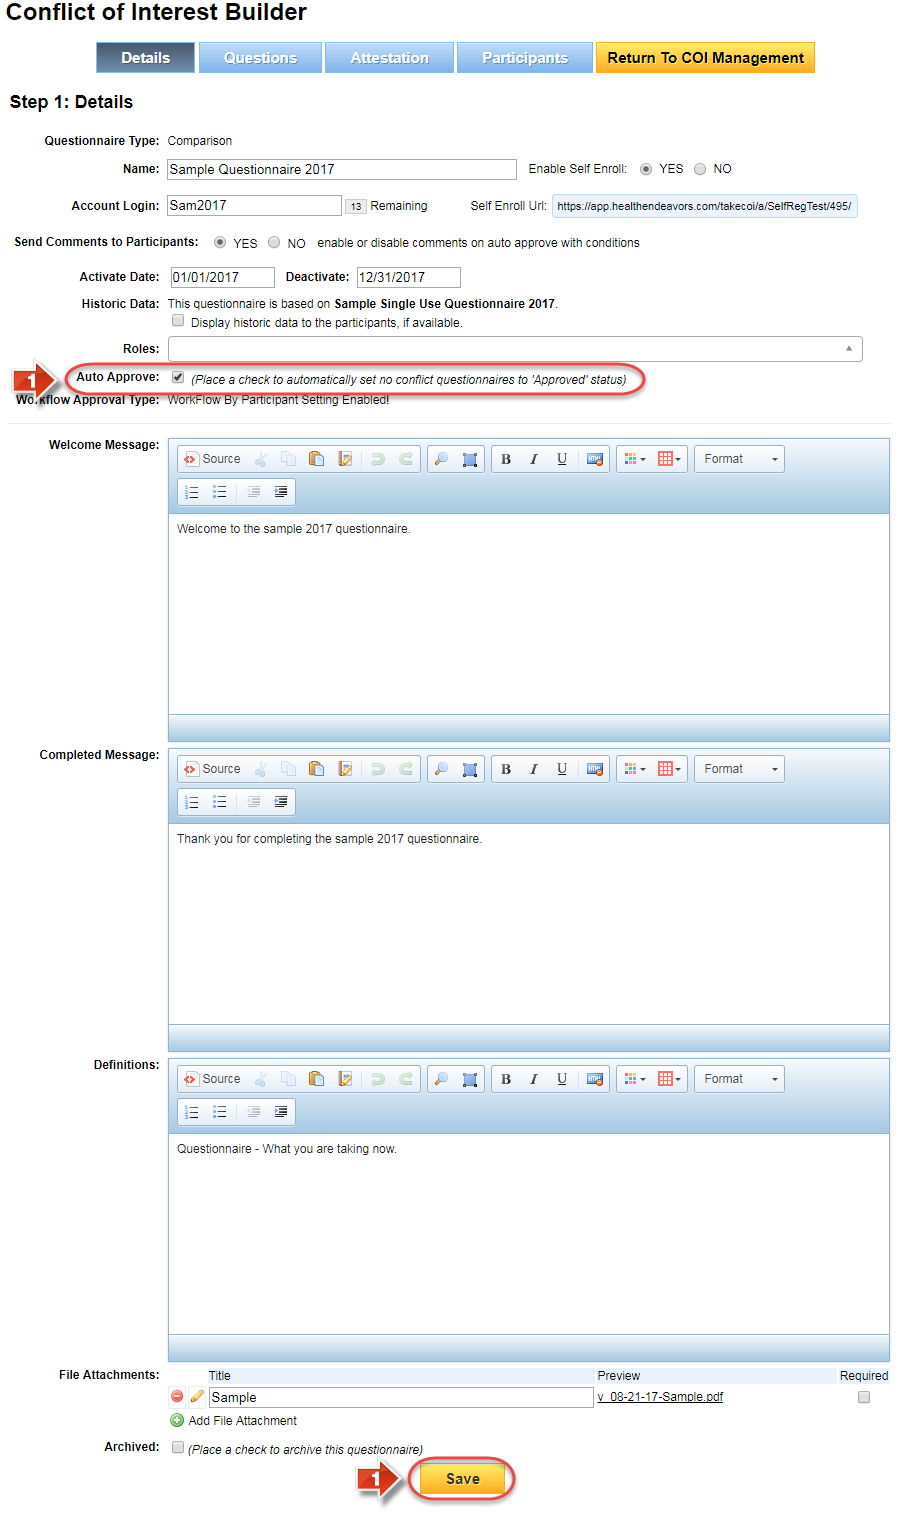
- On the 'Details' page of the questionnaire, make sure that the checkbox for 'Auto Approve' is filled, and 'Save' if necessary.
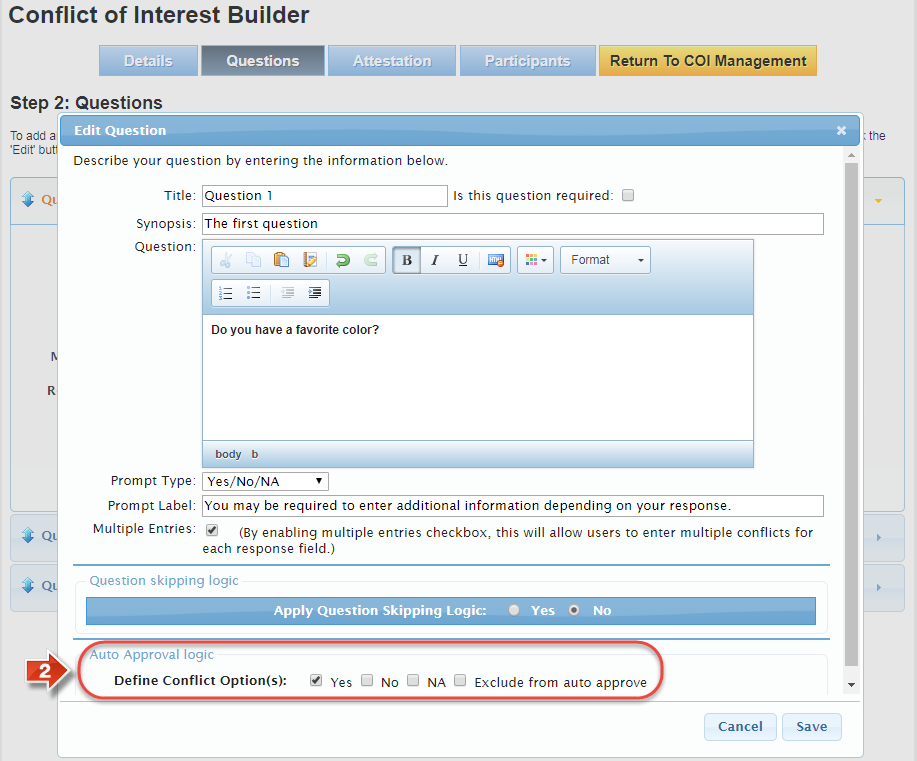
- On the 'Questions' page of the questionnaire, make sure each question that uses Yes/No, Yes/No/NA, or Checkbox has the 'Auto Approval Logic' section mapped out. Choose the response(s) that would remove the participant from automatic approval, or exclude a question from auto approval logic as necessary
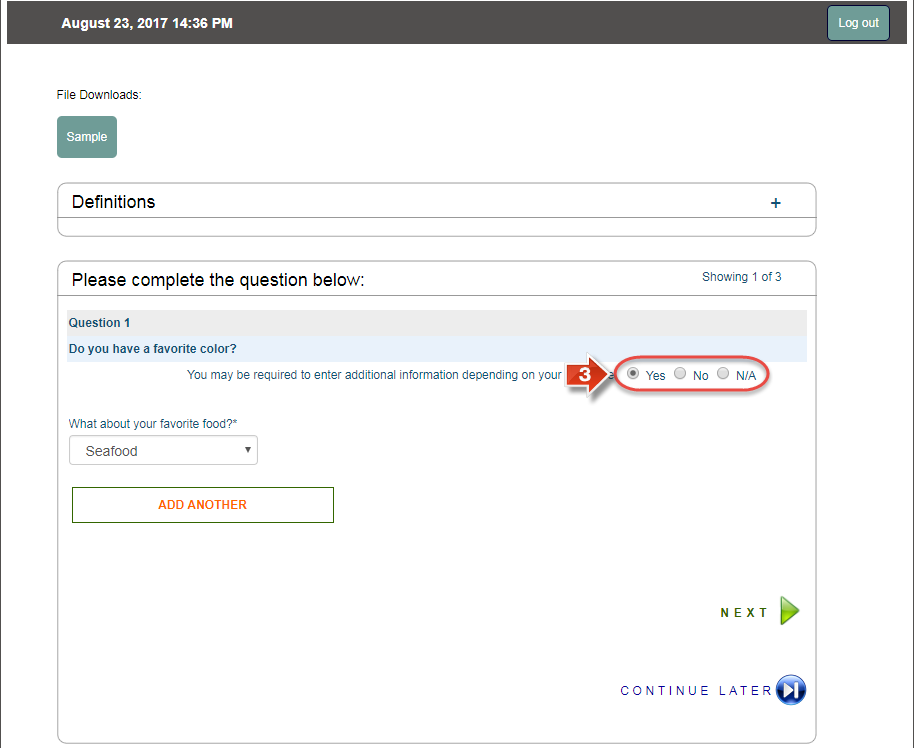
- As a participant goes through the questionnaire, if they choose any of the checkarked items from the auto approval logic, they will go into Pending status once their questionnaire is submitted for review
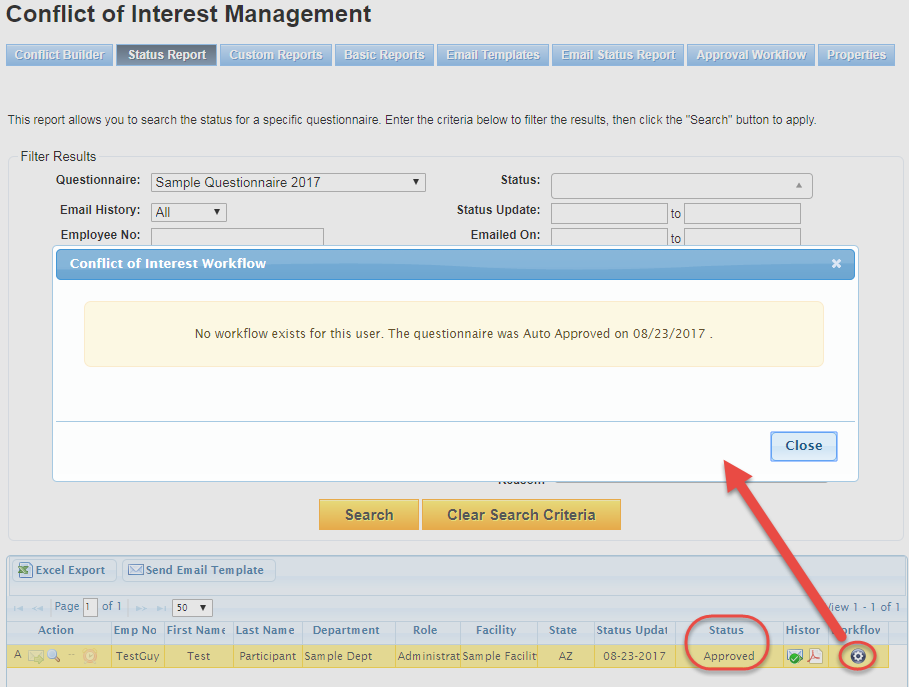
- On the 'Status Report' page, you can review participants and their progress in the questionnaire. Participants who were automatically approved will be in 'Approved' status, and trying to check the workflow for that participant will indicate when they were automatically approved
Did you know: Auto approval logic is a huge timesaver when launching a questionnaire. Whether your questionnaire has 10, 100, or 1000 participants, any who are processed through auto approval give you time to focus your attention on participants with more significant disclosures.
Related articles


