Create an Approval Discussion
Use this process to create a discussion during an approval workflow, or to participate in an existing discussion to which you have been invited.
Step-by-step guide
Show Me How to Create a Discussion
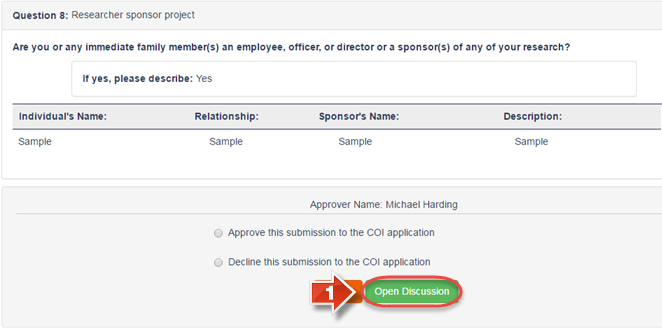
- On the approval workflow page, click the 'Open Discussion' button. (This page is only available when you are the active approver in an ongoing approval workflow.)
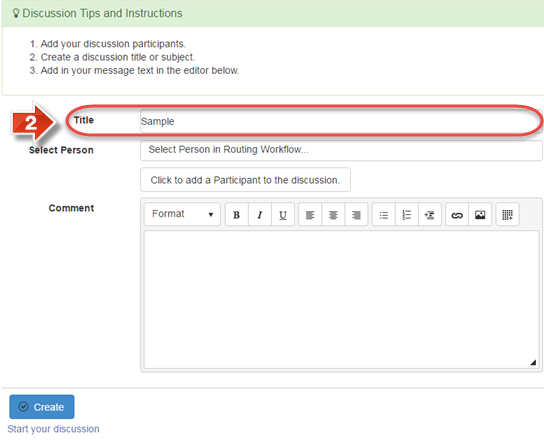
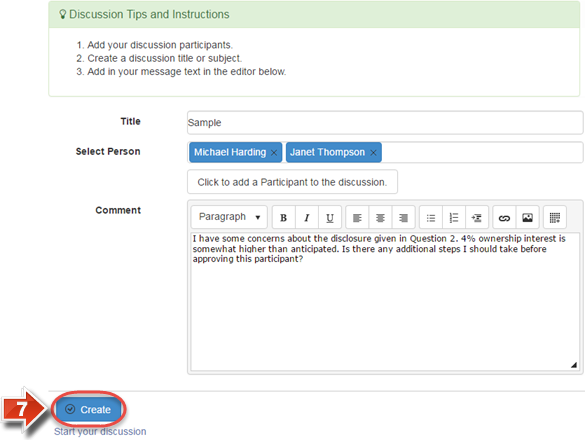
- On the creation page for the discussion, give a 'Title' for the discussion. The title should briefly summarize the topic of the discussion.
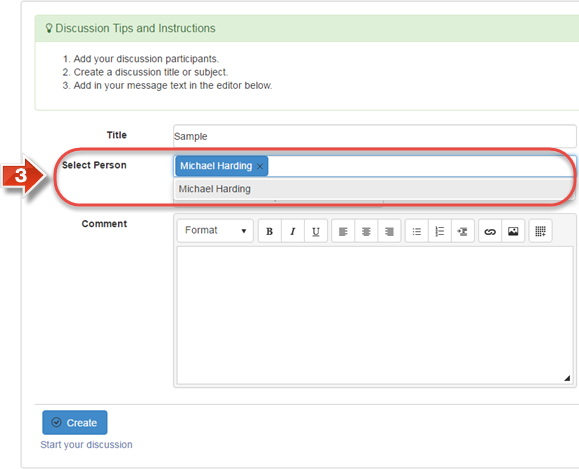
- There are two ways to add people to the discussion. If the invitees are within the same approver group, you may pick them using the 'Select Person' dropdown menu.
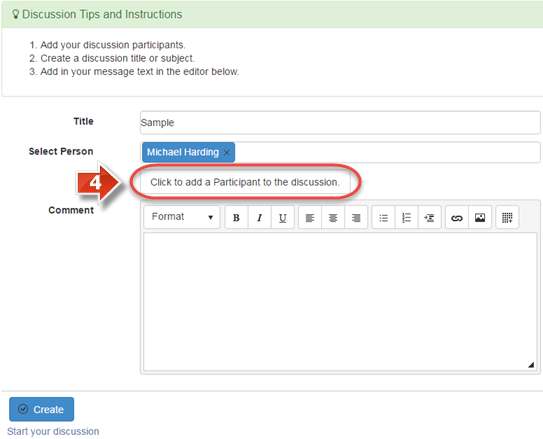
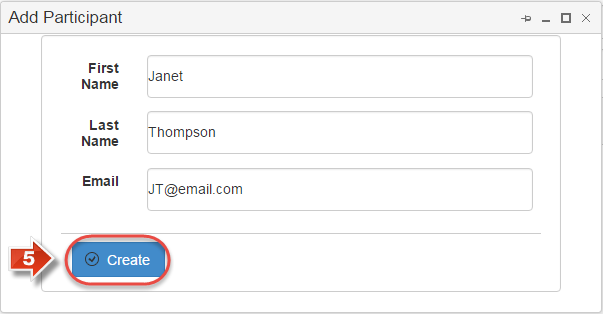
- If the invitees are not part of the approver group, there is an alternative option using the button labeled 'Click to add a Participant to the discussion'.
- Enter the First Name, Last Name, and Email address of the invitee. Then, click 'Create' to confirm.
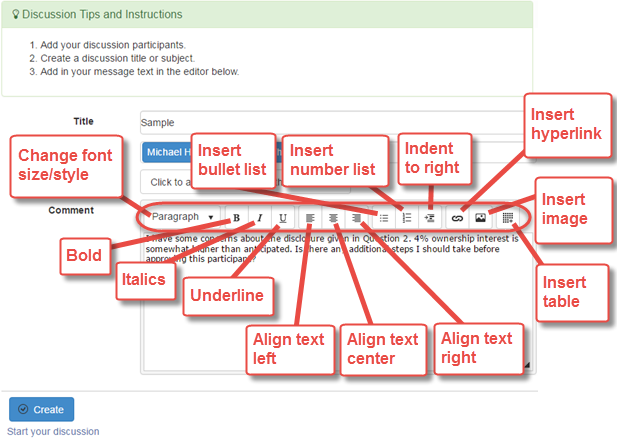
- The Comment area is where you will create the initial discussion text. Using the toolbar for the text box, there are a number of formatting options available.
What do these buttons do?
Paragraph – Change the general font size and style of the text.
Bold/Italics/Underline – Make all or some of the text boldface, italicized, or underlined.
Align Text Left/Center/Right – Change the alignment of the text to the direction specified.
Insert Bullet/Number List – Create an indented list using either bullet points or numbers.
Indent to Right – Moves text over to the right once, similar to when Tab is pressed.
Insert Hyperlink – Create a clickable hyperlink within the text.
Insert Image – Link to an image to make it appear within the text.
Insert Table – Creates a table with segmented rows/columns.
- When the discussion is ready to post, click the 'Create' button to confirm. (The approval workflow will not be available while the discussion is active. Once the discussion has been closed, you may resume the workflow normally, or create another discussion as needed.)
Show Me How to Participate in a Discussion
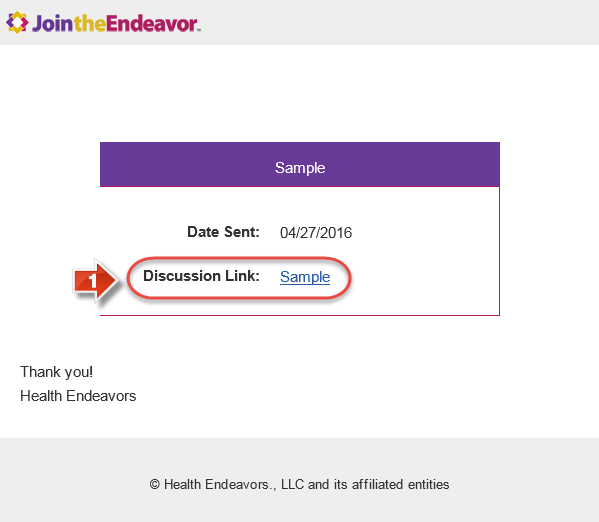
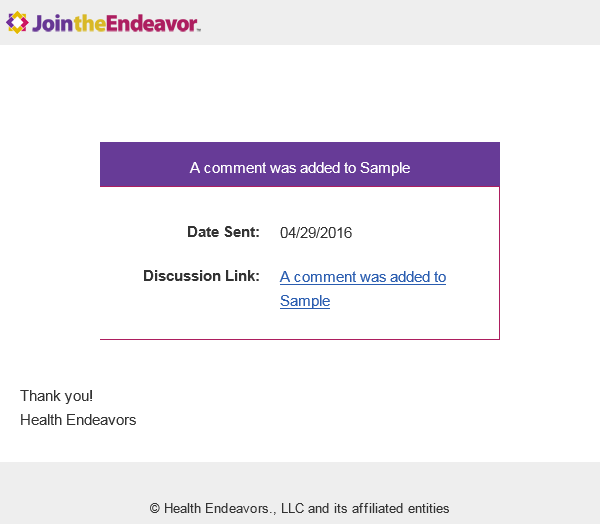
- When the discussion has been created, the creator and any invitees will receive an Email with a link to the discussion page. The link is named after the title of the discussion, and each invitee’s link is unique to that person. Click the 'Discussion Link' to access the discussion.
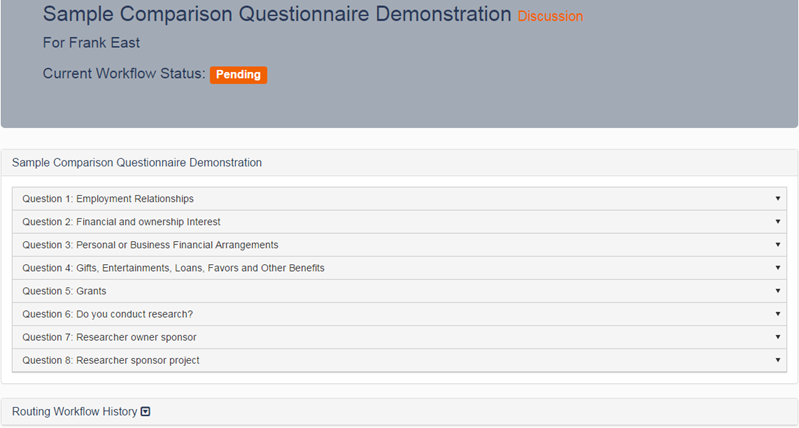
- Upon entering the discussion, you may review all of the 'Questions' in the questionnaire, along with the participant’s responses. You may also review the 'Routing Workflow History', which will show each approver in the queue and their decision on the participant’s status so far.
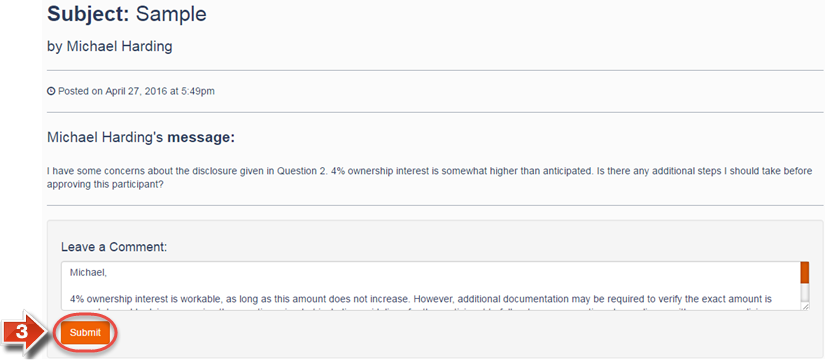
- At the bottom of the discussion page, you may review posted comments, as well as enter a comment yourself. After entering a comment, click the 'Submit' button to post it to the discussion.
- Discussion participants will receive an Email update whenever a comment is added to the discussion.
Show Me How to Close a Discussion
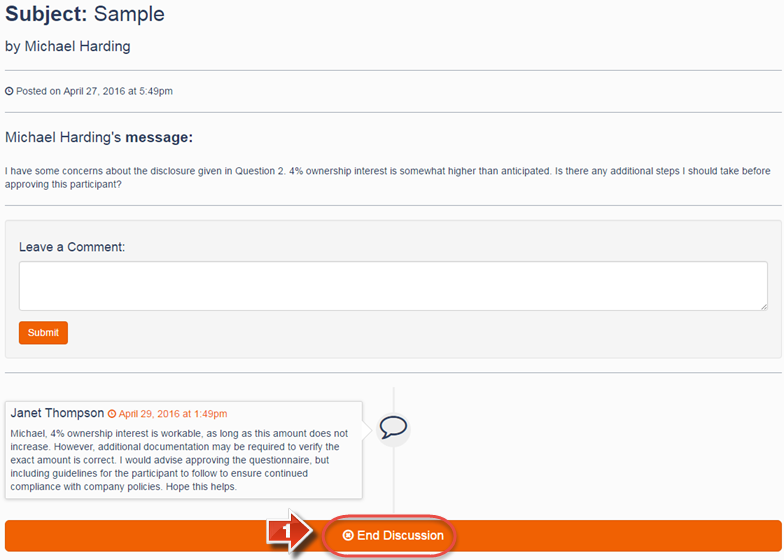
- The discussion may hold as many comments as necessary in order to resolve the topic. When the discussion is ready to be closed, the creator may click the End Discussion button. (This will enable the approver to return to the approval workflow page, where they may make a decision or create another discussion as required.)
Show Me How to Review Closed Discussions
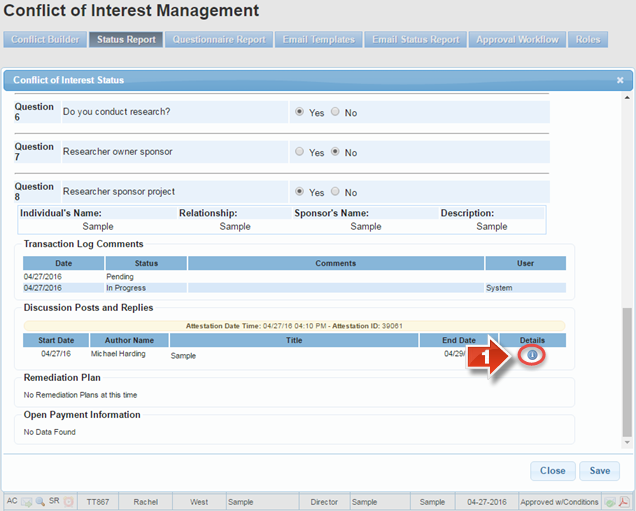
- After a discussion has been closed, it is saved on that participant’s profile in the Status Report. To view the discussion summary, bring up the participant’s profile with the magnifying glass icon. A summary of the discussion is available near the bottom of the status window. To view the entire discussion, click the information icon under 'Details'.
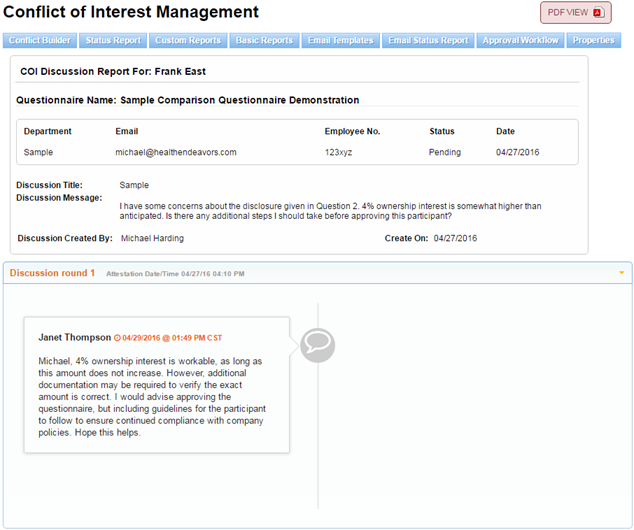
- The discussion, along with its replies, will be shown on this page. You may also click 'PDF View' to save a copy of the discussion log.
Related articles
-
Page:
-
Page:
-
Page:
-
Page:
-
Page:
