Entity Manager Add New Entity
The purpose of this user guide is to show how to create a new Entity in Entity Manager.
After reviewing this user guide, you will be able to perform several tasks:
- Create a new Entity.
Fill out Entity information as required.
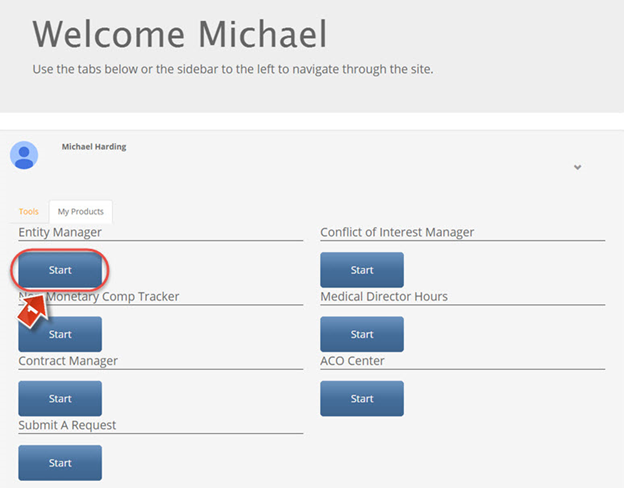
From the main landing page, click the “Entity Manager” (1) tab to open Entity Manager.
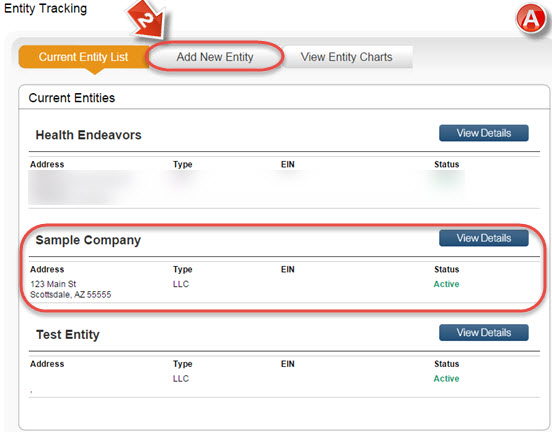
The “Entity Tracking” page (A) shows all currently created entities that are available for use in Contract Manager. It is possible to see details about each entity, as well as change these details. It is also possible to click the “View Entity Charts” button to upload documents related to multiple entities, such as meeting minutes or company overview charts. To create a new entity, click the “Add New Entity” button (2).
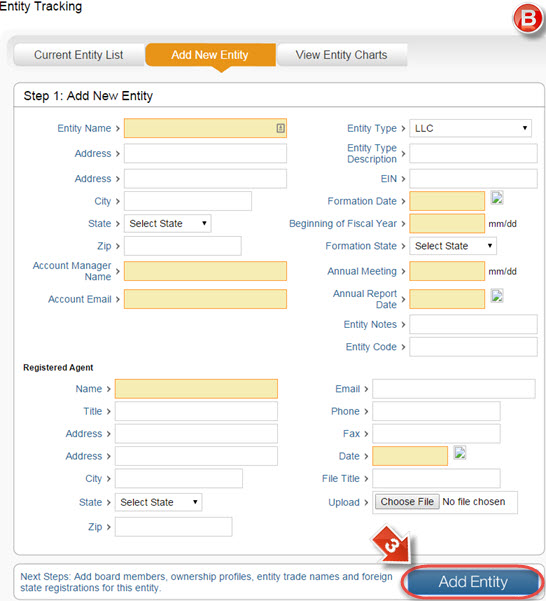
The “Add New Entity” page (B) has a number of entries for basic entity information. In the screenshot, all required fields are highlighted. Please note, however, that all available information should be entered here for ease of use during Contract Manager. When all desired information is completed, click “Add Entity” (3) to proceed with entity creation.
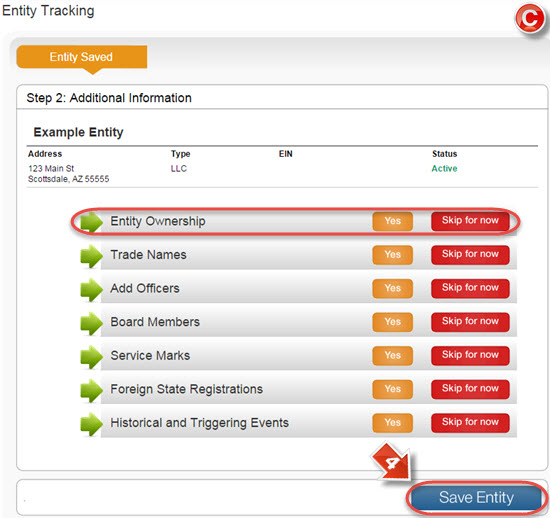
The “Additional Information” page (C) contains a number of available fields for further details on an entity. For any categories in which there is more information to enter, click “Yes” to input that information. To proceed with entity creation, either click “Skip for now” on any undesired entries and click “Save Entity”, or simply click “Save Entity” (4) to skip all listed entries. All information shown can be entered at a later time if necessary.


