Create and Manage Care Templates
Use this process to add, edit, or remove documentation templates used in event creation forms.
Step-by-step guide
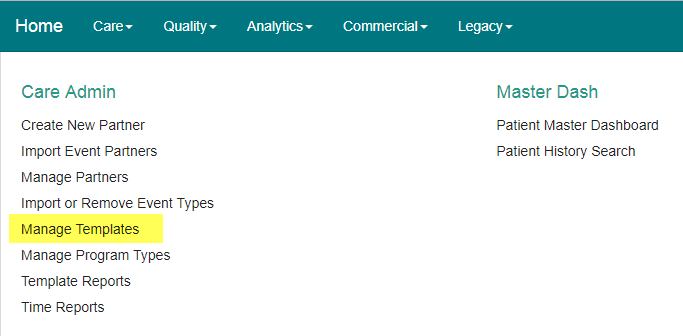
- Click the Manage Templates button.
- Show Me
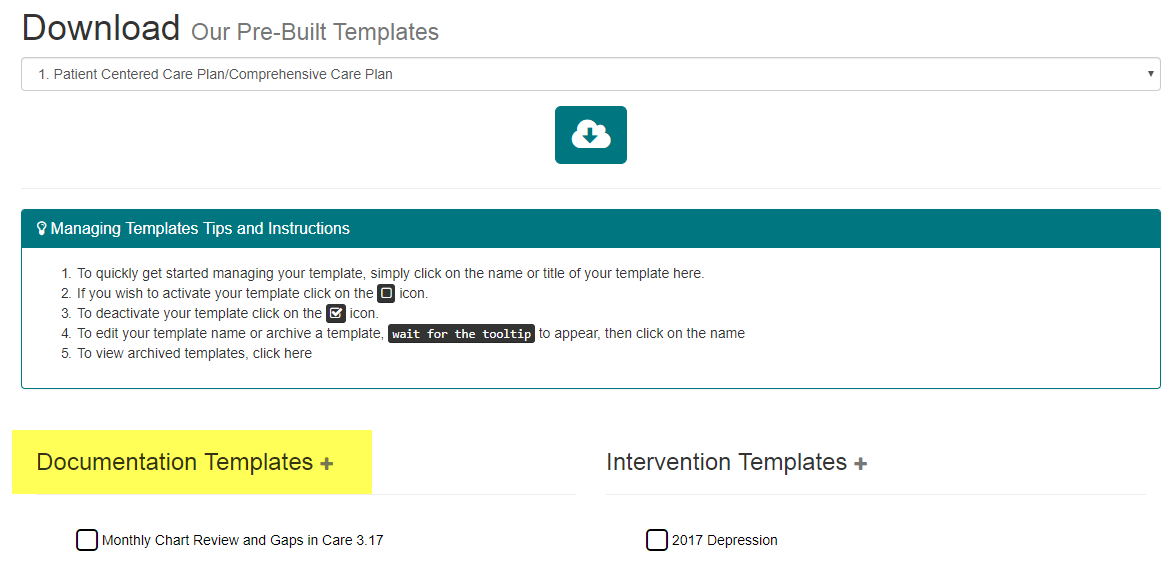
- Documentation Templates focus on gathering information about the event itself. To create a new template, click the 'Documentation Templates' header.
- Show Me
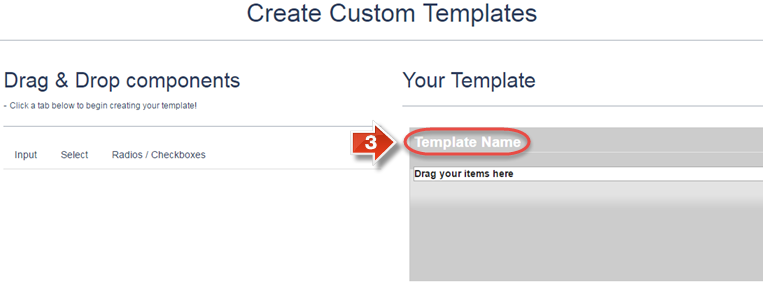
- On the Create Custom Templates page, there are several different sections to keep in mind. When creating a new template, however, the first step should be to give it a name by clicking the 'Template Name' heading.
- Show Me
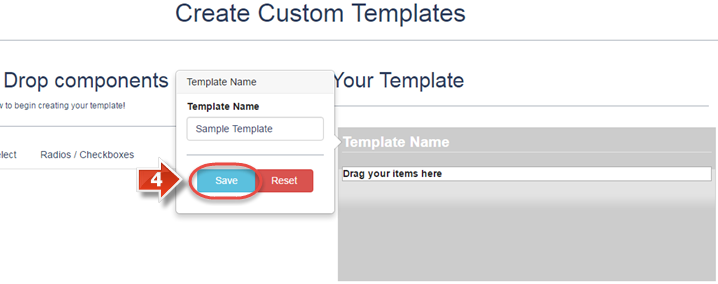
- Enter the Template Name in the text box, and click 'Save' to confirm. (Because users will select this template as part of event creation, it is best to give the template a name that is easy to associate with the information being gathered.)
- Show Me
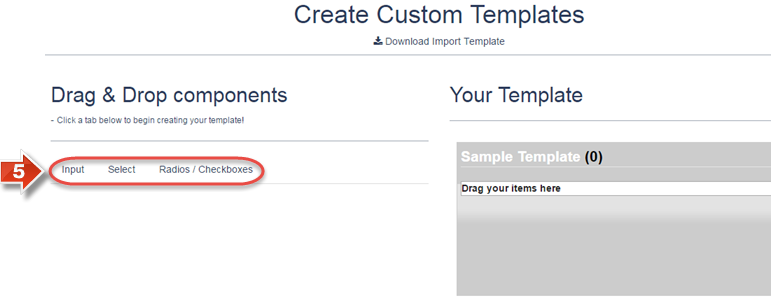
- After giving the documentation template a name, it is time to add response fields. First, select one of the three categories on the left: 'Input', 'Select', or 'Radios / Checkboxes'. The category you select should be determined by the answer format you are looking for in your custom field.
- Show Me
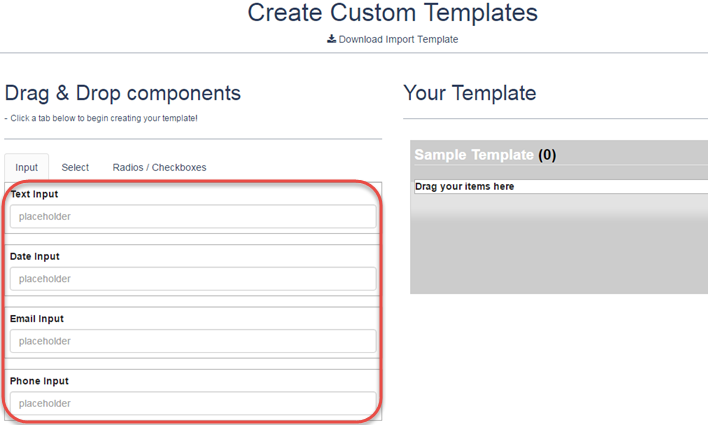
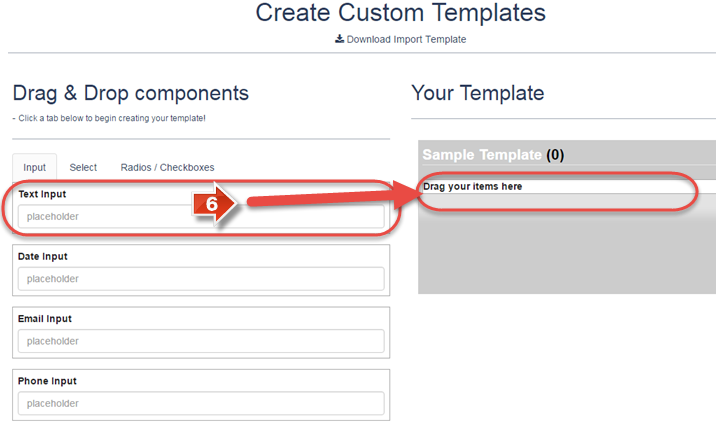
- The Input category has the following four available options:
- Text Input – The answer given must be a free-form text response.
- Date Input – The answer given must be a specific date, using a calendar selection.
- Email Input – The answer given must be an Email address.
- Phone Input – The answer given must be a phone number.
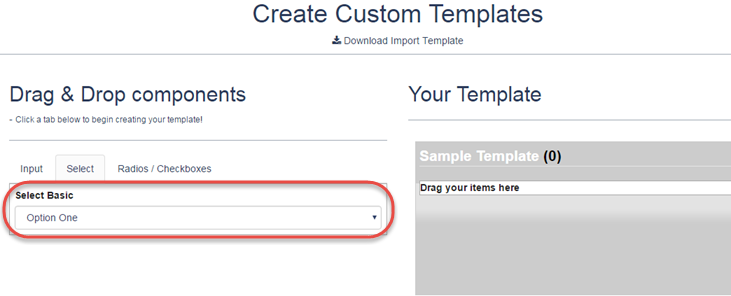
- The Select category has the following option:
- Select Basic – This field creates a dropdown menu with one or more choices. The answer given must be selected from one of these choices.
- The Radios / Checkboxes category has the following four available options:
- Inline Checkboxes – The answer given must be chosen from a row of checkbox options. More than one checkbox may be selected.
- Multiple Checkboxes – The answer given must be chosen from a vertical column of checkbox options. More than one checkbox may be selected.
- Inline Radios – The answer given must be chosen from a row of radio buttons. Only one radio button may be selected.
- Multiple Radios – The answer given must be chosen from a vertical column of radio buttons. Only one radio button may be selected.
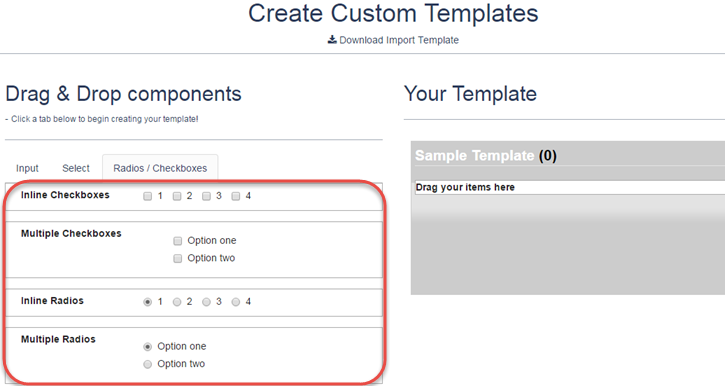
- Once you have chosen the format of the response field, click and drag the selected response option from left to right, directly into the gray area under 'Your Template'.
- Show Me
- On the right side of the page, a pop-up will appear prompting the filling of several fields. Once these have been configured, click the 'Save' button.
- Show Me
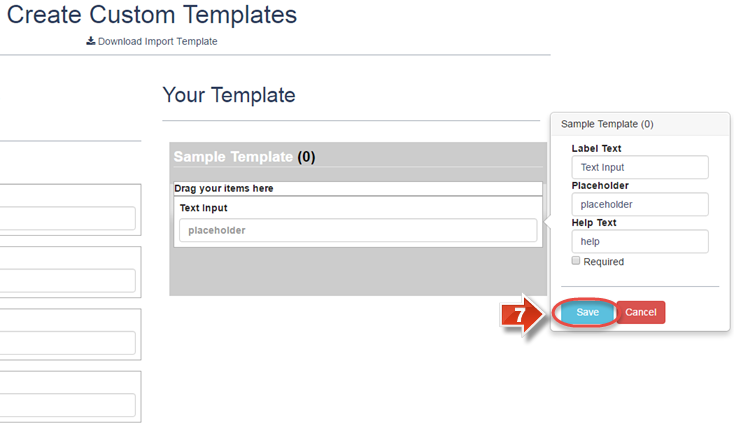
- What do these fields mean?
- Label Text – The text stating the question or requested information for the event.
- Placeholder – The light gray text that a user sees before entering any response in this field.
- Help Text – If the user hovers their mouse cursor over the field, this text will appear to guide their response.
- Required – If this checkbox is filled in, the user must respond to this field before the event can be created or modified.
- The field is saved on the documentation template immediately. To add more response fields, repeat steps 5 through 7 as needed.
- Show Me
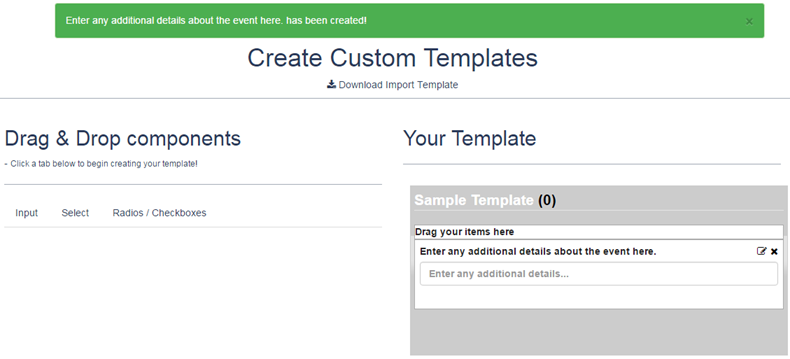
- Hover the mouse cursor over the template name until the gray text prompt appears to edit. Then, click the template name.
- Show Me
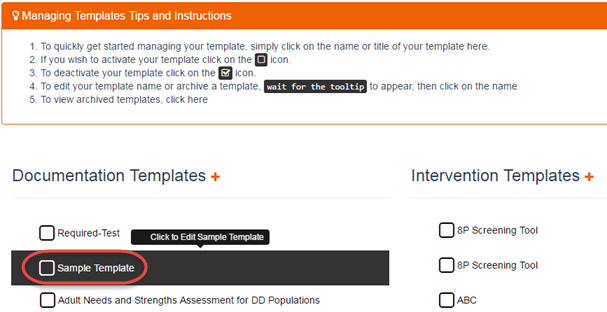
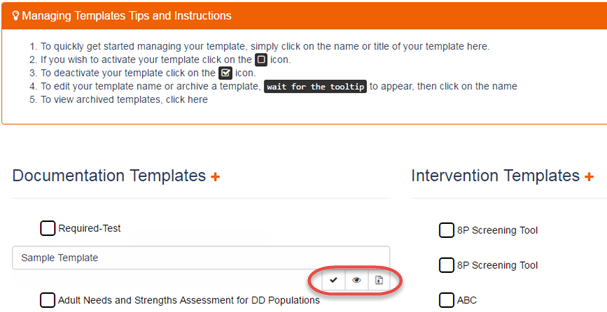
- To rename a template, change the text of the template name, then click the checkbox button to Save. To Edit the contents of the template, click the eye icon. To Archive this template, click the page icon.
- Show Me
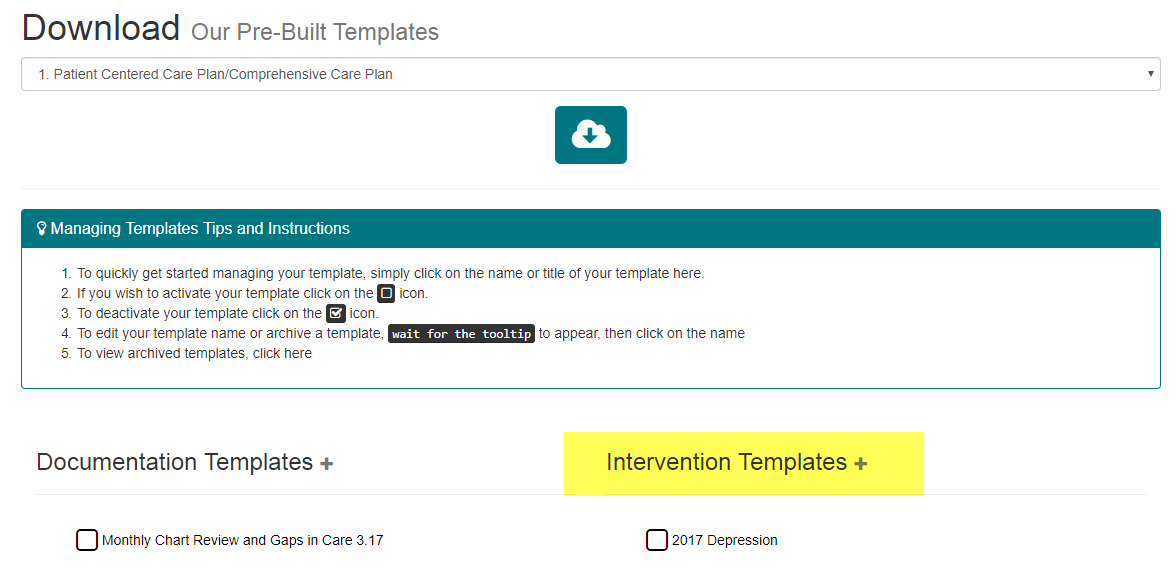
- Click the 'Intervention Templates' heading to begin creating a new intervention template.
- Show Me
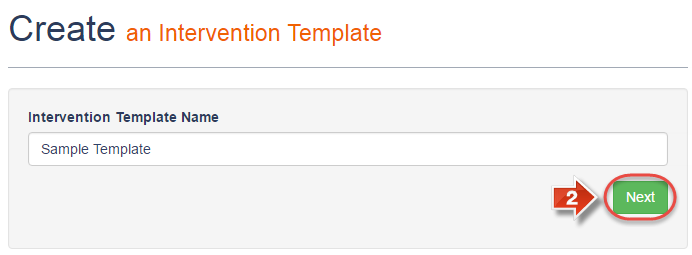
- The first step in creating an intervention template is to give it a name. Fill in the 'Intervention Template Name' field, then click 'Next' to continue.
- Show Me
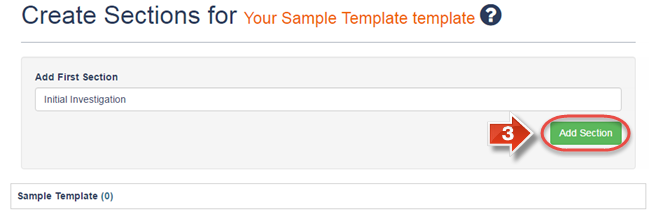
In intervention templates, sections exist to break up the phases of the intervention. To create a section, fill in the name under 'Add First Section', then click 'Add Section' to continue.
- Show Me
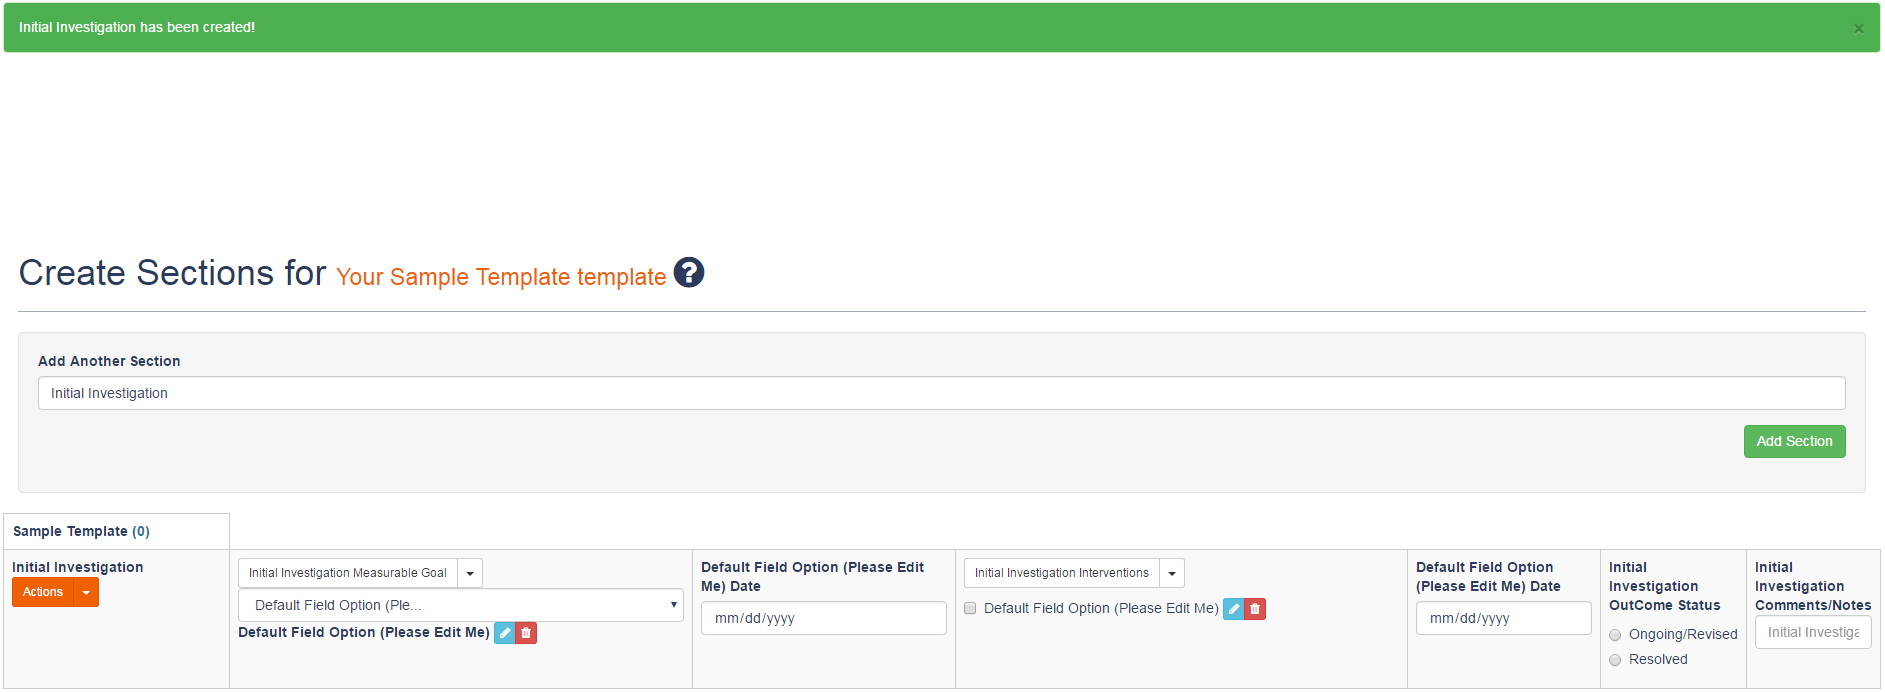
- When a section is created for the intervention template, additional configuration options appear at the bottom of the page. To add more sections, fill in a new name under the Add Another Section field. Each section created in this manner will have its own configuration options.
- Show Me
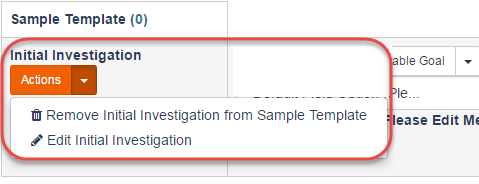
- Individual sections have additional configuration options. Under the 'Actions' menu, you may 'Remove' the section entirely, or 'Edit' the name of the section.
- Show Me
- The next configuration, 'Measurable Goals', determines the objectives that must be met as part of each section. To use this area, begin by clicking the dropdown menu to 'Create Goal Options'.
- Show Me

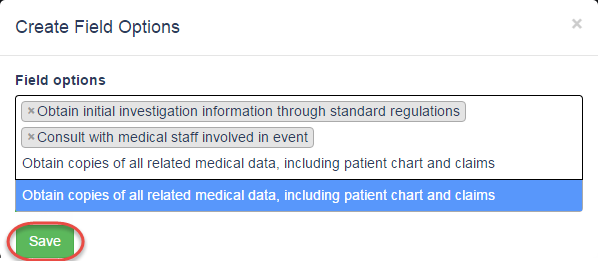
- In this window, you may create multiple 'Field Options' at once. Type in each measurable goal related to this section of your intervention template, then click the blue bar to lock that goal into the list. You may remove any entered goal by clicking the x beside the gray bar highlighting the goal. When all goals have been entered for this section, click 'Save' to continue.
- Show Me
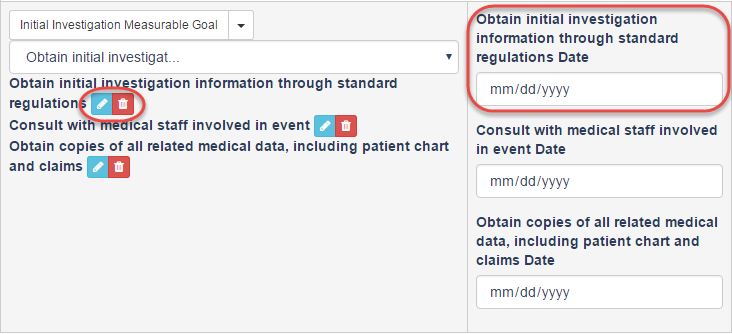
Each measurable goal entered on the previous window has a separate entry in this portion of the section. To edit a goal name or delete the goal entirely, use the blue pencil icon and the red trash icon respectively. Each goal also has a separate 'Date' field. These are utilized by users to indicate when each measurable goal has been reached as part of the intervention. Because users will fill out these dates during an event intervention, they do not need to be interacted with during template configuration.
- Show Me
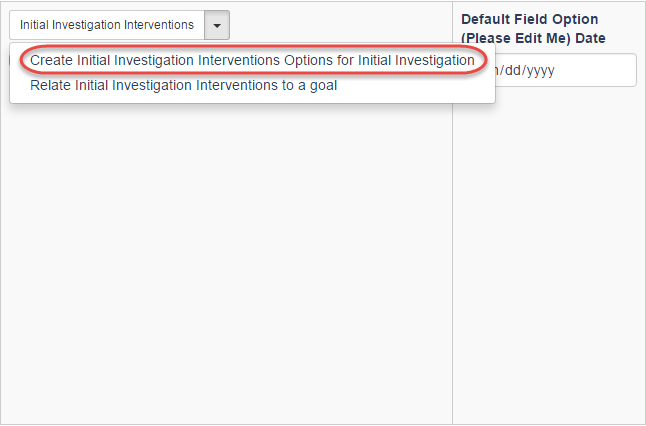
- The next area creates additional Interventions and relates them to measurable goals. First, use the 'Create Options' selection from the dropdown menu.
- Show Me
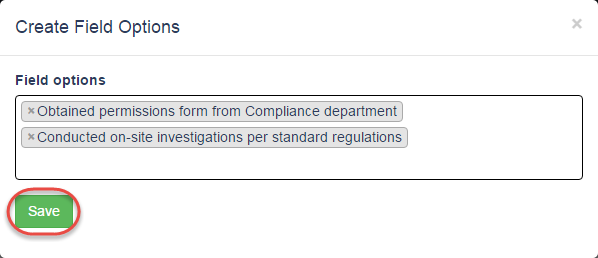
- This window functions identically to the window for adding measurable goals. These Field Options, however, are intended to be interventions related to each goal, indicating steps taken to accomplish the goal. After creating the options in this area, click 'Save' to continue.
- Show Me
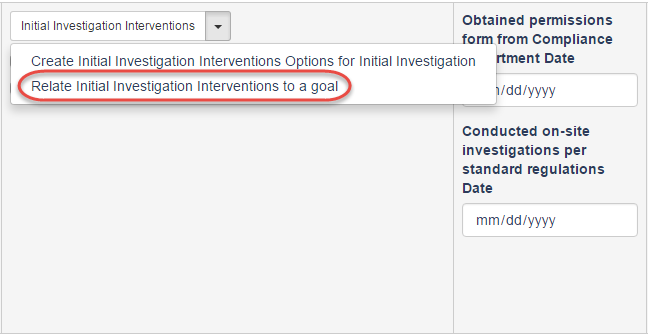
- After creating the field options, select the 'Relate Interventions to a goal' option.
- Show Me
- In this window, there are two dropdown menus. The top dropdown menu, labeled 'Related Options', allows you to select one or more of the previously created Intervention Options. Once you have selected these options, the bottom dropdown allows you to choose the Measurable Goal, also called 'Parent Option'.
- Show Me
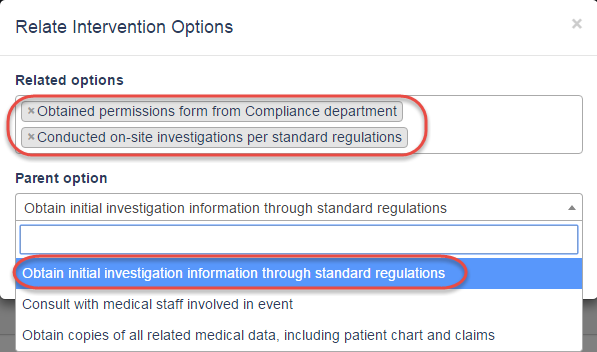
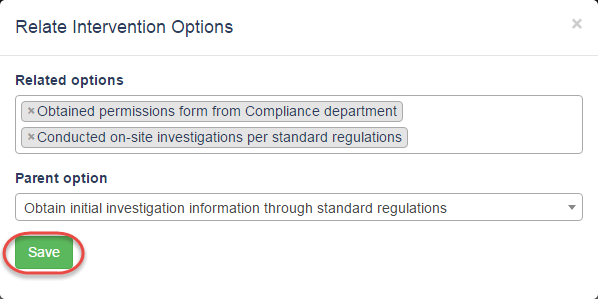
- Once you have chosen all Related Options and selected the Parent Option to which they should be associated, click 'Save' to continue.
- Show Me
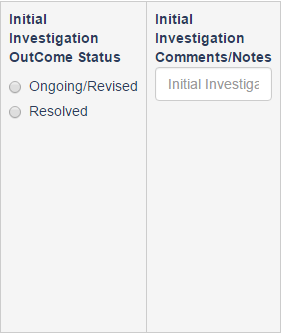
- The final two areas are for reference only and do not need to be filled out during template configuration. The 'Outcome Status' will provide two radio buttons for users that manage the event to choose from. 'Ongoing/Revised' should be selected by users until this section has been completed, at which point 'Resolved' should be selected. Users also have a 'Comments/Notes' section available to fill out when using these intervention templates.
- Show Me
- After configuring each section of the template, with its measurable goals and associated intervention options, return to the Manage Templates page. As with documentation templates, an intervention template may still be edited as required by highlighting and then clicking to rename the template itself, or to edit the options within the template. Once the template is ready to be used, click the checkbox to make it available on the event creation form.
- Show Me
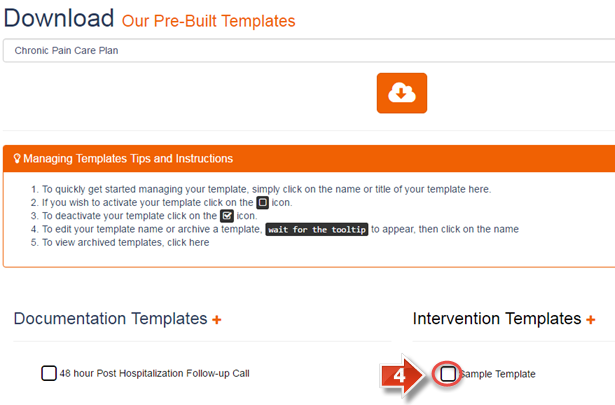
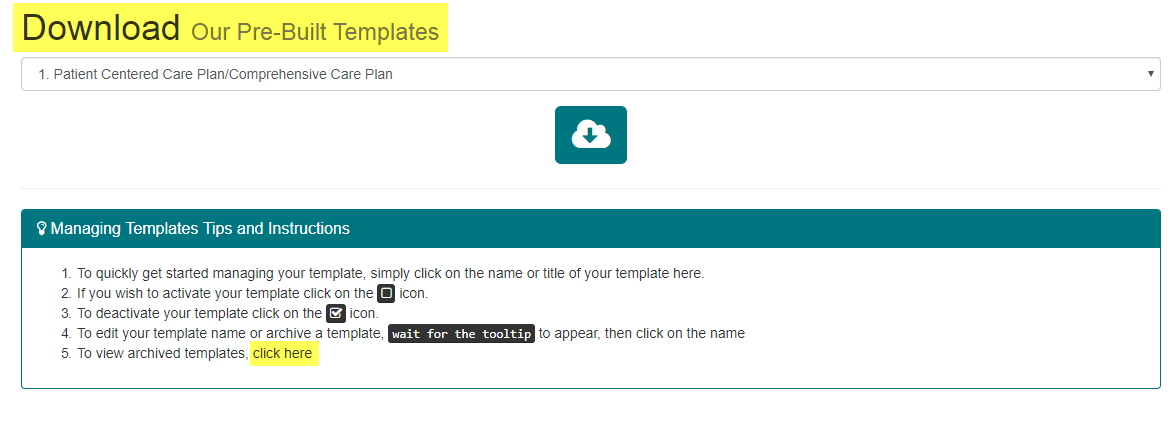
As an optional feature, numerous Pre-Built Templates have been prepared that may be imported, edited, and used as required by your organization. To obtain a pre-built template, select it from the Download dropdown menu at the top of the page, then use the orange cloud icon to import the template into your list. Both documentation and intervention templates are available in this manner. To view archived/deleted templates; on line number 5 of the managing template tips and instructions section, select 'Click Here'. This will open a page where all deleted and archived templates will be located.
- Show Me
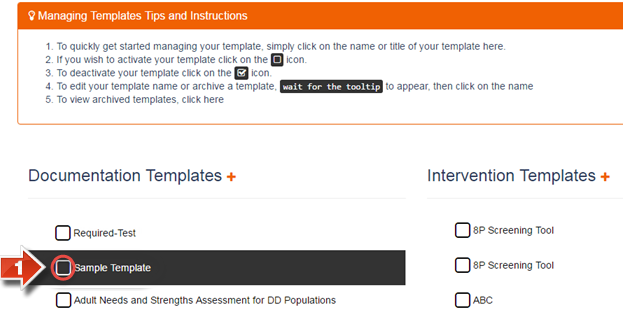
- To lock down the template and add it to the list of available templates on the event creation form, click the checkbox to the left of the template name.
- Show Me
