Configure Your Timesheets
Use the processes outlined in this section to help you create timesheet data. You can also edit or remove timesheet data by following the steps in this guide.
Step-by-step guide
To create a new timesheet, or to add entries to an existing timesheet, perform the following steps:
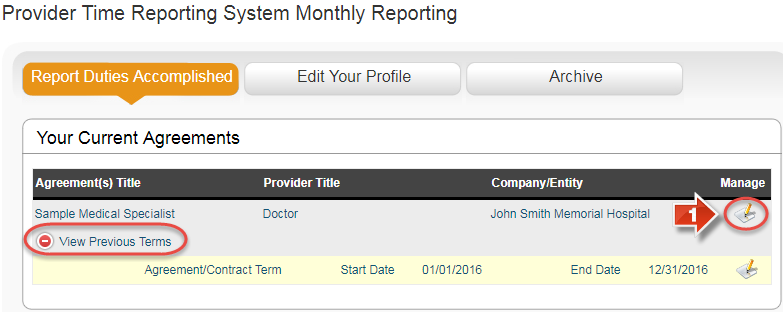
- Find the contract you wish to create a timesheet for, and click the pencil and paper icon under the 'Manage' column (If the timesheet is for a previous term in your contract, click the 'View Previous Terms' button to reveal these terms and enable timesheet creation)
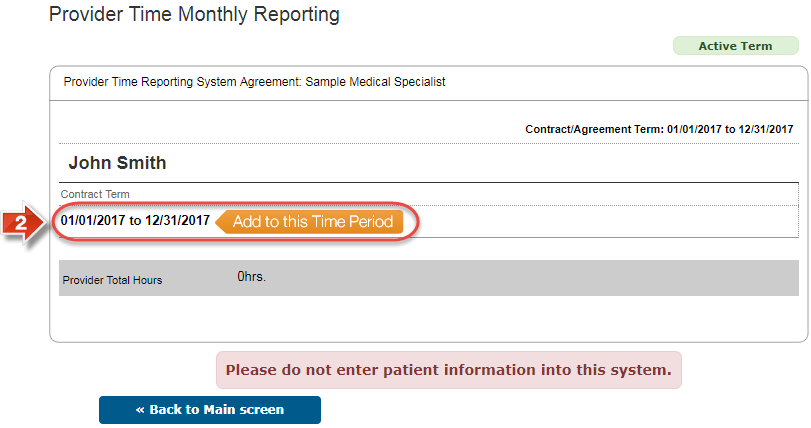
- On this page, review the dates of the current contract term. If the timesheet you are creating corresponds to a pay cycle within this term, click the 'Add to this Time Period' button
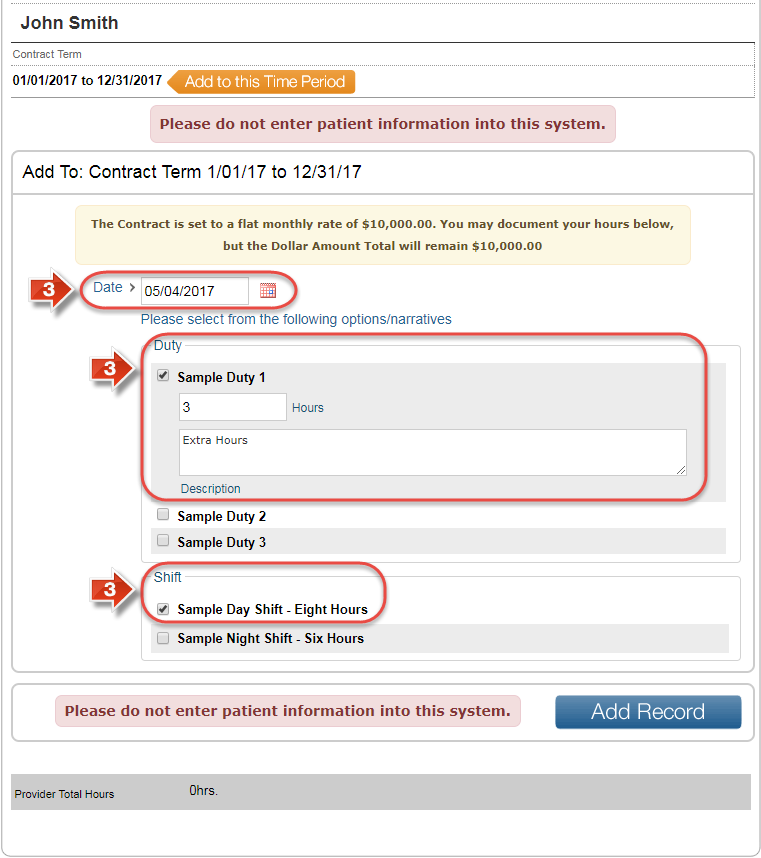
- Select a date that you worked within the pay cycle in question, then select at least one duty or shift. If you select a duty, enter the number of hours and a description. If you select a shift, no further action is required for this step (Depending on your contract, you may or may not have both duties and shifts to select during this step)
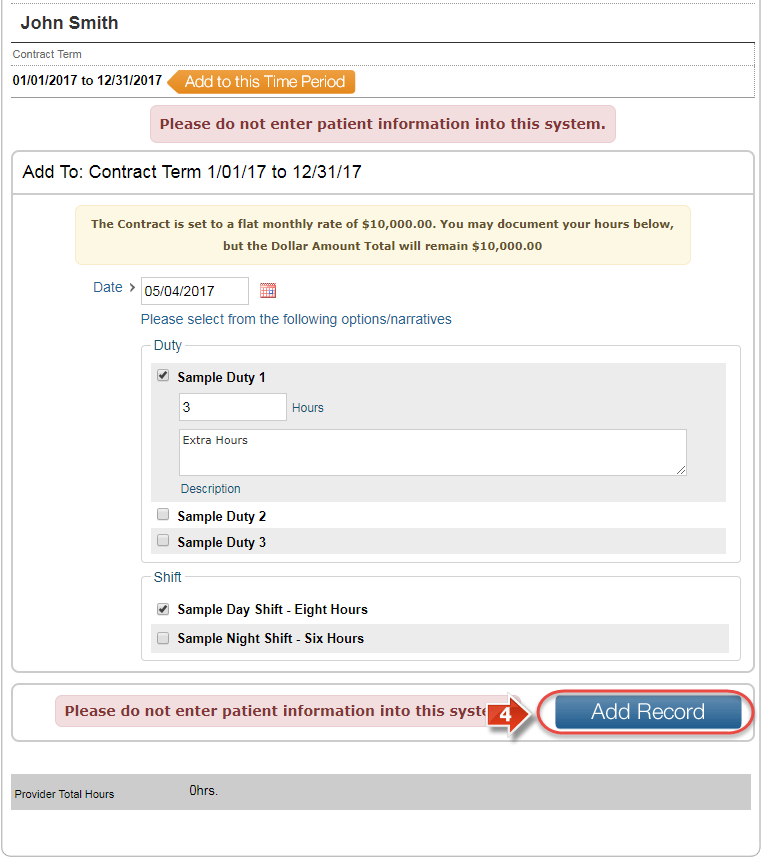
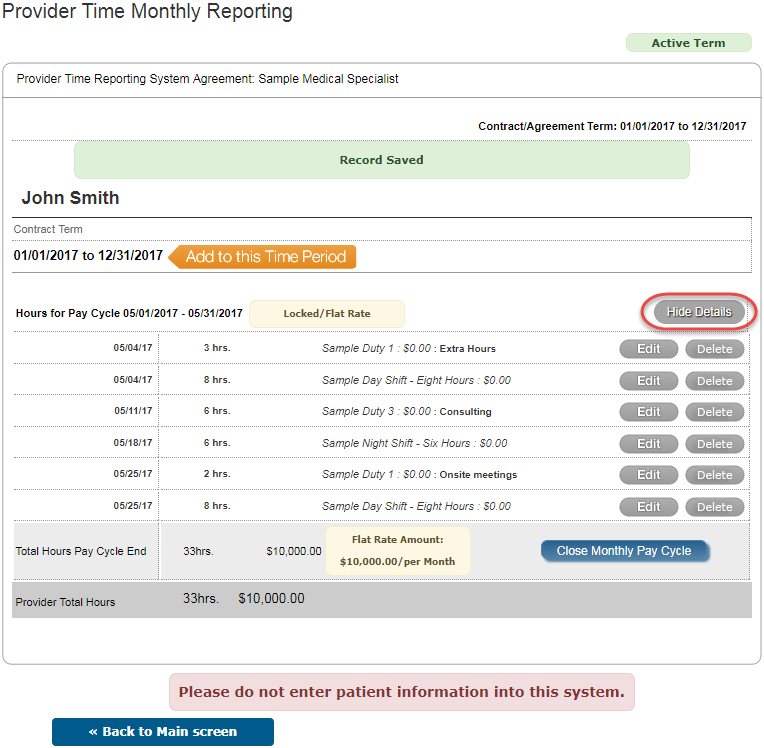
- Click the 'Add Record' button to confirm the timesheet entry
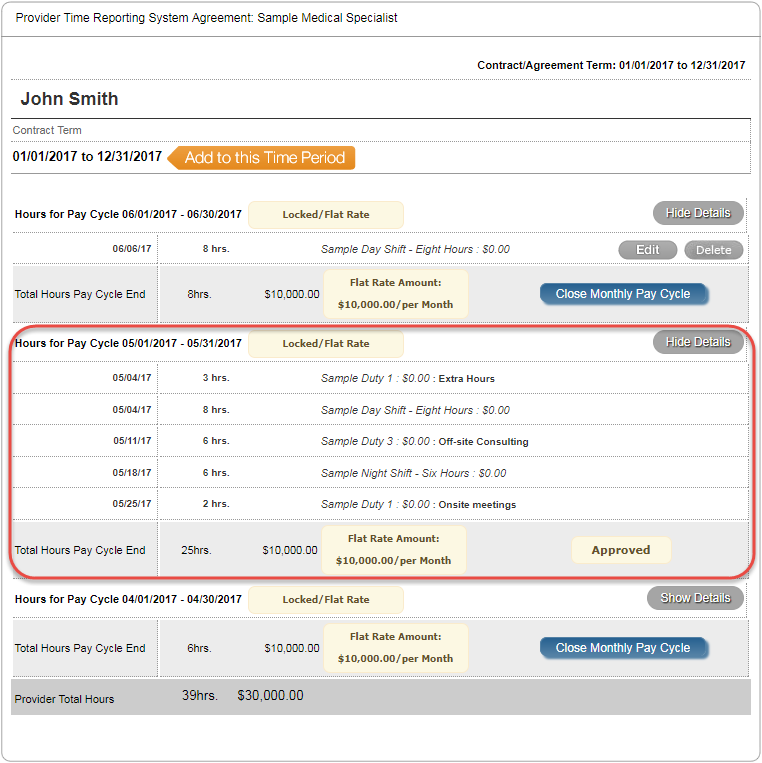
- Once the first record is saved, a timesheet dedicated to the corresponding pay cycle is created. Repeat steps 2 through 4 to fill the timesheet with all required entries (Click the 'Show/Hide Details' button to either expand or collapse a particular timesheet's individual entries)
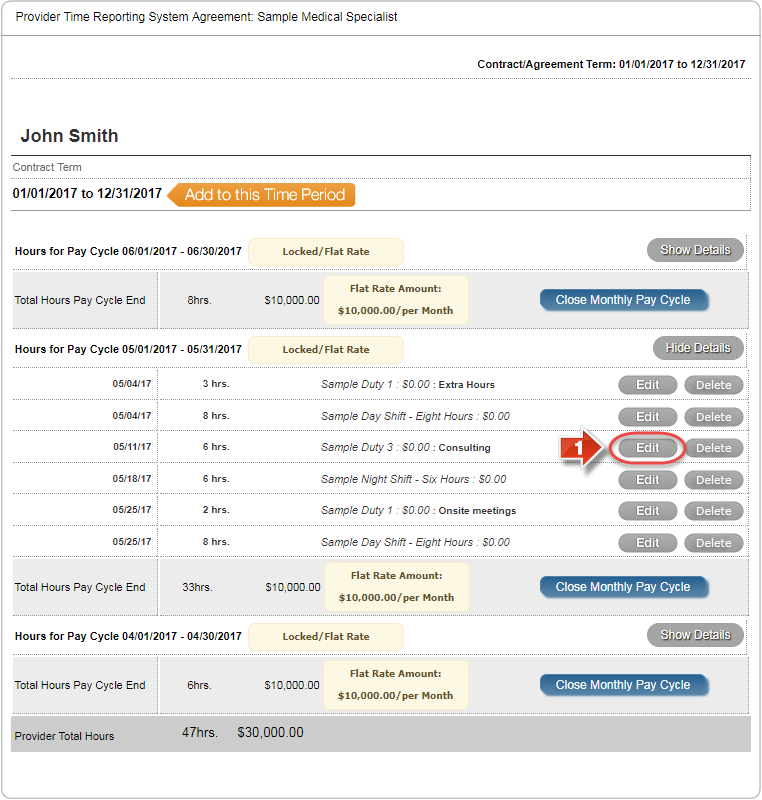
To edit an entry in a timesheet, perform the following steps:
- Click the 'Edit' button beside the entry that requires editing
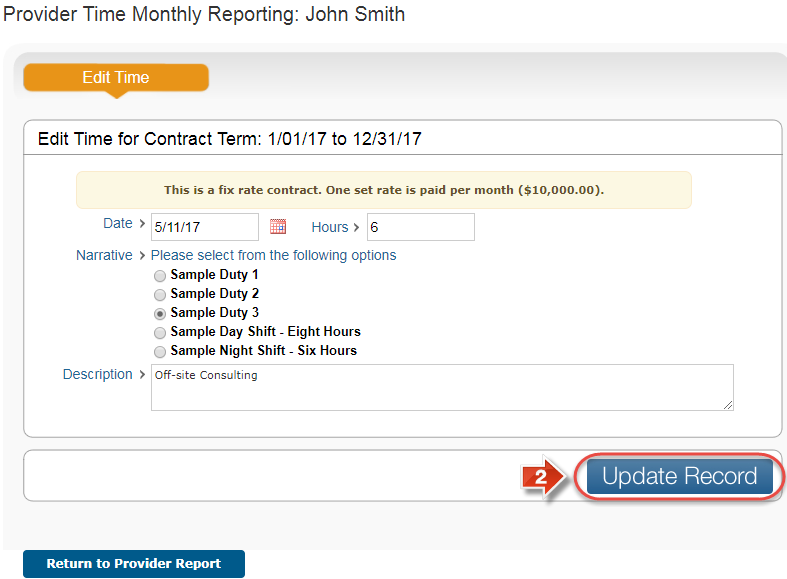
- Make any necessary changes to the entry, then click the 'Update Record' button to confirm (You may change the date of the entry, the selected duty/shift, the number of hours in a duty, or the description of a duty)
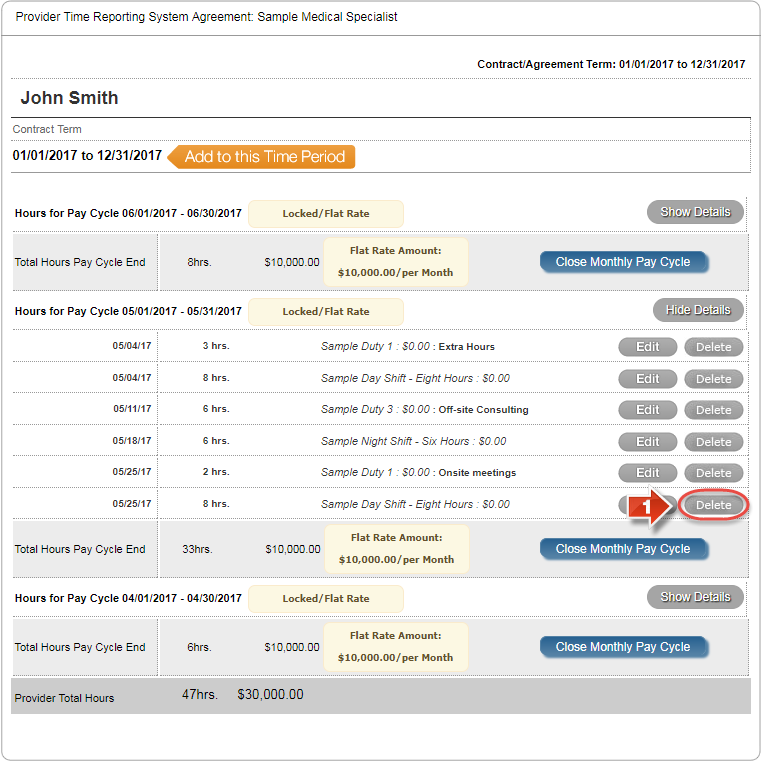
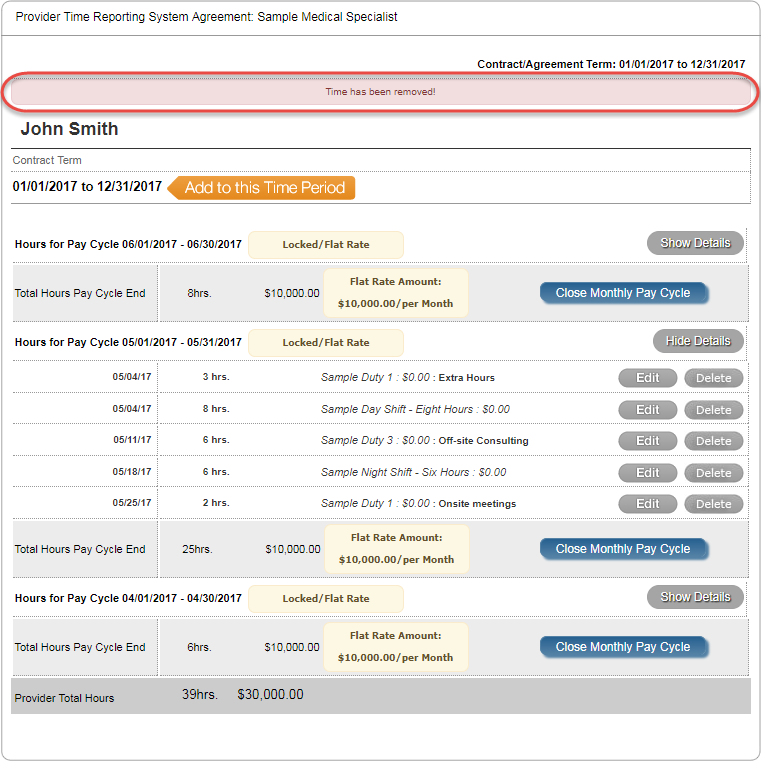
To delete an entry in a timesheet, perform the following steps:
- Click the 'Delete' button beside the entry that requires removal (Please note that this will immediately delete this entry)
- Once the entry is deleted, a confirmatino message will be displayed (Delete entries will need to be manually re-added later if this is required)
Did you know: Timesheets may only be added to or edited BEFORE being submitted for review. Please check your timesheets for accuracy carefully before submitting, as submitted timesheets cannot be changed unless declined by an approver.
Related articles