PNMC Tracker Add Entity
The purpose of this user guide is to show how to add an Entity to the Entity Tracker.
After reviewing this user guide, you will be able to perform several tasks:
- Add a new Entity.
- Remove an existing Entity.
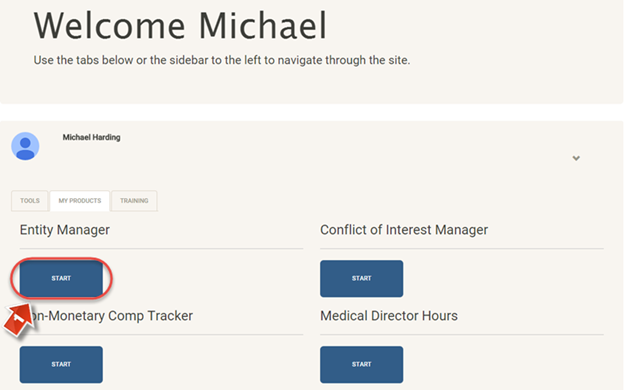
The first step in creating new entities for the Physician Non-Monetary Compensation Tracker involves an associate program known as the Entity Manager. Click the “Entity Manager” button (1) on the main landing page.
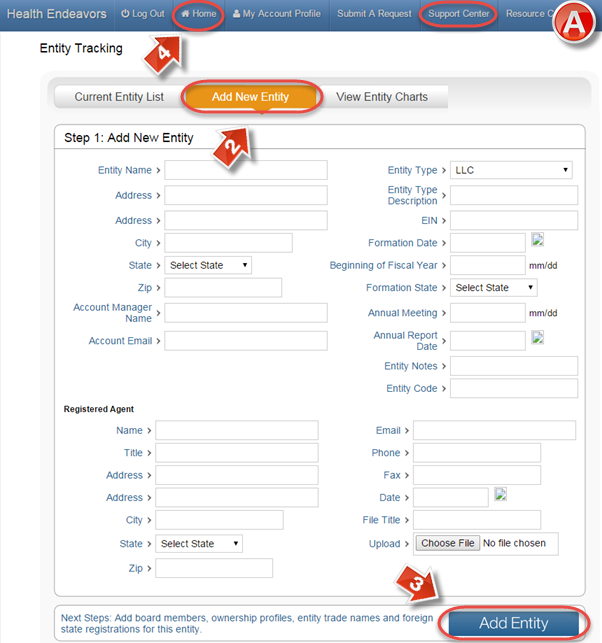
The “Entity Tracking” screen (A) allows you to create, edit, and view Entities for the Compensation Tracker. To start, click “Add New Entity”(2), fill out the information, then click “Add Entity”(3) to proceed. Click “Home”(4) when all Entities have been created.
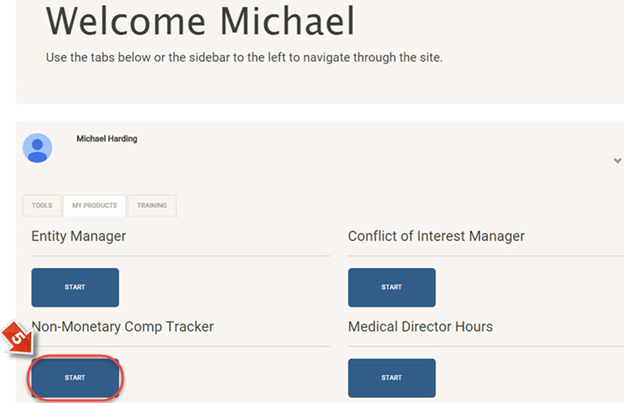
Back on the main landing page, click “Non-Monetary Comp Tracker” (5).
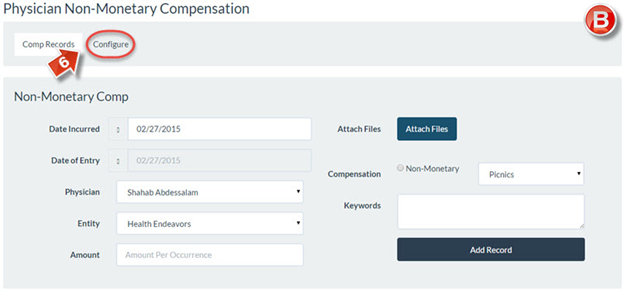
On the “Physician Non-Monetary Compensation” main page (B), click the “Configure” button (6).
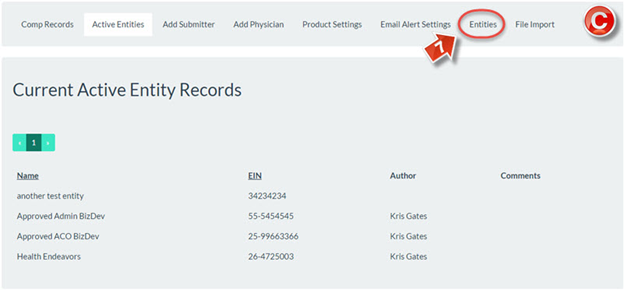
The “Current Active Entity Record” screen (C) has listings for all active Entities. To activate another, go to “Entities”(7).
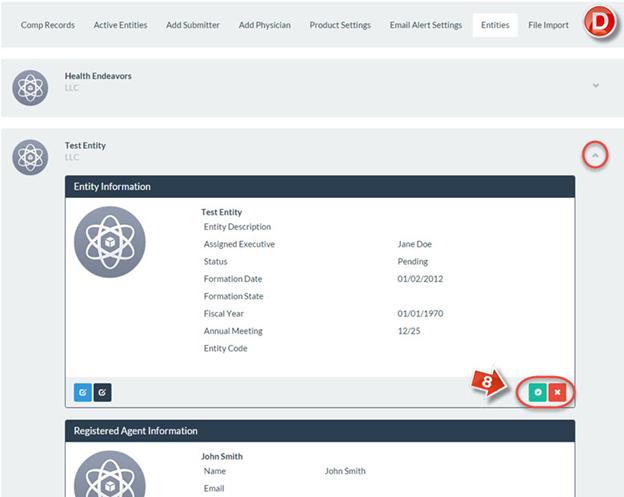
On the “Entities” page (D), entries from Entity Manager will be available in a listing. Click the arrow next to an Entity’s name to expand it, and click the colored buttons to either activate or deactivate the Entity (8).
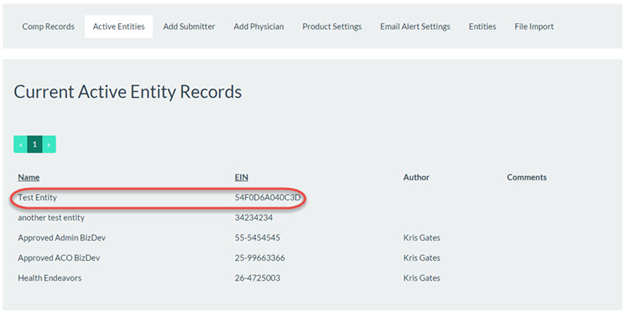
The added Entity will appear on the “Active Entities” list.
Note: If no changes are apparent, reloading the page or clicking the “Refresh” button will update the list and cause the entry change to appear.
Click here for the “How-To” video.
