Use the Properties Tab
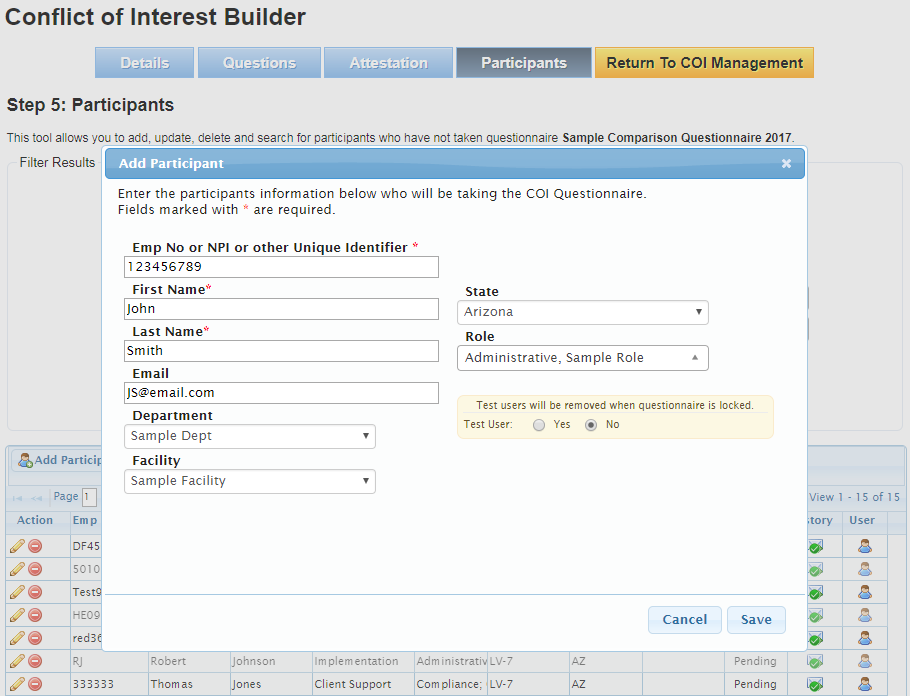
You may use this section to fill in participant profile options for Department, Facility, State, and Roles. All of these fields are optional by default.
Step-by-step guide
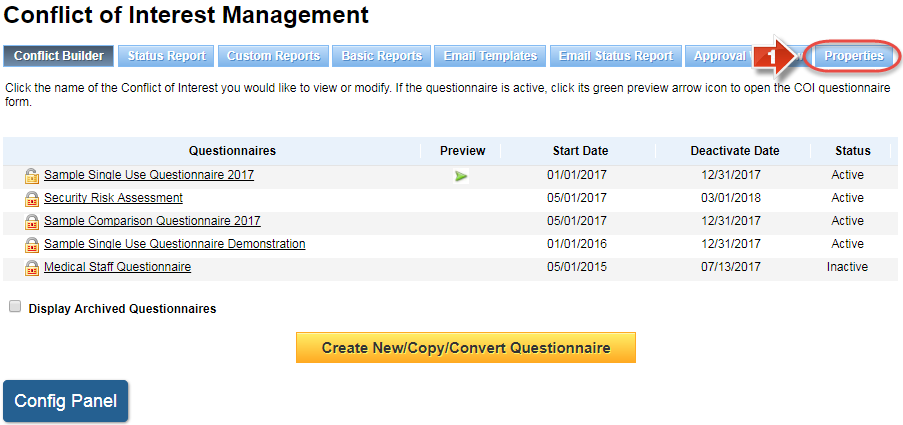
Show Me How to Access the Properties Tab
- Click the 'Properties' button
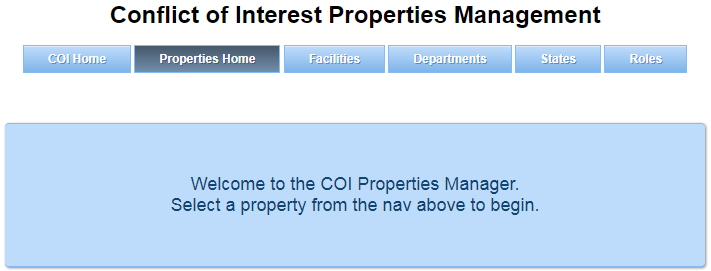
- From here, you may navigate to each section of the Properties tab using the blue buttons
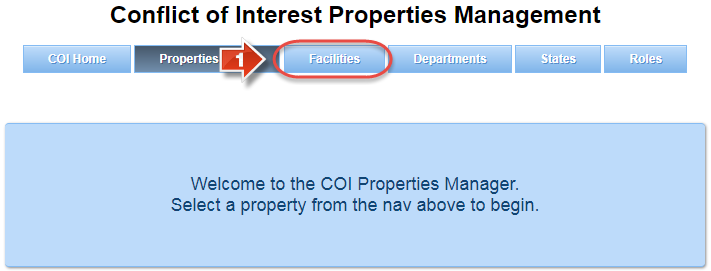
Show Me How to Configure Facilities
- Click the 'Facilities' button
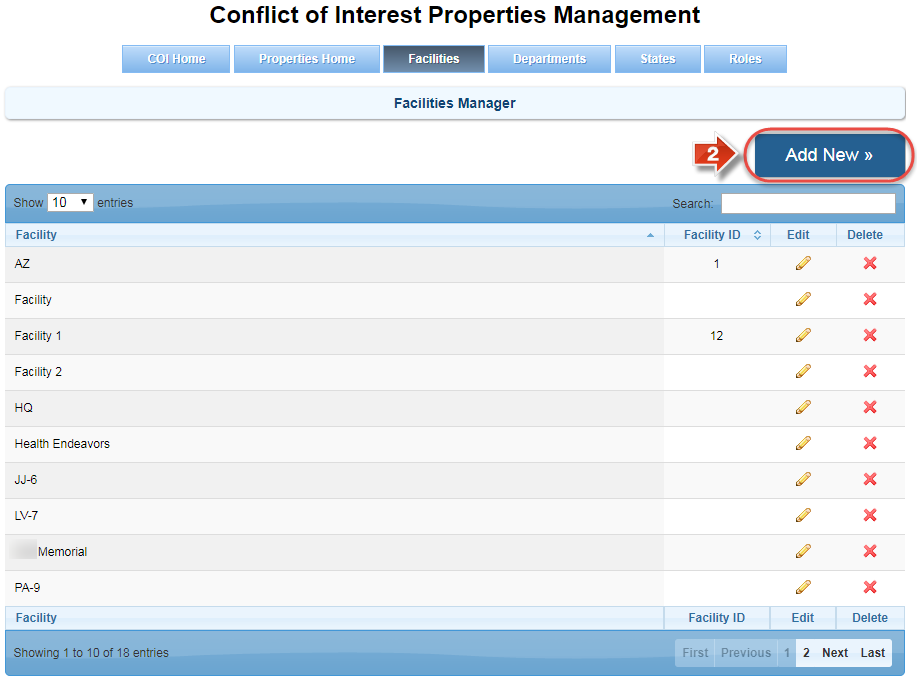
- To create a new Facility, click the 'Add New' button
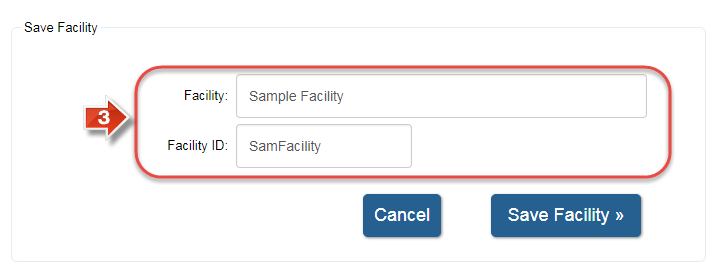
- Enter the facility name in the 'Facility' field and any relevant code in the 'Facility ID' field (The name is required, but the ID is optional)
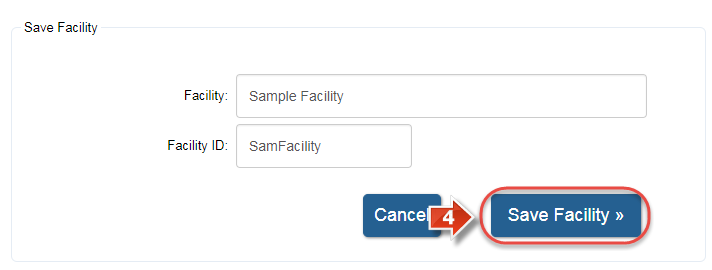
- Click the 'Save Facility' button to add this facility to the list (Or click 'Cancel' to exit this menu without saving changes)
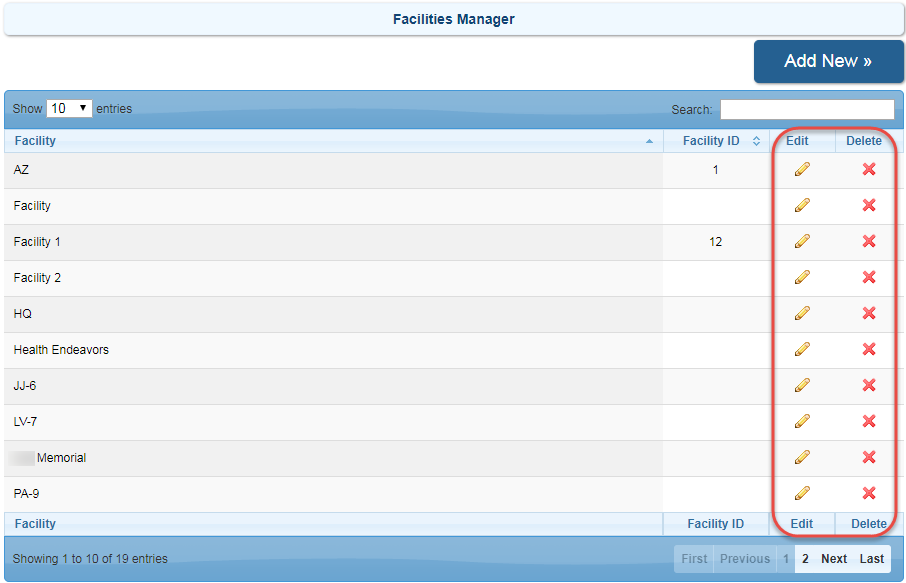
- In addition to adding facilities, you may edit or delete facility entries by using the icons under the 'Edit' and 'Delete' columns
Show Me How to Configure Departments
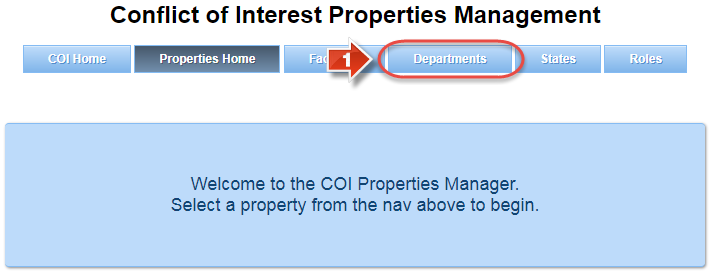
- Click the 'Departments' button
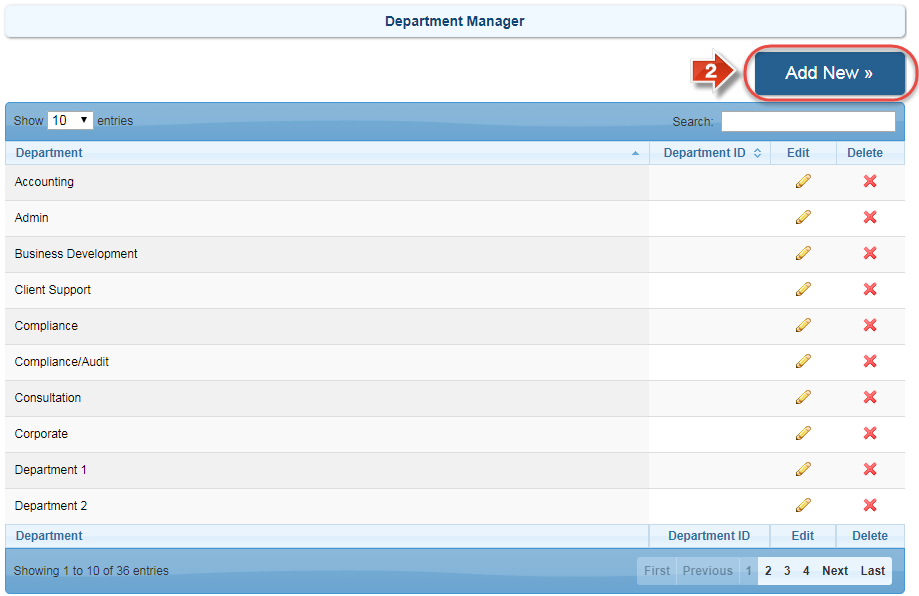
- To create a new Department, click the 'Add New' button
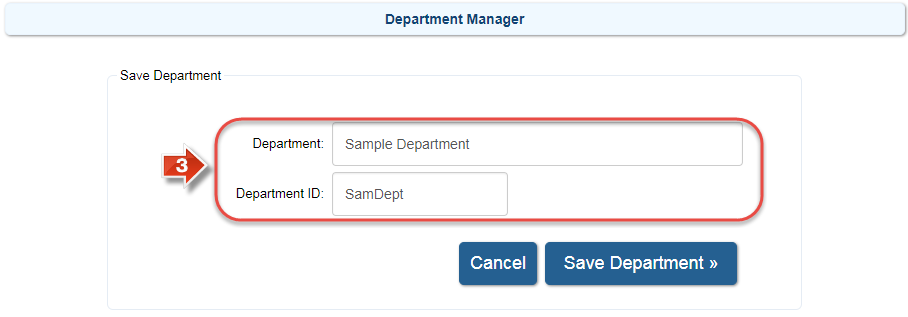
- Enter the department name in the 'Department' field and any relevant code in the 'Department ID' field (The name is required, but the ID is optional)
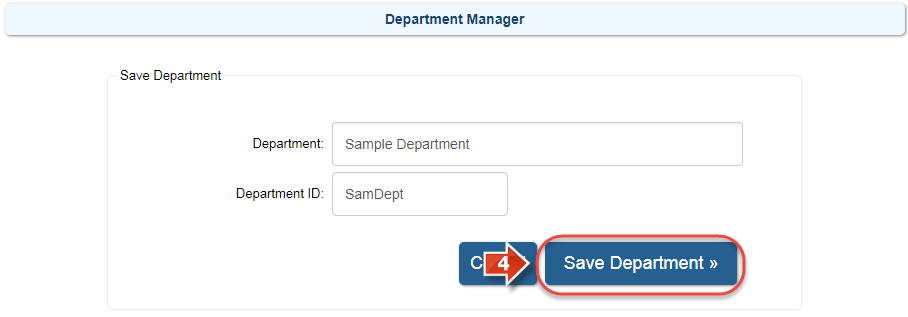
- Click the 'Save Department' button to add this department to the list (Or click 'Cancel' to exit this menu without saving changes)
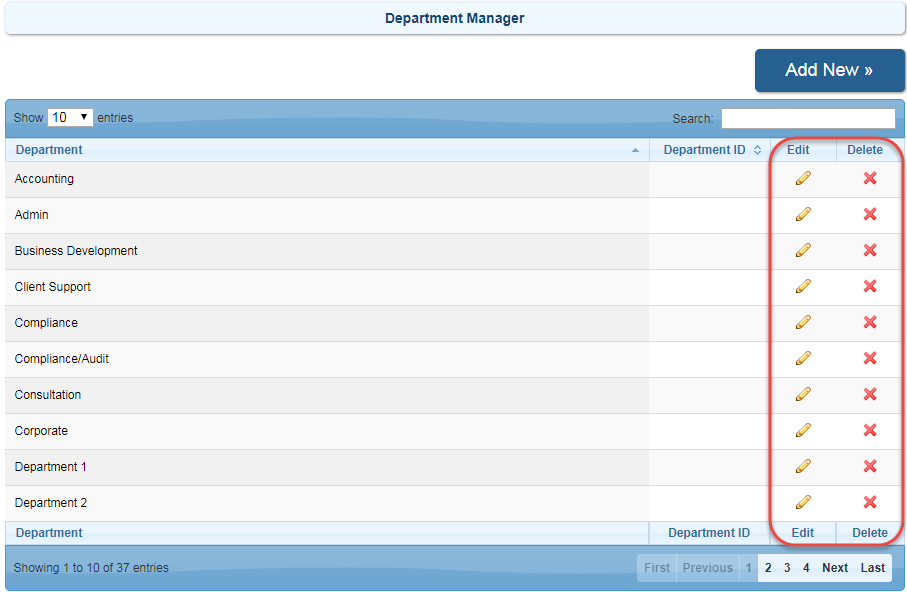
- In addition to adding departments, you may edit or delete department entries by using the icons under the 'Edit' and 'Delete' columns
Show Me How to Configure States
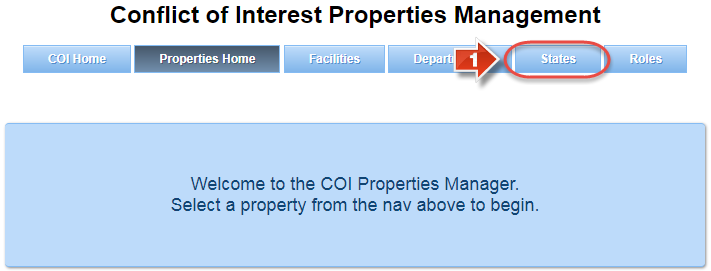
- Click the 'States' button
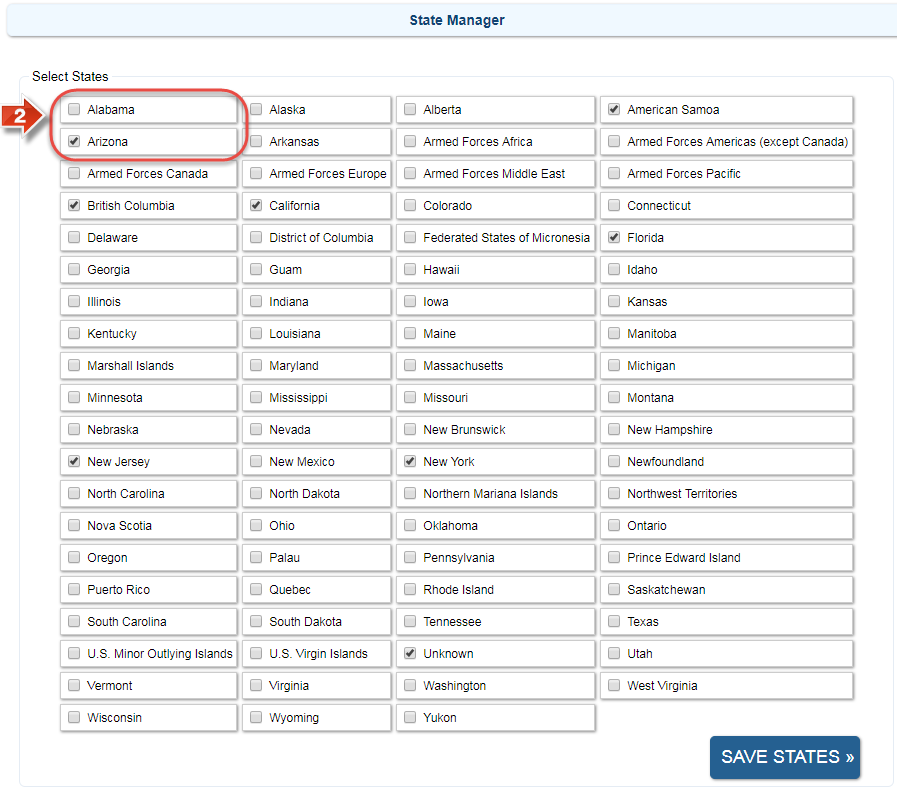
- Click the checkbox beside a location to enable that location as a potential option on participant profile data
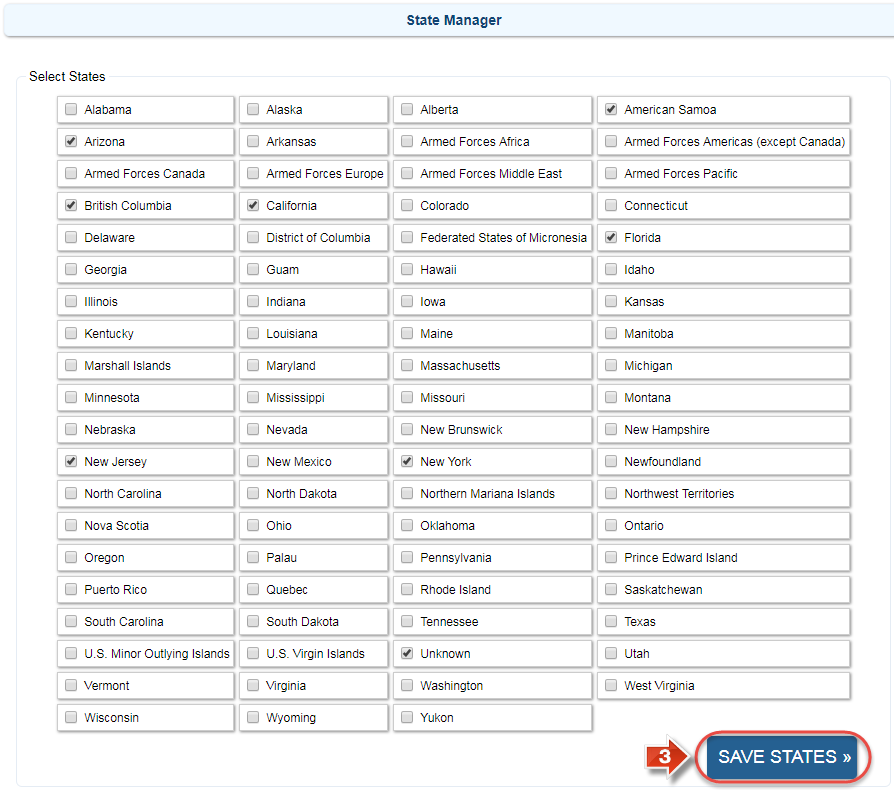
- Click the 'Save States' button to confirm the available states for selection (Or click to another section to exit this menu without saving changes)
Show Me How to Configure Roles
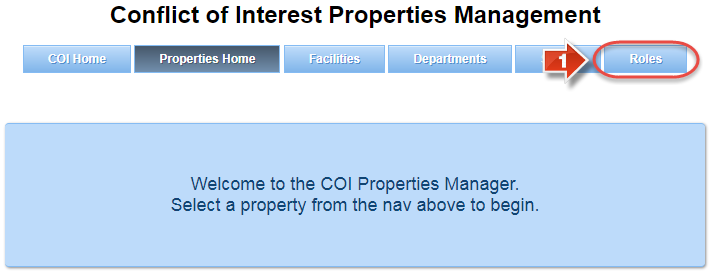
- Click the 'Roles' button
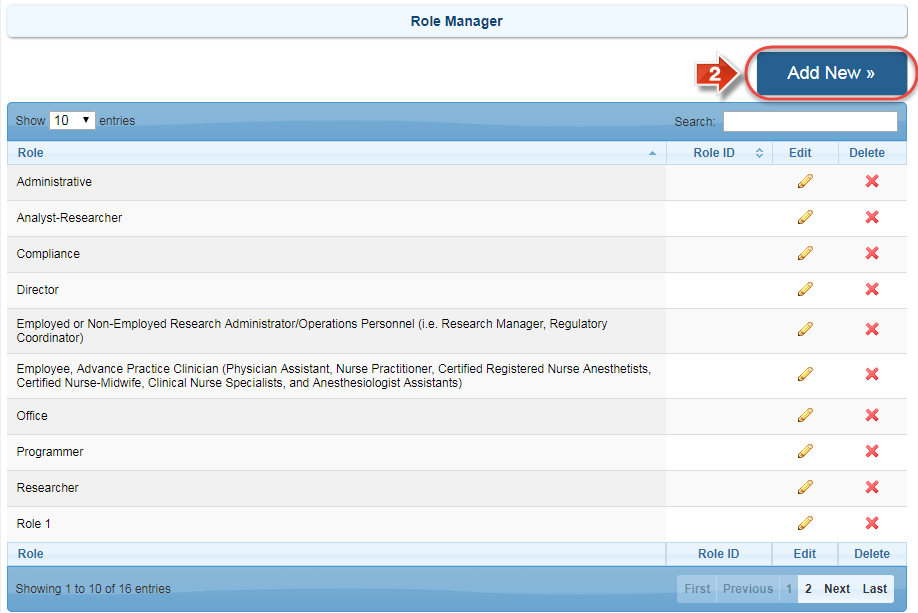
- To create a new Role, click the 'Add New' button
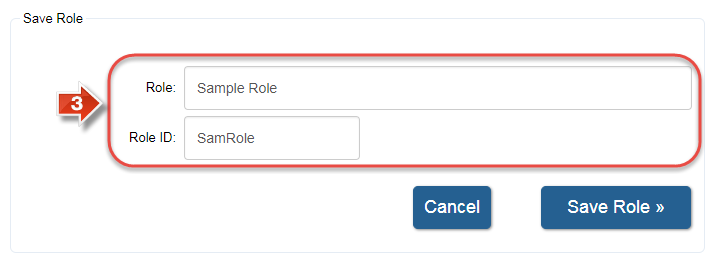
- Enter the role name in the 'Role' field and any relevant code in the 'Role ID' field (The name is required, but the ID is optional)
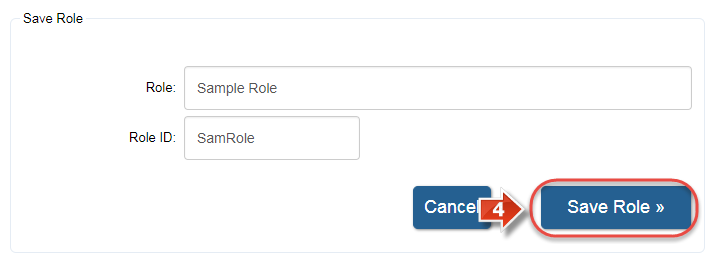
- Click the 'Save Role' button to add this role to the list (Or click 'Cancel' to exit this menu without saving changes)
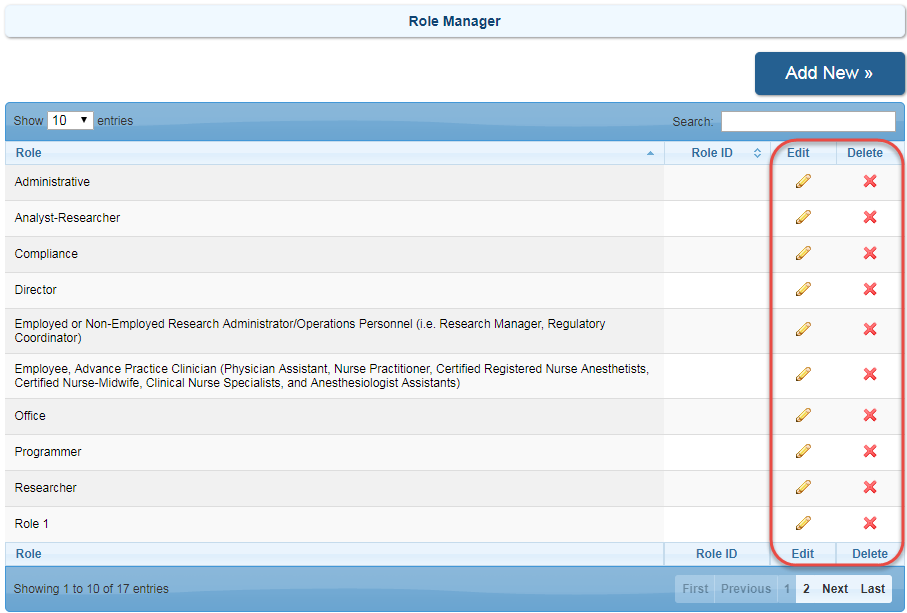
- In addition to adding roles, you may edit or delete role entries by using the icons under the 'Edit' and 'Delete' columns
Related articles
-
Page:
-
Page:
-
Page:
-
Page:
-
Page:
