How to Use My Team - Business Admin Tools
Use these My Team processes for managing HA (Healthcare Administration) users within the Conflict of Interest, Contract Manager, Entity Manager, ProTime, and Non-Monetary Compensation products.
Step-by-step guide
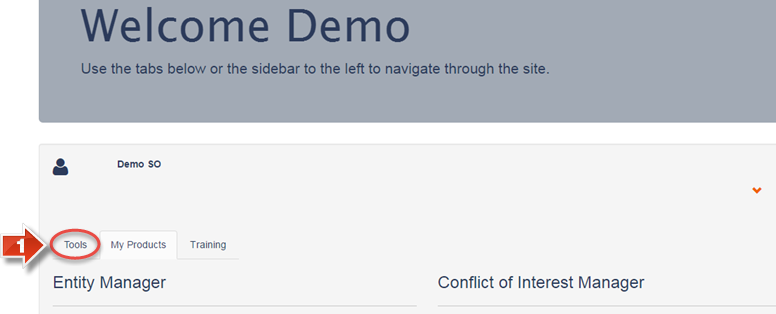
- Administrators have My Team available under Tools, which is a clickable tab that is just above the product selection menu.
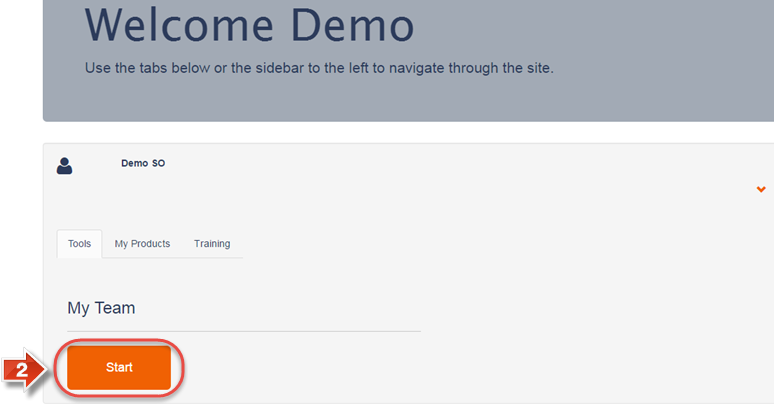
- After clicking on the Tools tab, the My Team section will appear. Click on the Start button to access My Team.
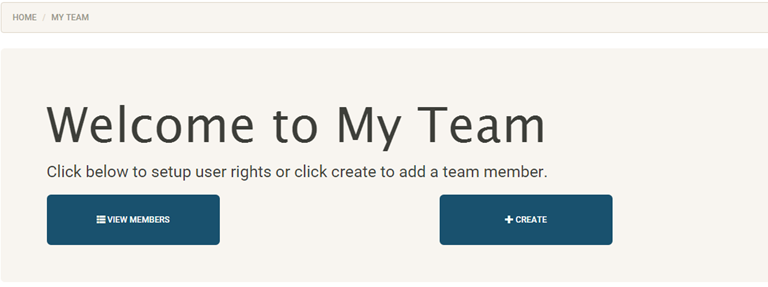
- From the My Team menu, you may add, view, modify, or archive users.
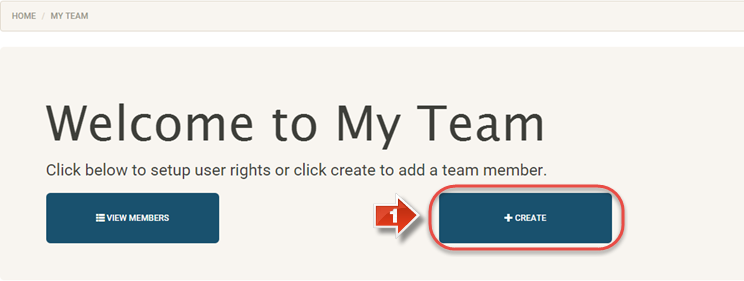
- Click on the Create button.
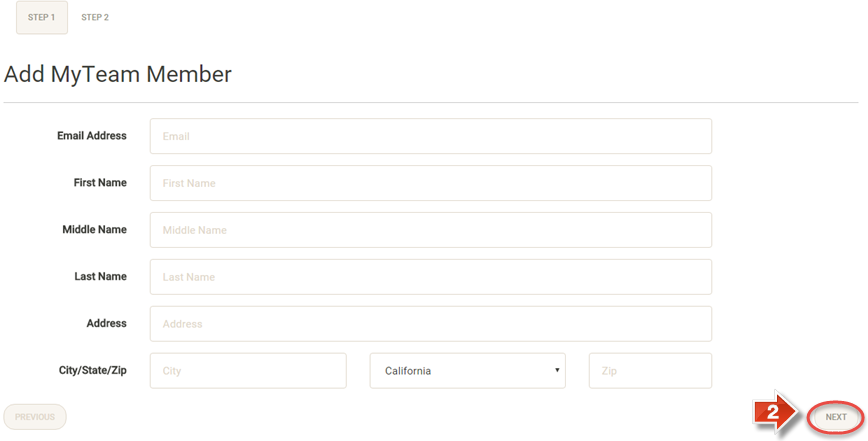
The first step in adding a new user is to enter their basic information. All user entries require the following fields to be completed:
• Email Address
• First Name
• Last Name
The other fields are useful for adding detailed contact information, but not required. The user themselves may also change this information once they are registered and have logged into the system. Also, please note that the Email address must be unused in our system in order for the registration to be successful.
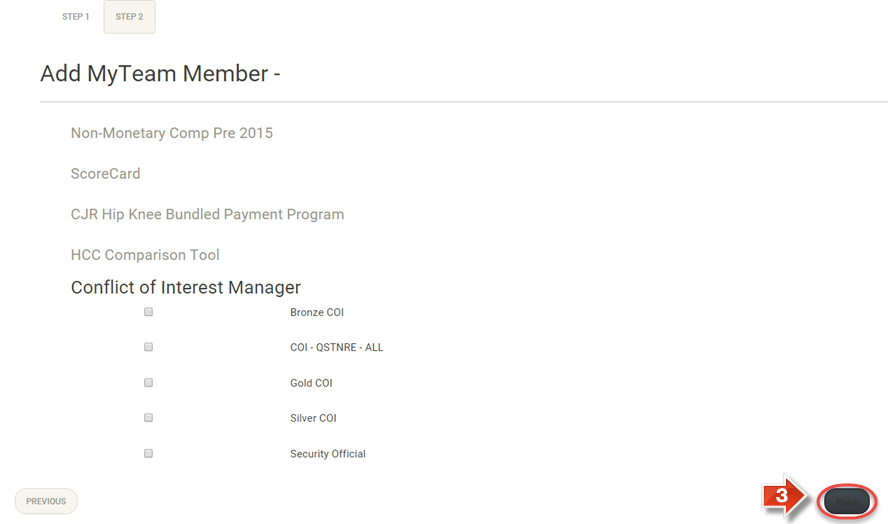
After entering required and supplementary information as needed, click the Next button to continue.On Step 2, you may configure a user’s access level. Levels are divided into Bronze, Silver, Gold, and Security Official access. Click the checkbox beside an access level to assign it to the user. It is important to only check one access level, as assigning multiple access levels to a single user can cause access issues for that user. Once you have finished configuring the user’s access level, click the Finish button at the bottom of the screen to create the user.
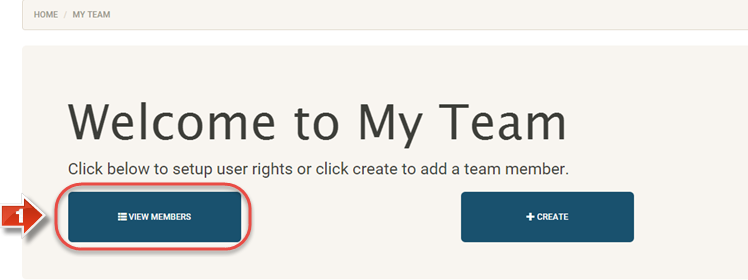
- To see a listing of existing users, click the View Members button.
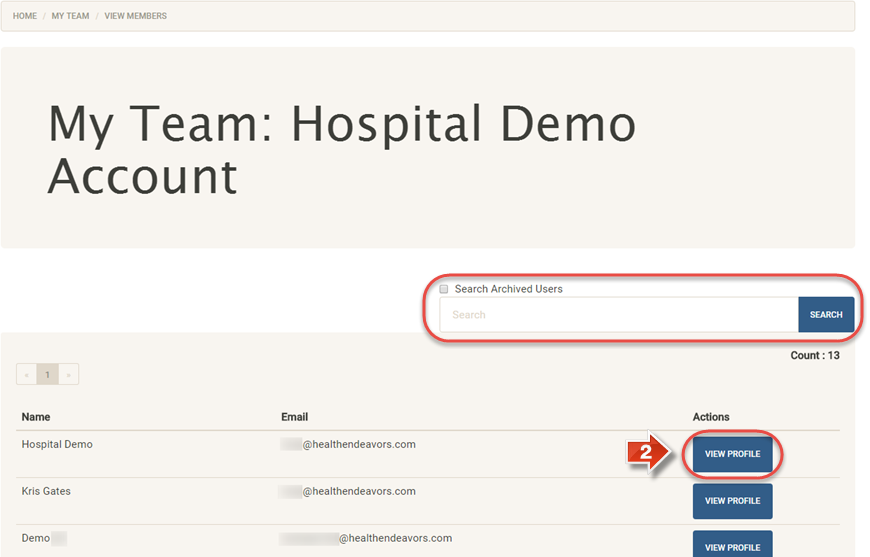
- On this screen, all existing users will be listed. Using the search bar, you can narrow the list down to users with matching names or Email addresses to the search criteria you enter. Deleted users can also be viewed by clicking the Search Archived Users checkbox and then searching. To access a user’s profile, click the View Profile button.
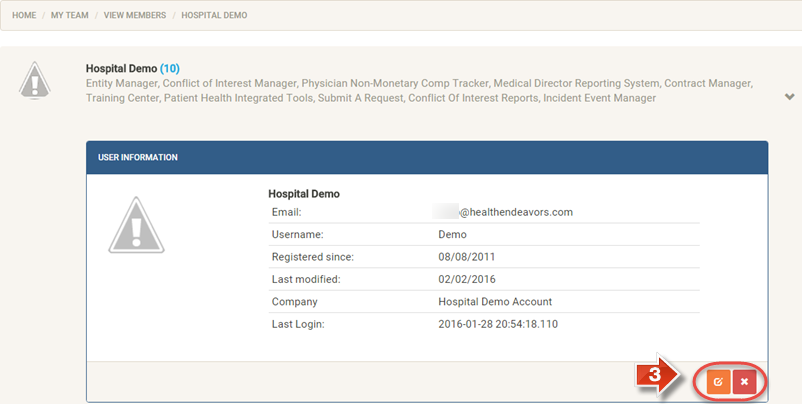
- At the top of a user’s profile page, you will see their basic information. Clicking the red x icon will delete a user, which adds them to the archived list, and removes their ability to login. Clicking the orange icon will edit some of a user’s information.
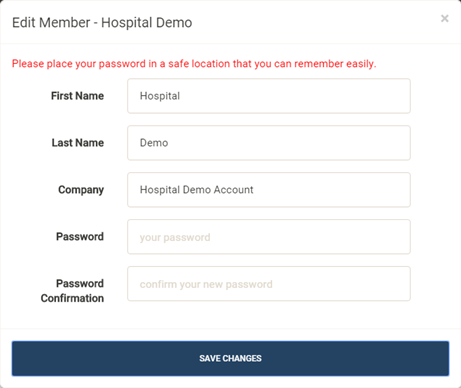
- The primary function of the editing window is to allow you to change a user’s password if required. Entering a new password will send an Email to that user informing them of the new password. (This is only recommended after having the user try to reset their password themselves using the options available on the Login page.)
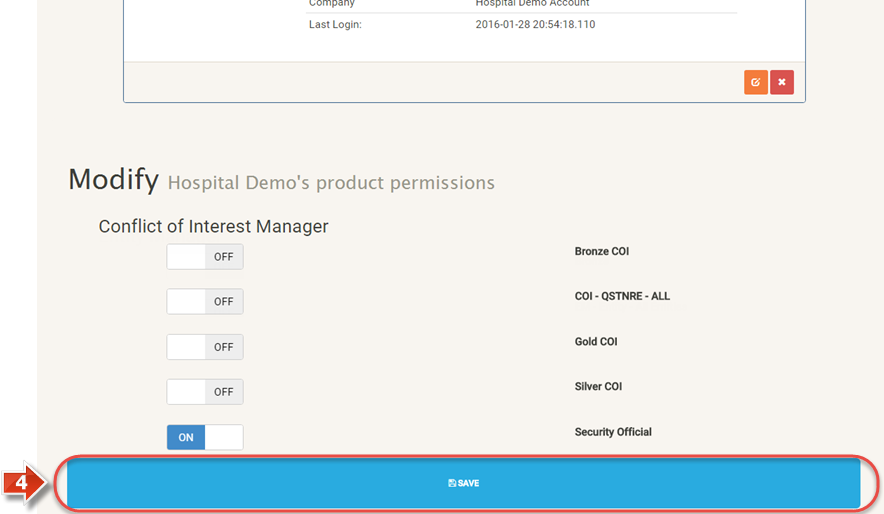
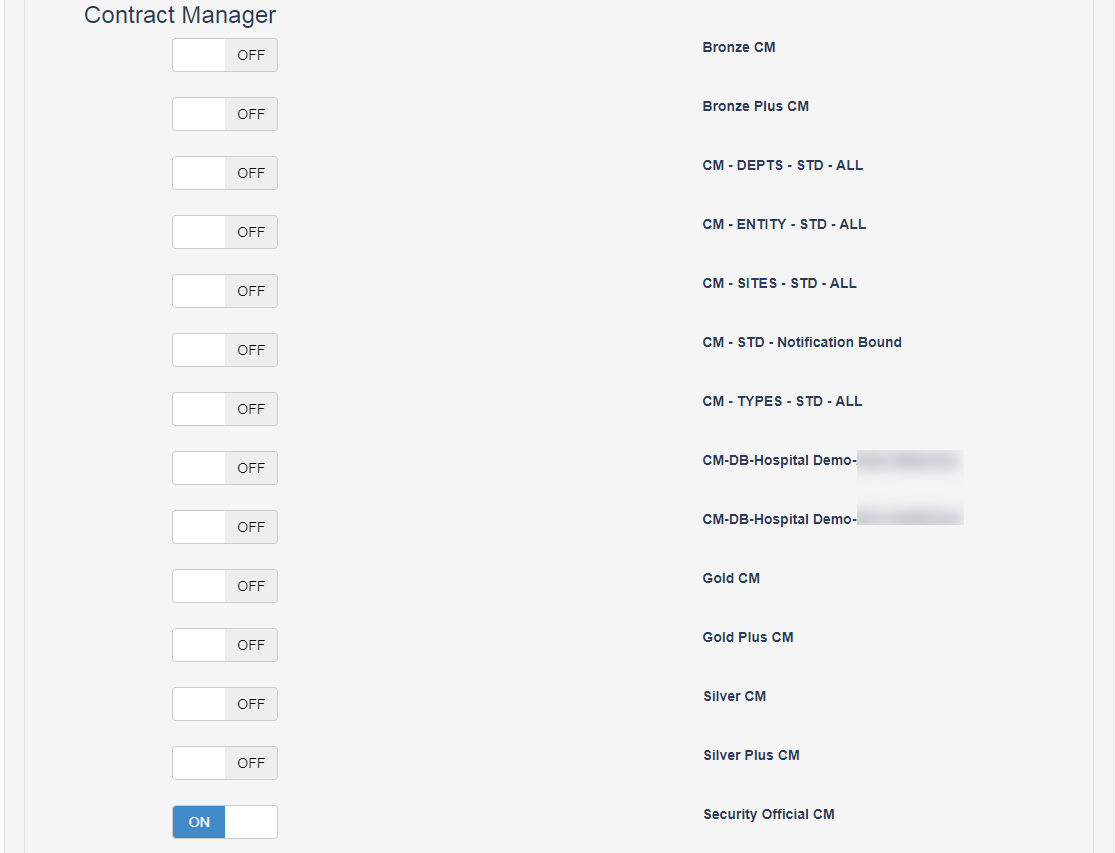
Further down the View Profile page, you may also make changes to a user’s permissions and access level. If a tab is ON, it indicates the user currently has this permission or access level. If it is OFF, they do not. Clicking the tab will switch it from ON to OFF and vice versa.
Once all desired changes are made to access, click the Save button to confirm these changes.
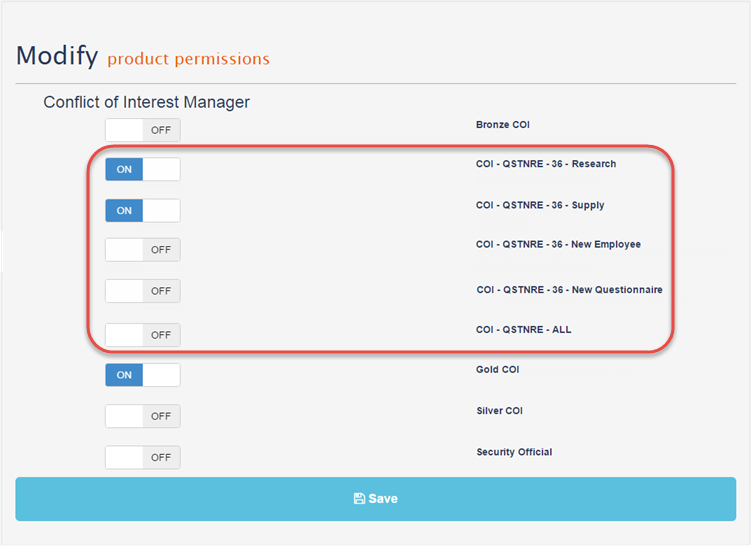
Depending on whether it has been enabled for your company, you may have the ability to assign permissions to a user based on specific questionnaires in the system. To enable the user to have access to the questionnaire, toggle it ON or fill in the checkbox depending on whether you are editing an existing user or creating a new one. To prevent a user from seeing or accessing a questionnaire, leave it OFF or unchecked. If you would like the user to have access to all questionnaires, enable the permission COI – QSTNRE – ALL. If you do not have this form of permissions enabled and would like to, please use Submit a Request.
Each individual user must have one access level at Bronze, Bronze Plus, Silver, Silver Plus, Gold, Gold Plus, or Security Official. There are also additional permissions available for activation upon request. These permissions enable restrictions by Entity, Department, Site, and Contract Type. Please use Submit a Request if you would like to enable these permissions for your company database. There is also a permission called Notification Bound. This permission will allow anyone who is in the Notifications section of a contract to see that specific contract regardless of their normal permissions. In other words, it allows you to specifically include someone who normally would not be able to see the contract.
Did you know: Only Security Officials may create, archive, edit, or assign permissions to users.
Related articles
