Entity Manager Restrict Access By Entity
The purpose of this user guide is to show how to create a new Entity in Entity Manager.
After reviewing this user guide, you will be able to perform several tasks:
- Create a new Entity.
Fill out Entity information as required.
Note: Please be aware that this update is not automatically activated for your company account. In order for clients to be able to apply permissions by Entity, we need to activate this type of access control for you. To communicate a request for permissions by Entity activation to us, please use the “Submit a Request” portal.
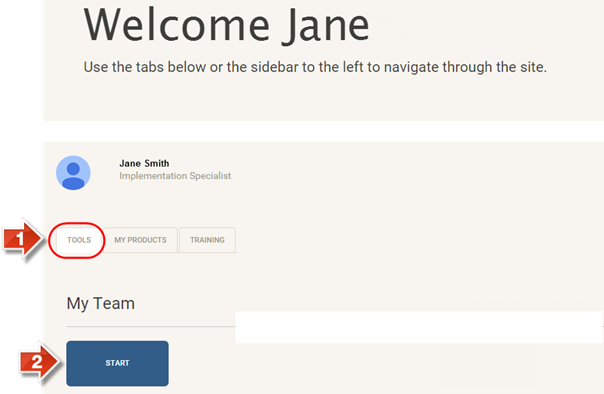
Select the “Tools” tab (1) on the lower section of the main landing page and then click the “Start” button under “My Team” (2).
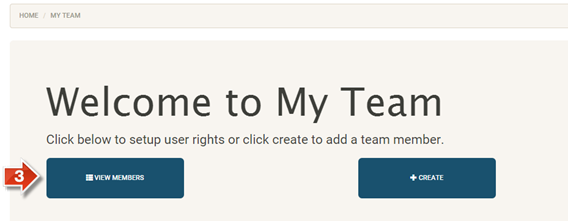
Click the “View Members” button (3) to see the list of users.
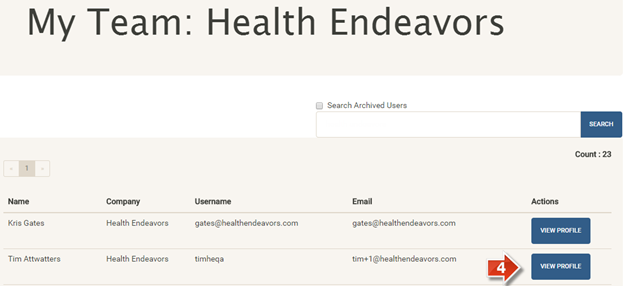
Locate the team member and click the “View Profile” button (4).
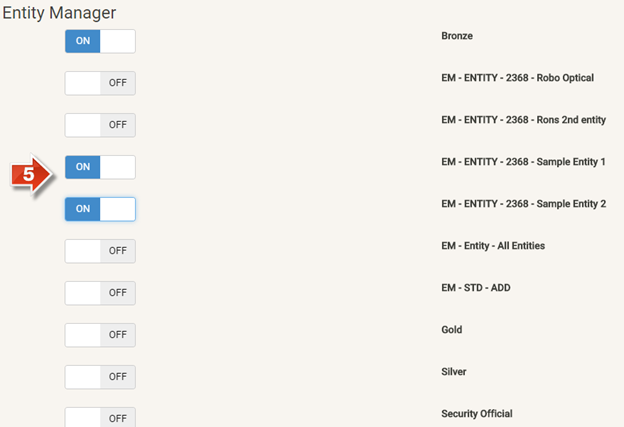
On the user profile page, find the “Entity Manager” section and turn the switch on for Entities that you want that user to be able to access (5).
Click the “Save” button at the bottom of the page to save your changes.
Please note that Entity roles can be assigned to any Entity Manager user regardless of whether they are a Security Official, Gold, Silver or Bronze user.
If the Security Official doesn’t want to limit the data access, they need to assign the “All Entities” role to the user.
Any new Entity that is created in Entity Manager will be automatically added to the system as a role to be used to assign to specific users. The user that creates an Entity automatically gets assigned permissions to it.


