Add and Manage Participants

Use this process to add participants to a questionnaire. You can add regular participants one at a time or all at once, as well as test participants used to run simulations on the questionnaire.

Step-by-step guide


 Show Me How to Add a Participant
To add a single participant to a questionnaire, perform the following steps:
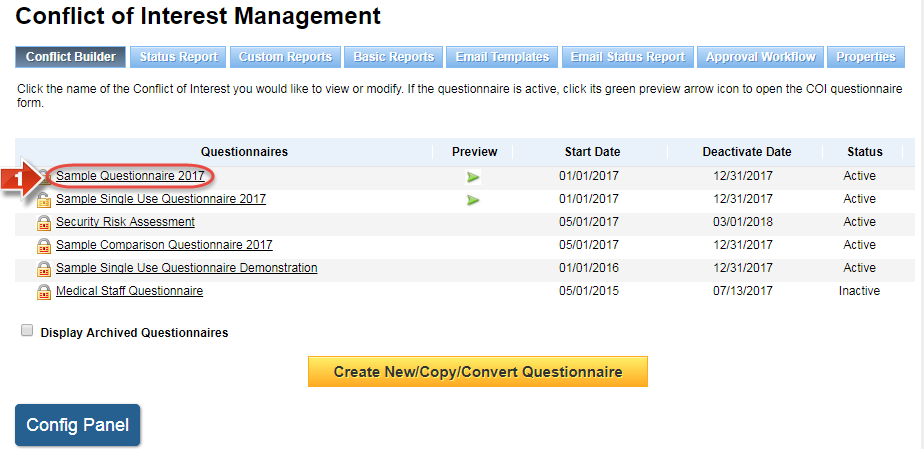
  1. Click the title of the questionnaire
    1.  Show Me

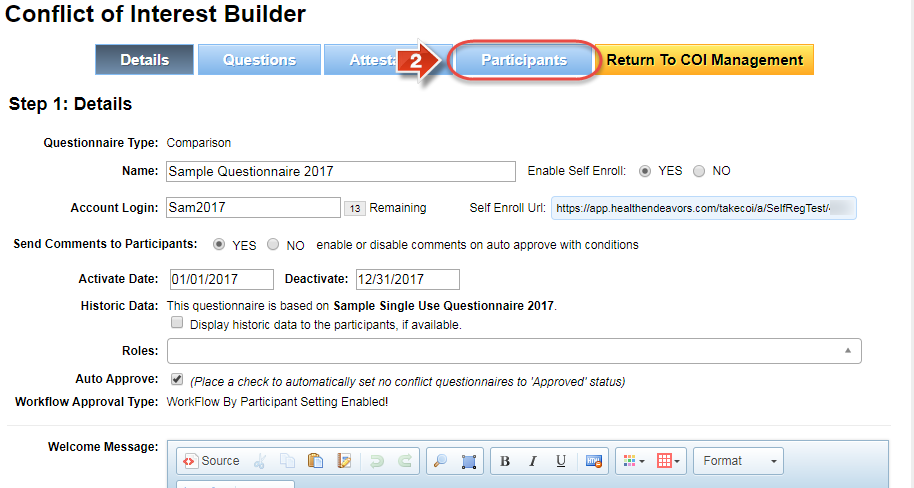
  2. Click the 'Participants' tab
    1.  Show Me

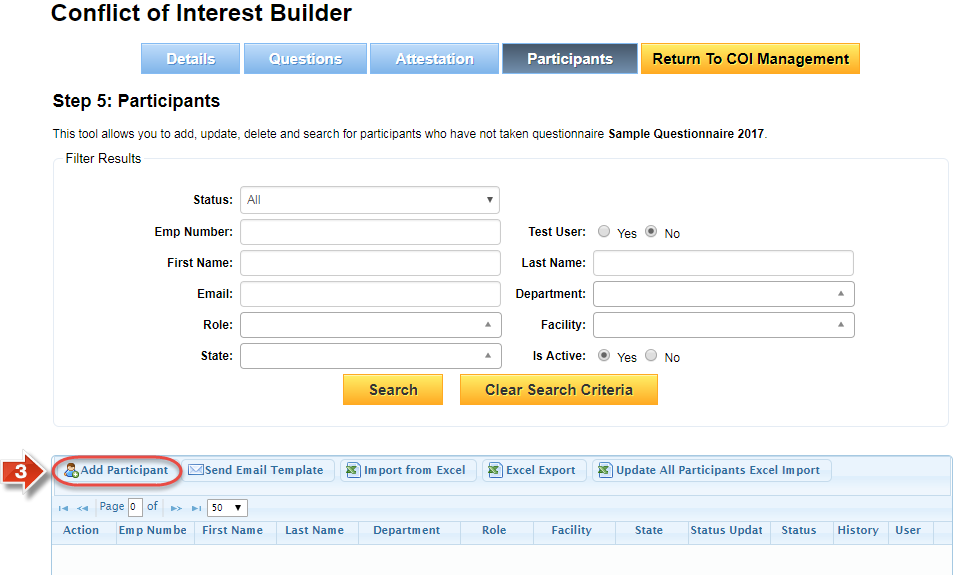
  3. Click the 'Add Participant' button
    1.  Show Me

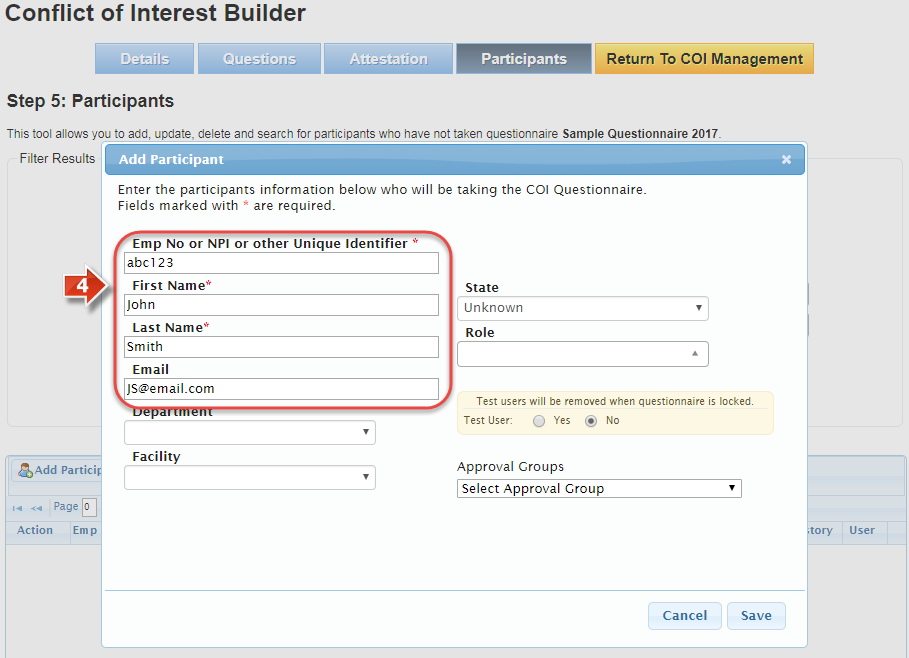
  4. Fill in the 'Emp No or NPI or other Unique Identifier', 'First Name', and 'Last Name' as these are required fields for every participant (We also recommend filling in the 'Email' field in order to use the various Email functions within this software)
    1.  Show Me

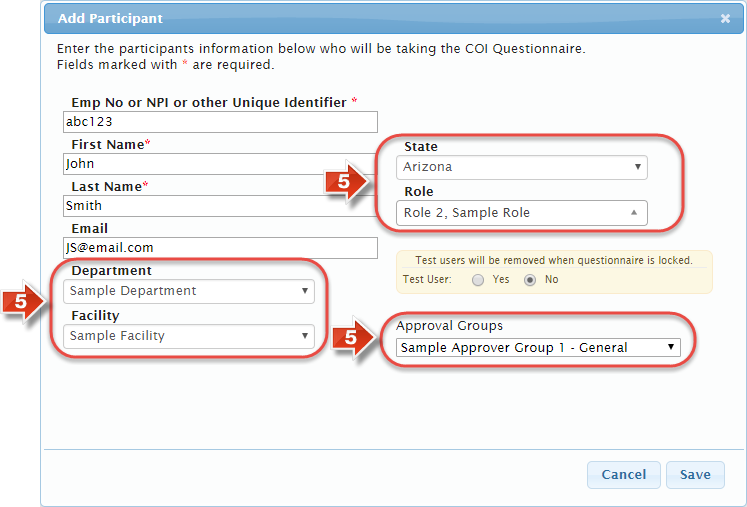
  5. Fill in the other profile data based on the available options from the 'Properties' database. The remaining fields use dropdown menus where one option may be selected except for 'Roles', which allow multiple selections up to ten (If you are using Participant-based approval workflow, you may also assign the approval group to the participant using the dropdown)
    1.  Show Me

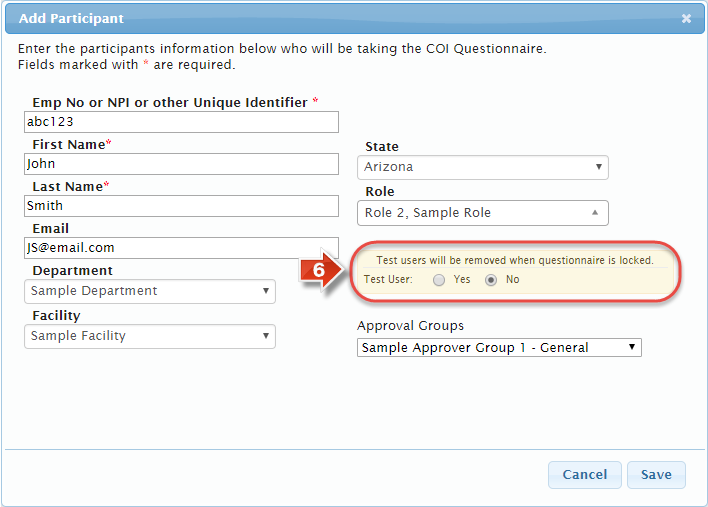
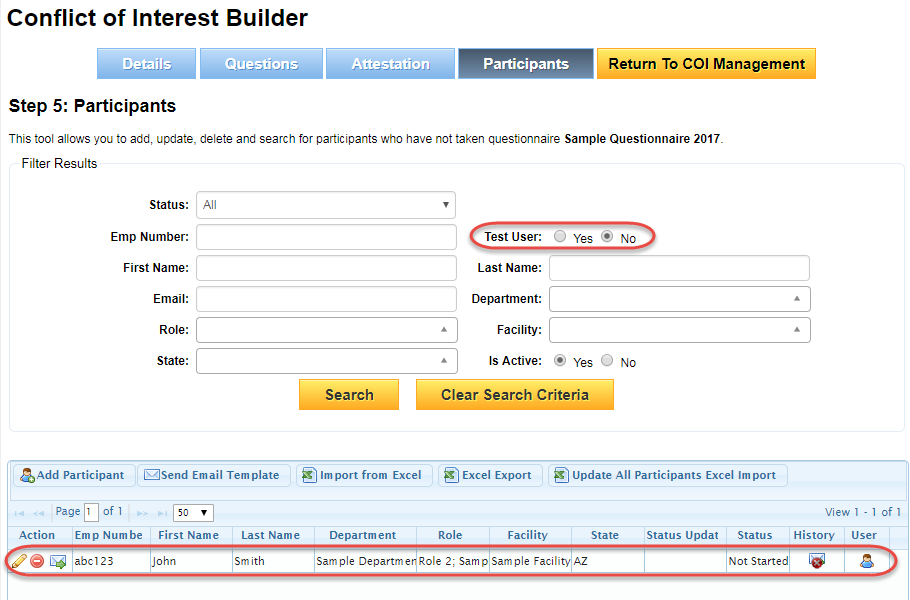
  6. By default, any participant created in this window is a regular participant. However, you may switch this entry to a test participant by using the 'Test User' radio buttons (Test users can access the questionnaire while it is unlocked, but are permanently deleted once the questionnaire is locked down)
    1.  Show Me

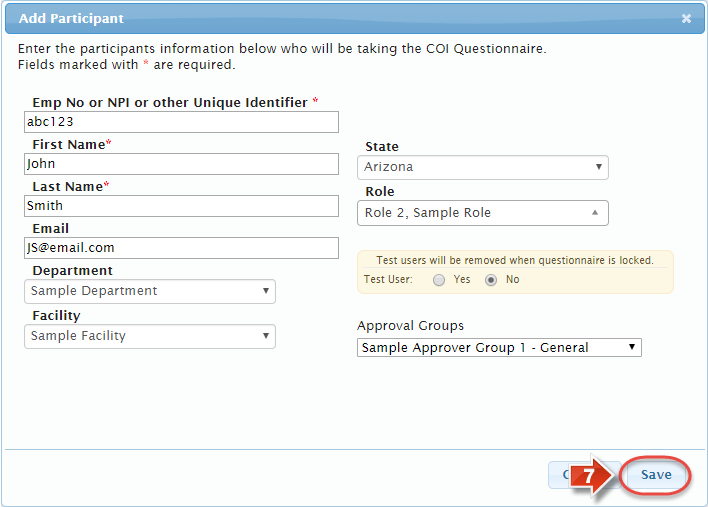
  7. Click the 'Save' button to create this participant entry
    1.  Show Me

  8. The participant is added to the participants table immediately (If you need to view test participants, be sure to use the 'Test User' buttons to switch between tables)
    1.  Show Me


 Show Me How to Add Multiple Participants
To import multiple participants at once using the 'Import from Excel' option, perform the following steps:
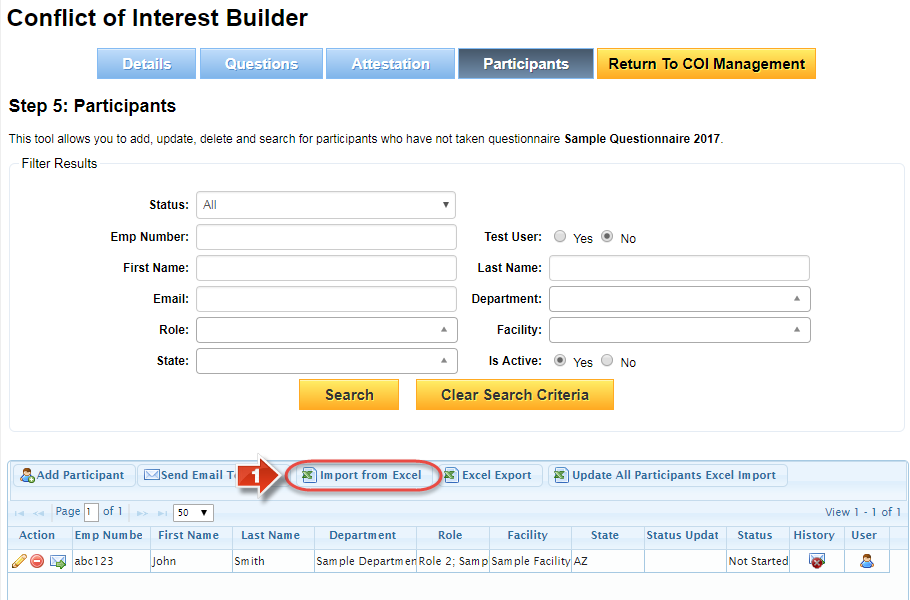
  1. Click the 'Import from Excel' button on the Participants table
    1.  Show Me

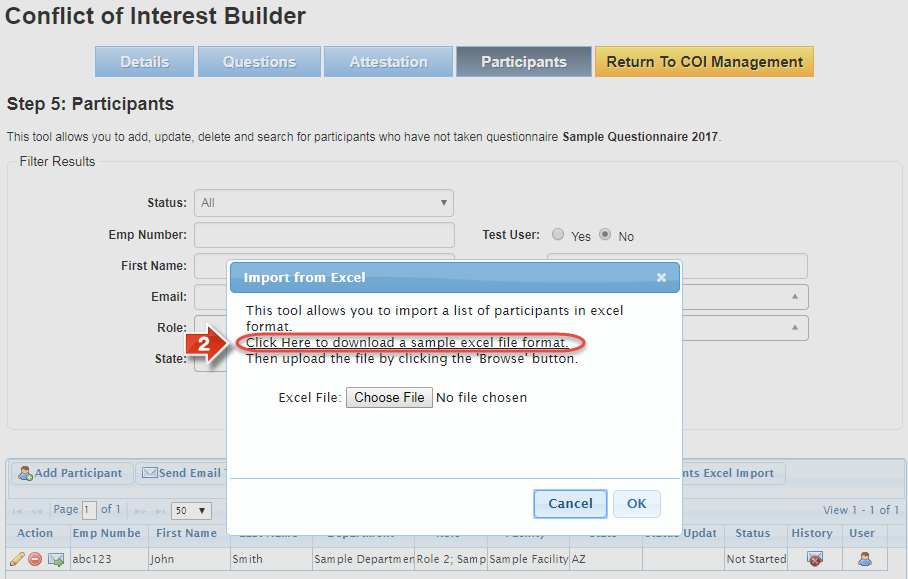
  2. When the Import from Excel window appears, use the included link to download a blank copy of the import template
    1.  Show Me

  3. Fill out the import template with all participants you wish to import, and the type of action you want the import to take. The columns all match participant profile information, but column A 'Admin' requires one of three choices: 

     Admin Options

    A - Add the participant to the questionnaire using the information provided

    C - Change the participant already in the questionnaire to the information provided (Employee ID column must match existing entry)

    R - Remove the participant from the questionnaire and archive their data (Can be restored manually or by putting a C in this column in a different import)

    1.  Show Me

      In this example, we're adding Jane Doe, changing John Smith's Roles list, then removing John Smith as an active participant.

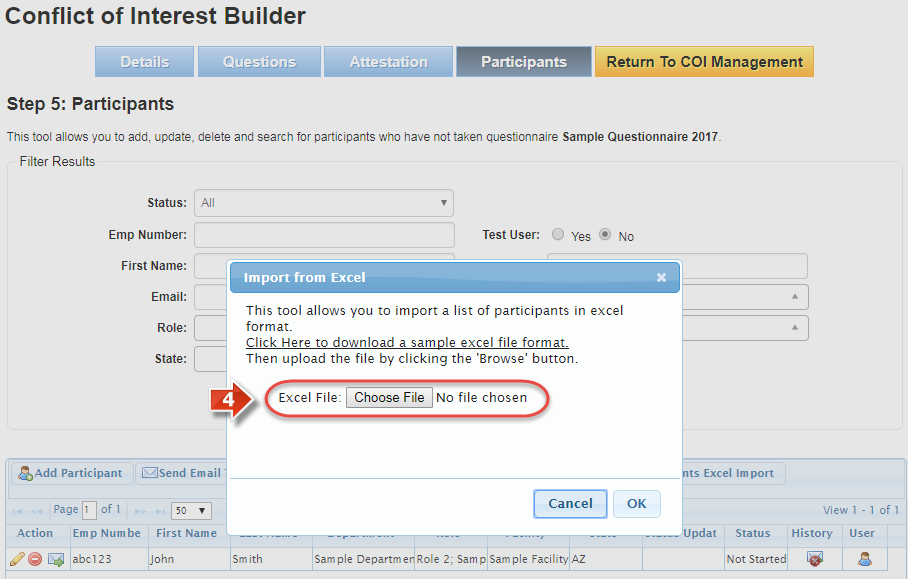
  4. When the spreadsheet is filled out and ready for import, click the 'Choose File' button and select the spreadsheet from your computer
    1.  Show Me

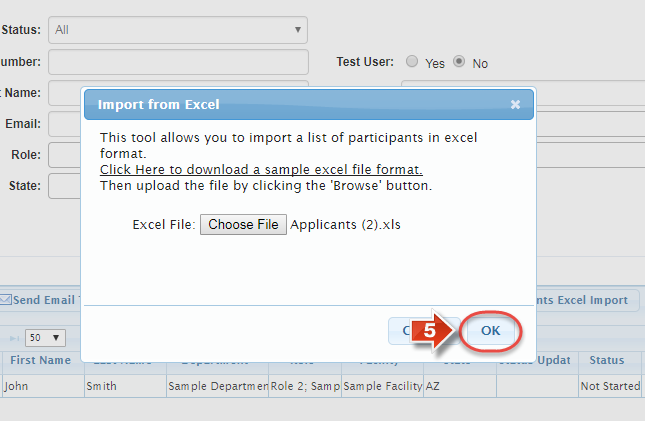
  5. Click the 'OK' button to begin the import (Depending on the number of participants in the spreadsheet, this may take a few minutes)
    1.  Show Me

  6. After the import finishes, you will see a results page with any errors listed based on spreadsheet row
    1.  Show Me

    2.  What are some common errors I might see?

      Employee Number, First and Last Name are required fields - The participant row is missing one of these fields in the import spreadsheet. In order to import this participant, make sure columns B, C, and D are filled in.

      Participant was previously entered - You are trying to (A) Add a participant that is already in the questionnaire based on the Employee ID. Check to see if the participant is already in the questionnaire, or if the ID is in use by another participant.

      Participant does not exist - You are trying to (C) Change or (R) Remove a participant that has not been entered into the questionnaire based on the Employee ID. You may need to add this participant instead, or check to ensure the ID is correct.

      ____ is not a valid Department - The department you entered does not match a department in the Properties tab. Check the Departments section of the Properties tab to make sure the department exists. If it does, check the entry in the spreadsheet to make sure it matches the name exactly and does not contain any excess characters (Such as extra spaces).

      ____ is not a valid Facility - The facility you entered does not match a facility in the Properties tab. Check the Facilities section of the Properties tab to make sure the facility exists. If it does, check the entry in the spreadsheet to make sure it matches the name exactly and does not contain any excess characters (Such as extra spaces).

      ____ is not a valid State - The state you entered does not match an activated state in the Properties tab. Check the States section of the Properties tab to make sure the state you selected has a checkmark. If it does, check the entry in the spreadsheet to make sure it matches the name or abbreviation exactly and does not contain any excess characters (Such as extra spaces).

      Note: Unlike the other fields, an invalid Role will not stop the import process for the participant row. If the role does not match an entry in the Properties tab, or if it is not allowed in this questionnaire, the participant will be imported with this role entry left out. This could result in a participant without any roles being imported into the questionnaire.
 Show Me How to Edit a Participant
To edit a participant, perform the following steps:
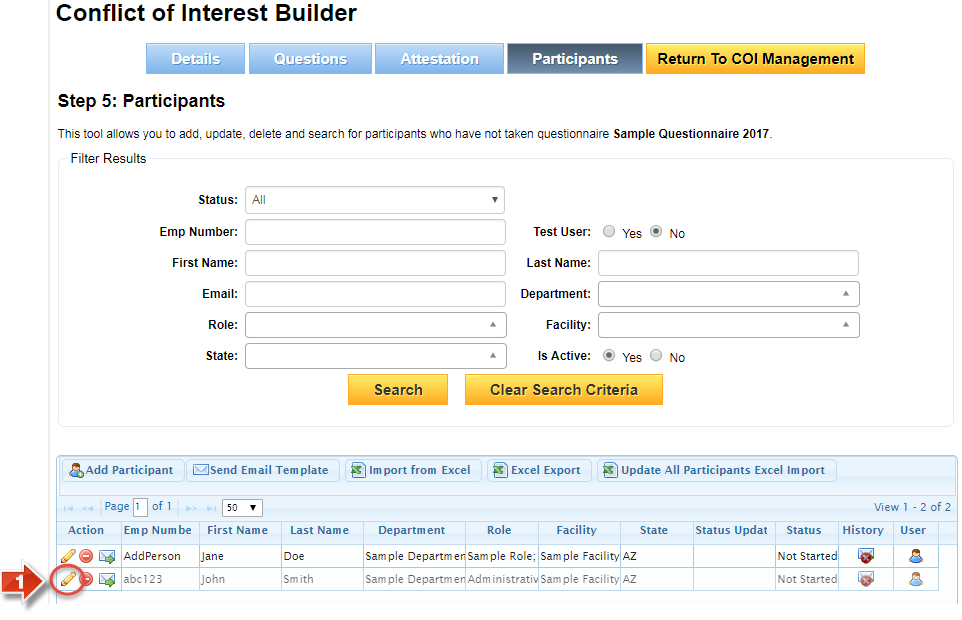
  1. Click the pencil icon under the 'Action' column
    1.  Show Me

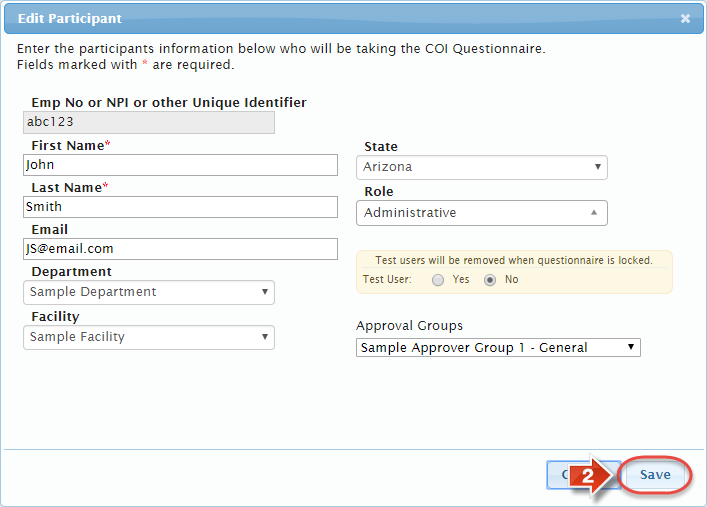
  2. On the Edit Participant window, you make make changes to any field except for Employee ID. When finished, click the 'Save' button to confirm (If you change the participant's approval group and they have already submitted their questionnaire for review, it will need to be submitted again for the new workflow group to take effect)
    1.  Show Me


 Show Me How to Archive a Participant
To archive a participant, perform the following steps:
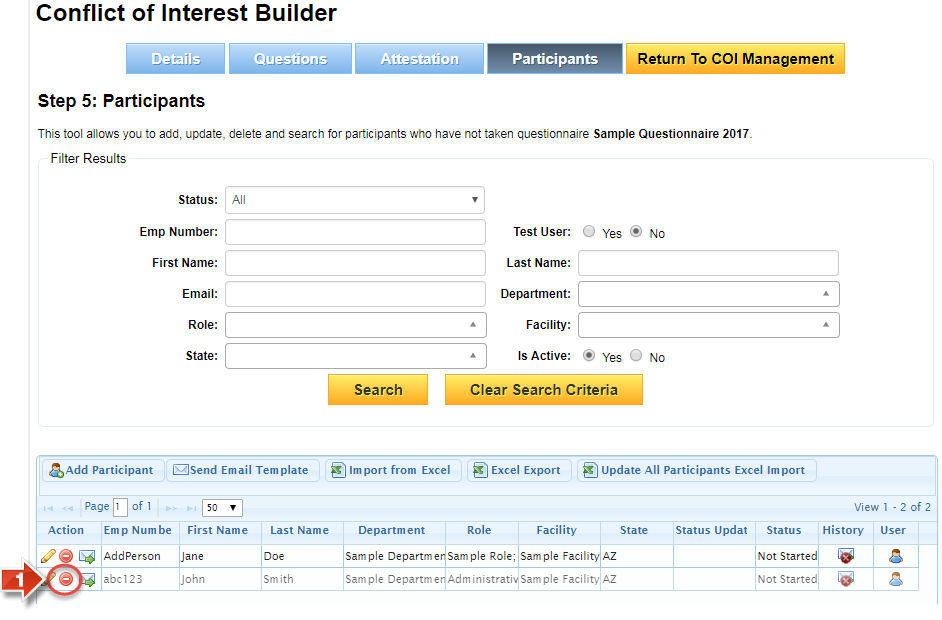
  1. Click the red circle under the 'Action' column
    1.  Show Me

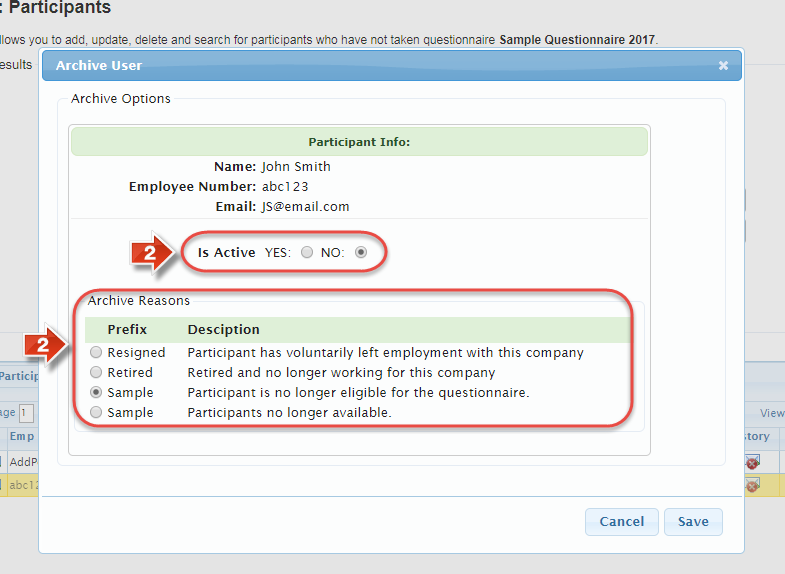
  2. Change the 'Is Active' field to 'NO' and (If available) select a reason for removing this participant
    1.  Show Me

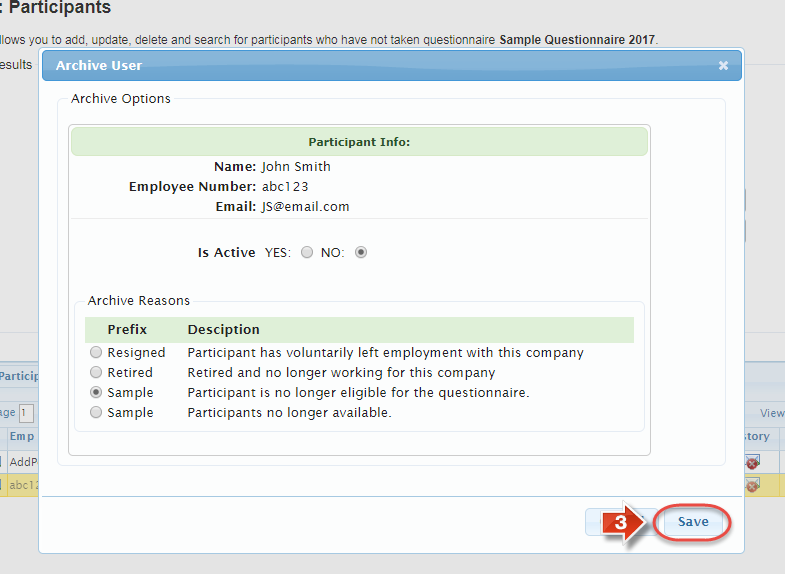
  3. Click the 'Save' button to confirm the removal of this participant
    1.  Show Me

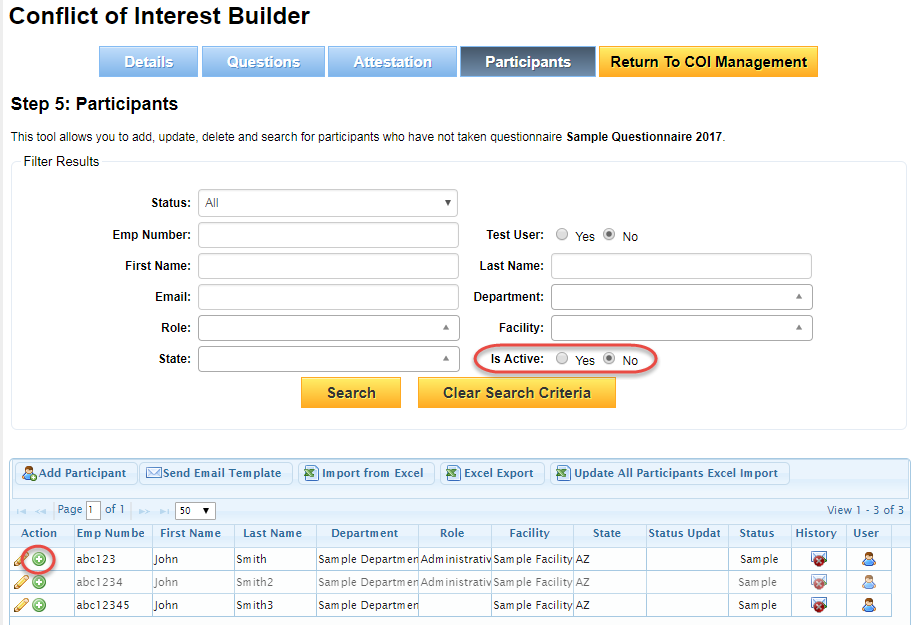
  4. To switch between viewing active and inactive participants, use the 'Is Active' filter. You can also restore an archived participant by clicking the green circle under the 'Action' column on this alternative table
    1.  Show Me


Did you know: Participants can be added, edited, or removed at any time, even while the questionnaire is locked. However, some functions on the Status Report page depend directly on the participant's current status.