Configure Questionnaire Details
Use these steps to configure the basic settings of a questionnaire, including auto approval, self-registration, role restrictions, and open/close dates.
Show Me How to Configure the Details Page
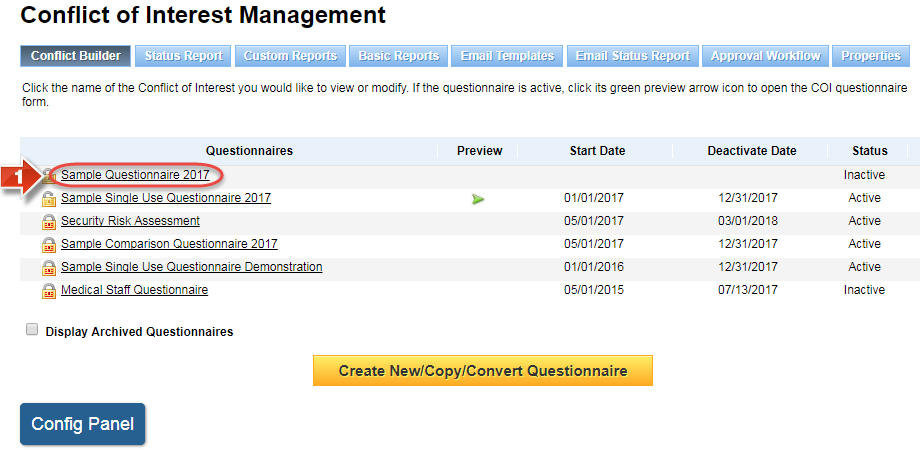
- Click the title of the questionnaire you wish to edit
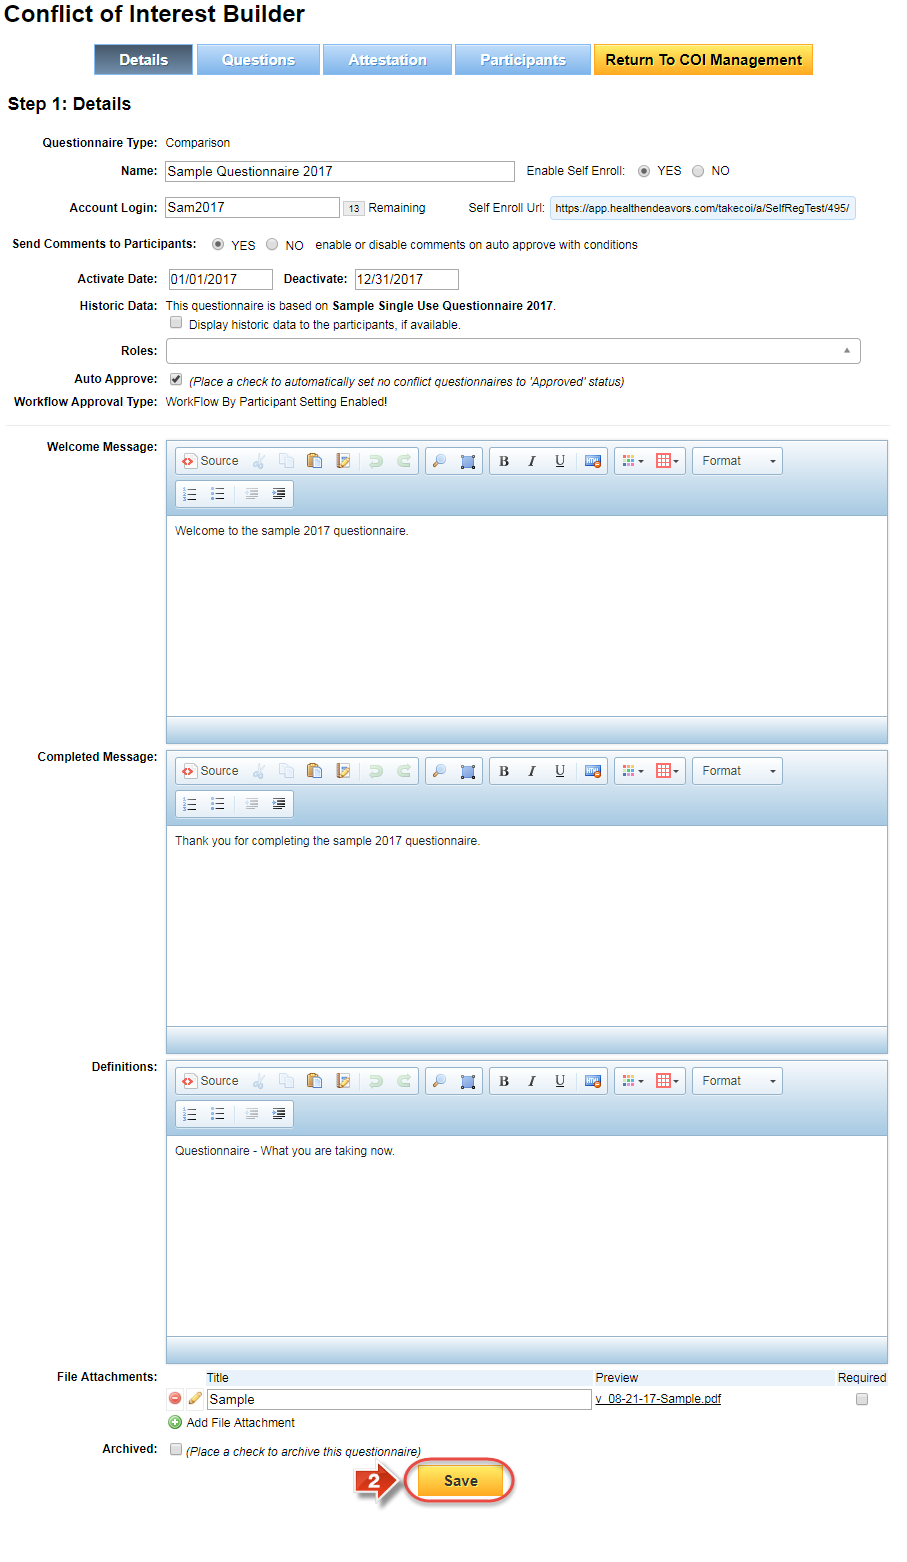
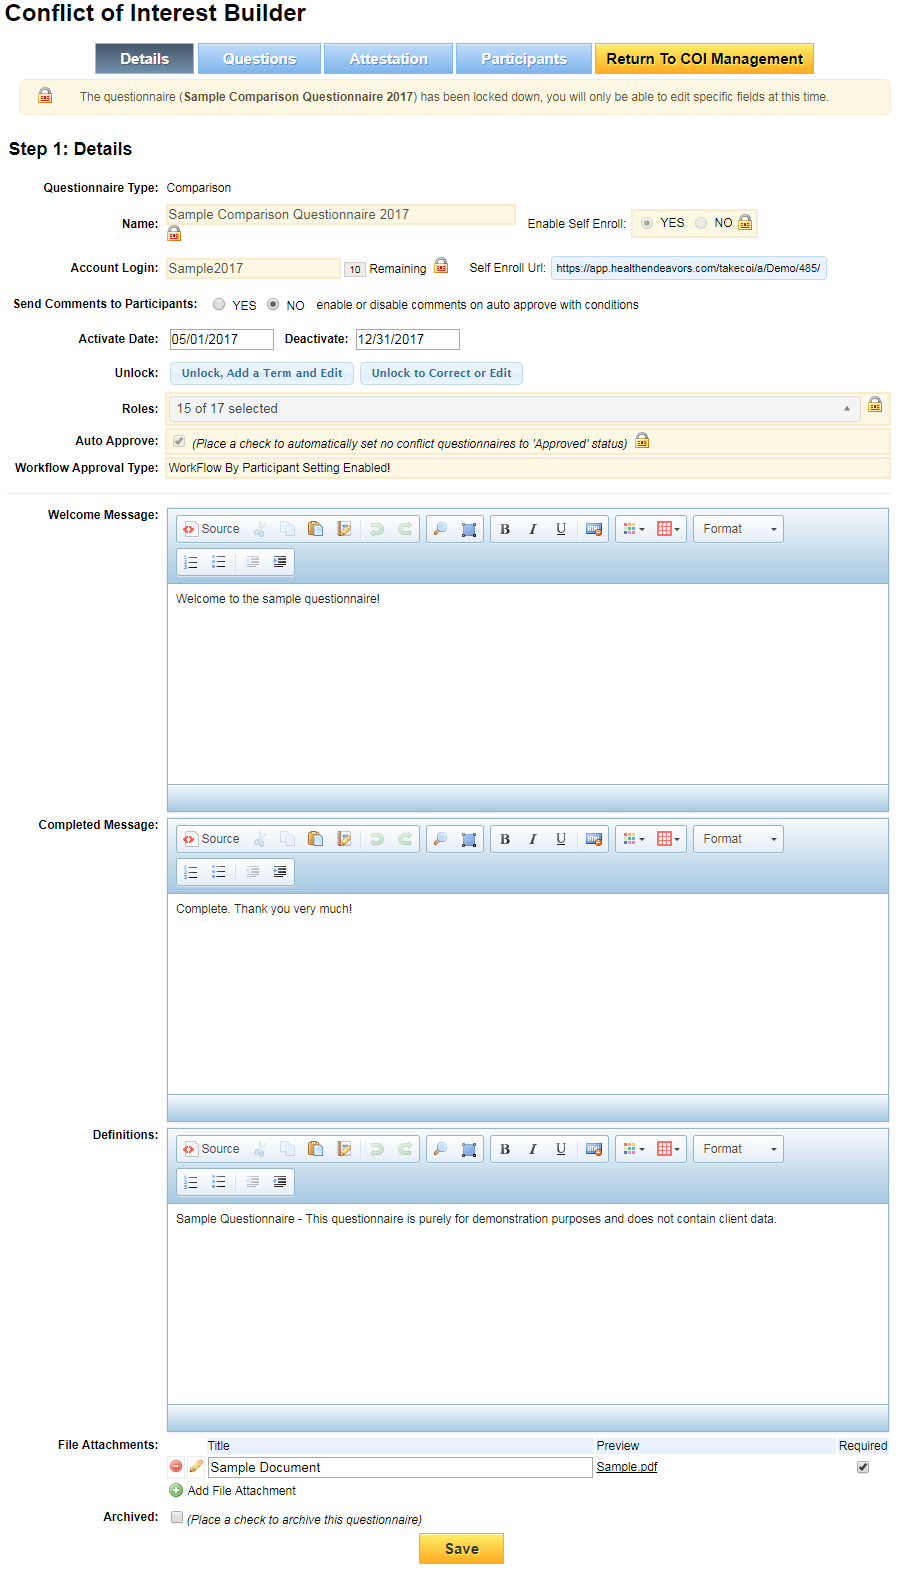
- Make any desired changes to the details of the questionnaire, and then click the 'Save' button to confirm (Make sure to save whenever you have made any changes on this page)
What changes are you trying to make in particular?
I want to change the name or the account login identifier
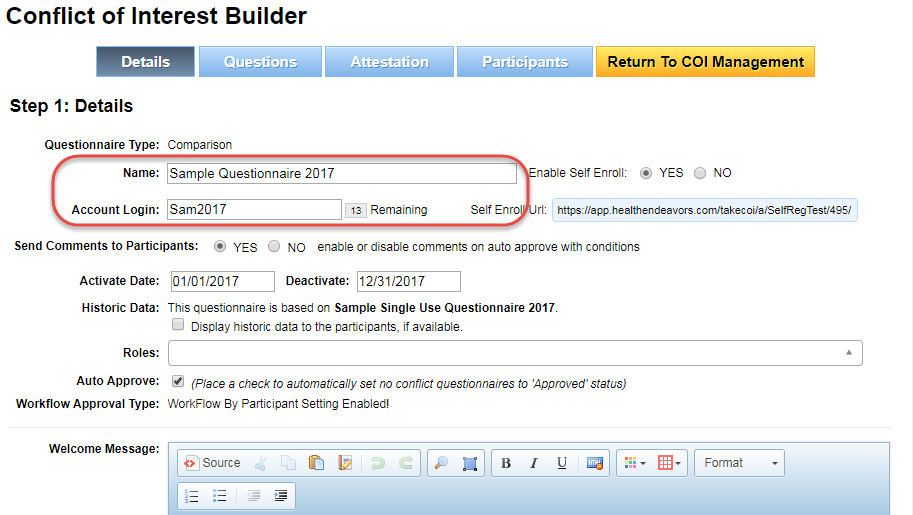
- To change the name of the questionnaire, use the 'Name' field
- To change the account login identifier, use the 'Account Login' field (Keep in mind that each account login must be unique, so you cannot use the same identifier for multiple questionnaires; also try to be fairly specific in order to prevent accidental access by a participant from another organization)
I want to enable or disable self-registration
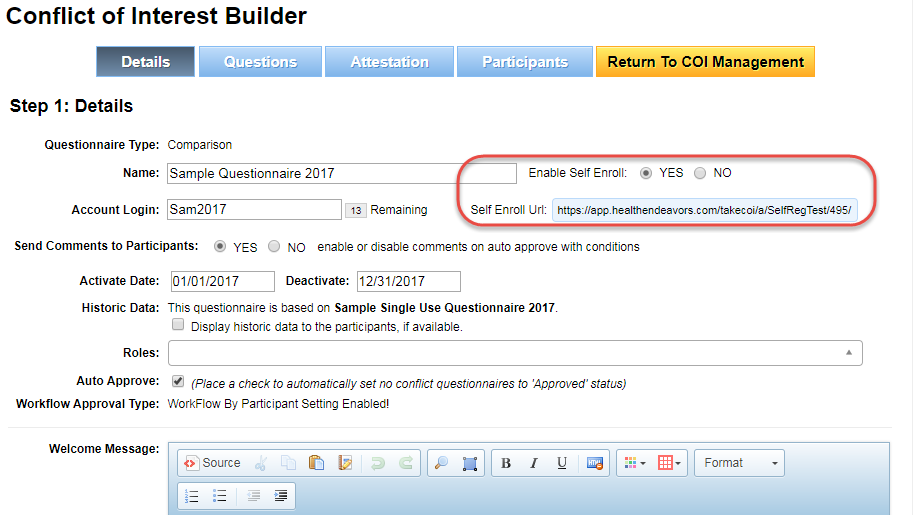
- Use the radio buttons next to 'Enable Self Enroll' to enable or disable this feature (If enabled, use the URL that appears to send a link to self-enrolling participants so that they can access the self-registration form)
I want to enable the ability to send comments
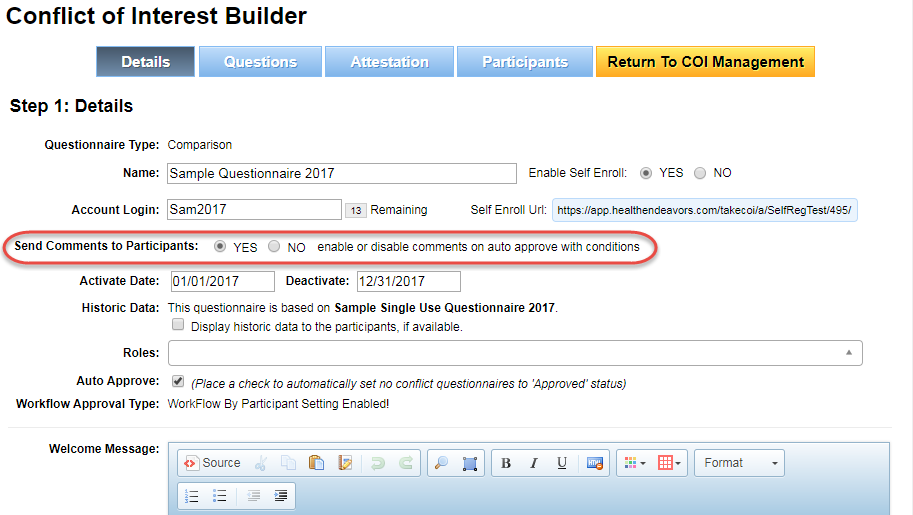
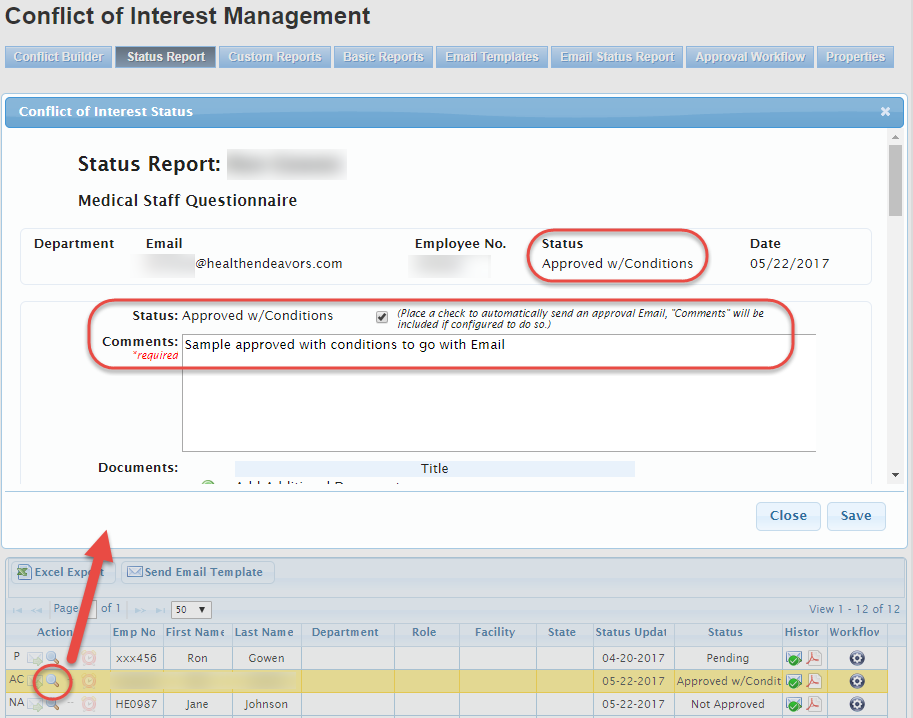
- Use the radio buttons next to 'Send Comments to Participants' if you would like to activate this ability
What does this even mean?
Approved with Conditions is a unique status that can be set to participants after they have submitted their questionnaire for review. If you enable this option, then administrators may use the 'Comments' box in the Status Report to send a special Email Template to participants. This template can insert the contents of the 'Comments' box to establish the conditions that the participant must abide by in order to avoid a potential conflict in the future. See below for an example.
I want to change the start date or end date
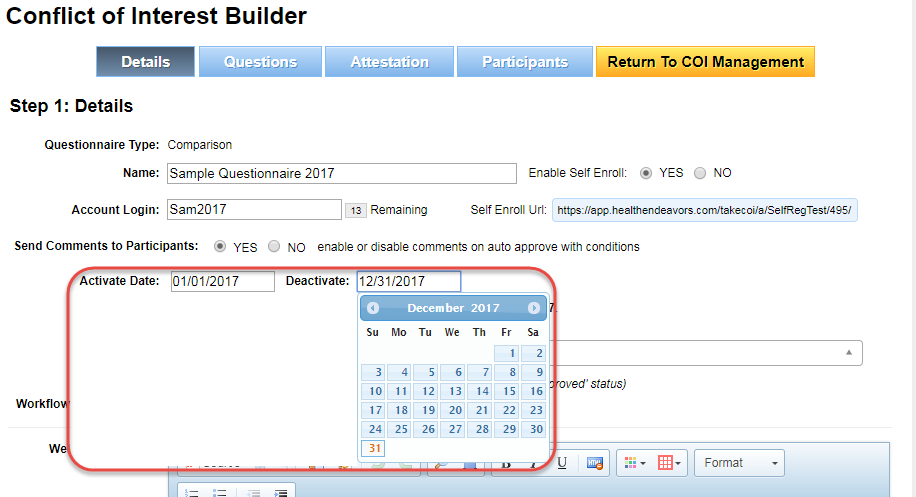
- Click on the date next to the 'Activate Date' or 'Deactivate' date fields and use the calendar pop-up to change this date (The Activate Date must be before the Deactivate Date... unless you're Marty McFly)
I want to toggle historic data for participants
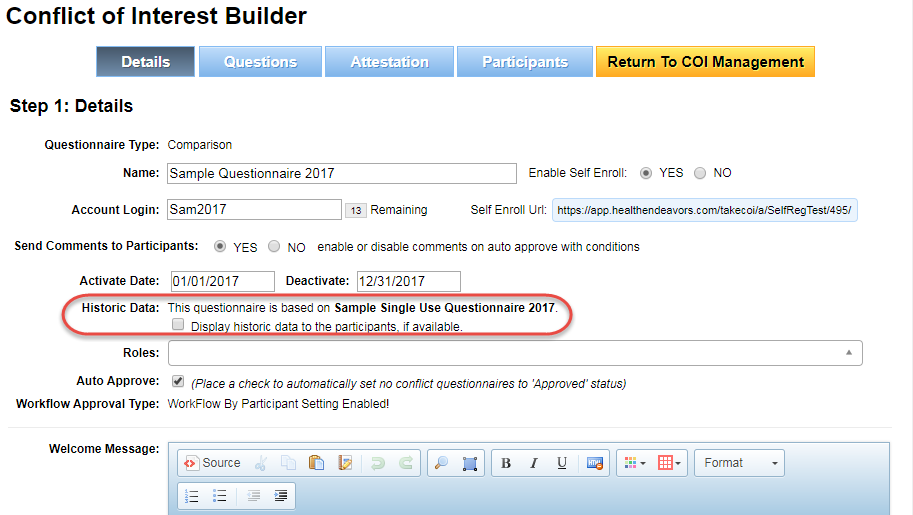
- Use the checkbox beside 'Display historic data to the participants, if available' to activate this feature (Not recommended for most questionnaires)
I want to restrict which participant roles are available for the questionnaire
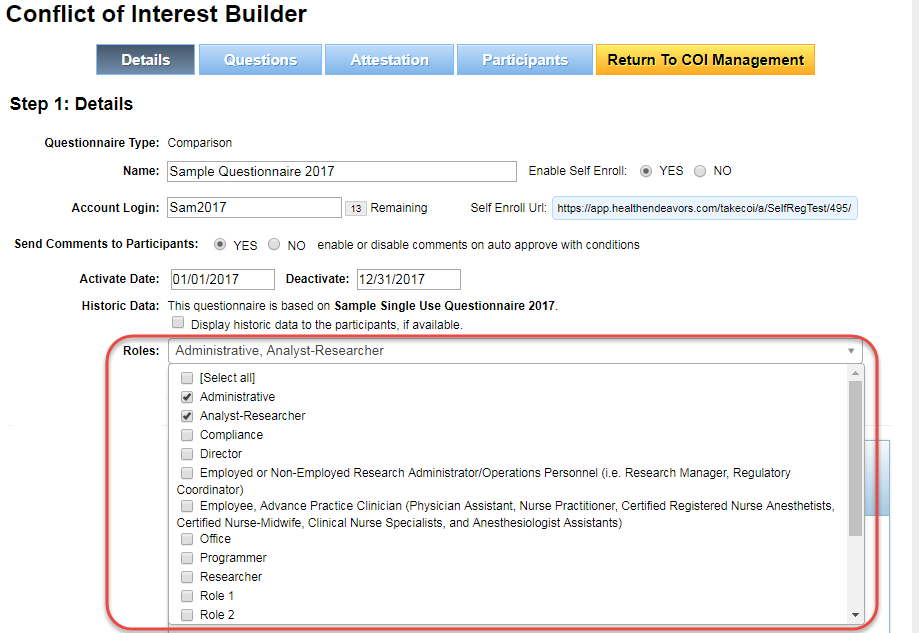
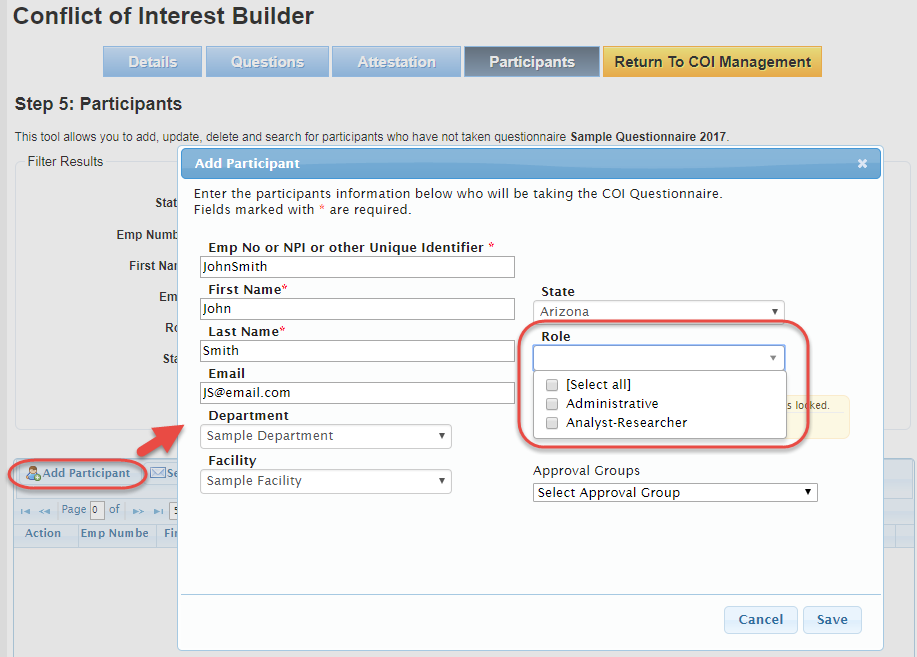
- Use the dropdown beside the 'Roles' field to select which participant roles are allowed for selection during participant creation/import
What does this mean?
When you are adding participants to a questionnaire, one of the profile fields is 'Roles'. By using the dropdown on the Details page, you may ensure that only participants that fit the set of allowed Roles will be added into the questionnaire.
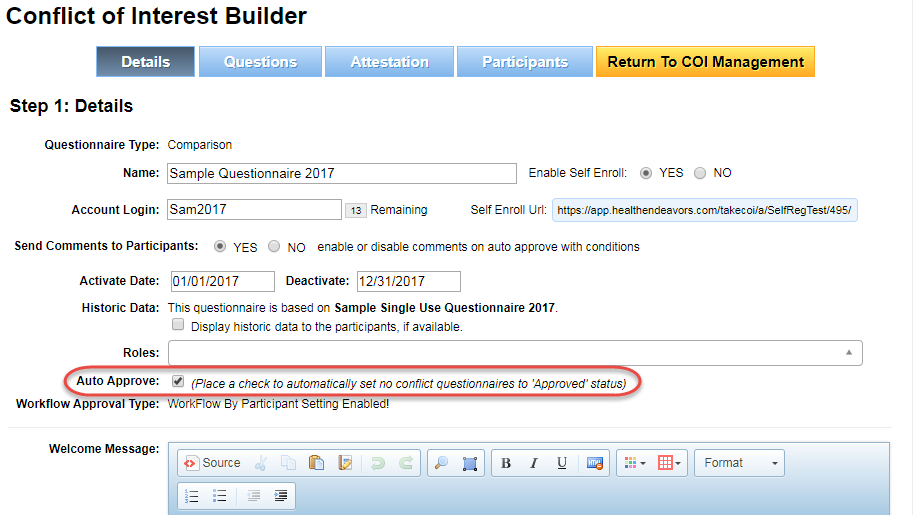
I want to enable or disable automatic approval
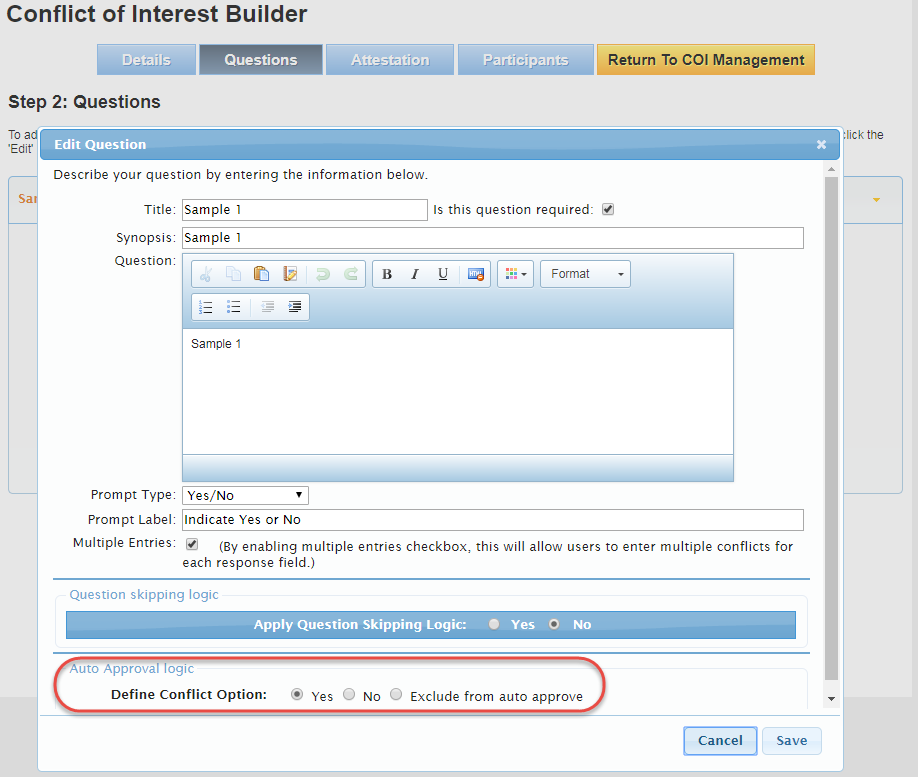
- Click the checkbox beside the 'Auto Approve' field to enable or disable this feature. When the checkbox is filled, auto approval logic may be configured on the 'Questions' tab of the questionnaire
Auto approval? Questions tab?
If this option is enabled, questions with specific response types can be configured with auto approval logic. By doing this, participants who do not trigger a specific answer in any of these questions may be approved in the system automatically.
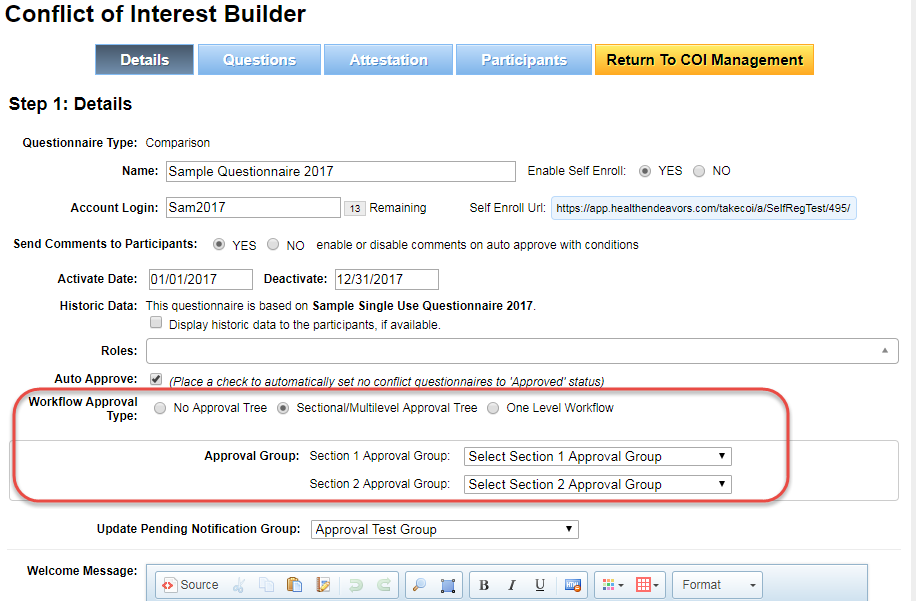
I want to assign an approval group to the questionnaire
- Use the radio buttons beside the 'Workflow Approval Type' field to indicate whether you want to have No Approval Tree (Approval from the Status Report page only), Sectional/Multilevel Approval Tree (Two approval groups with questions split between them), or One Level Workflow (One approval group for the entire questionnaire)
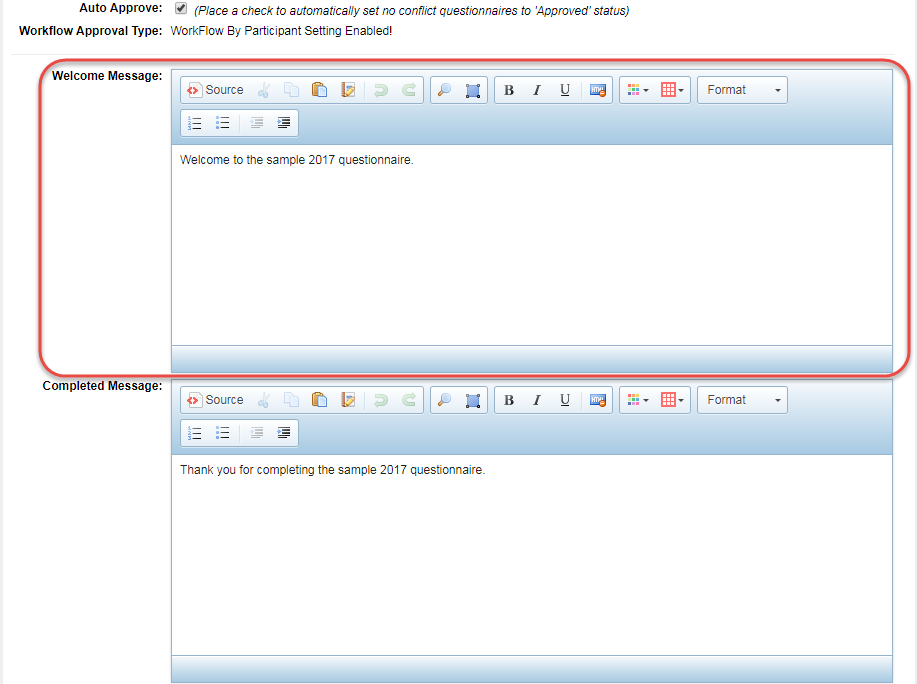
I want to edit the Welcome message
- Use the text box in the 'Welcome Message' field to make changes. You may also use the buttons in the text box to make formatting changing, such as font size, color, etc.
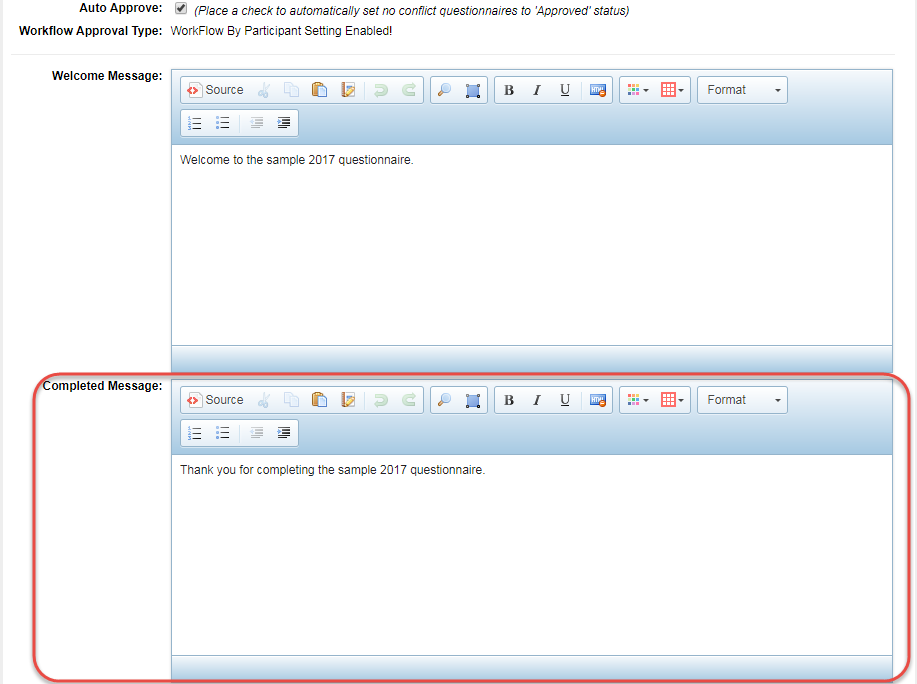
I want to edit the Completed message
- Use the text box in the 'Completed Message' field to make changes. You may also use the buttons in the text box to make formatting changing, such as font size, color, etc.
I want to edit the contents of the Definitions tab
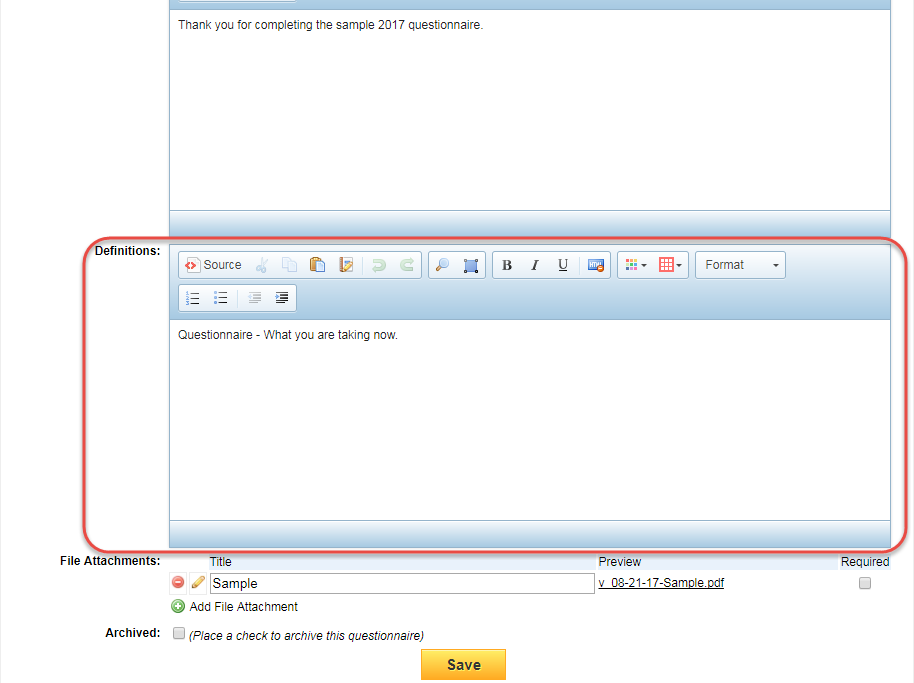
- Use the text box in the 'Definitions' field to make changes. You may also use the buttons in the text box to make formatting changing, such as font size, color, etc.
I want to attach files to the questionnaire
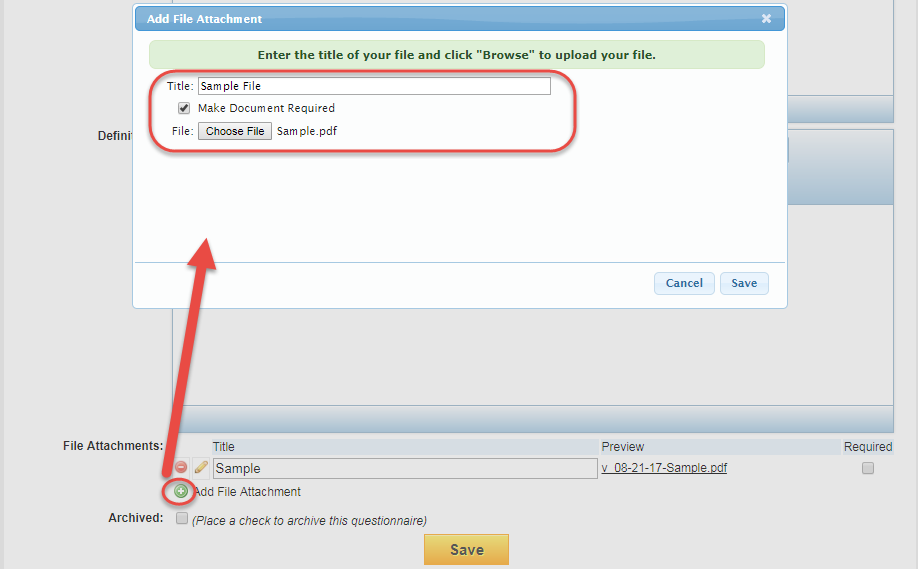
- To add a new file to the questionnaire, click the plus icon under the 'File Attachments' section, give the file a Title, and select the file from your computer (You may also make a file required to open before the participant can enter the questionnaire if this feature has been enabled in the Config Panel)
I want to archive the questionnaire
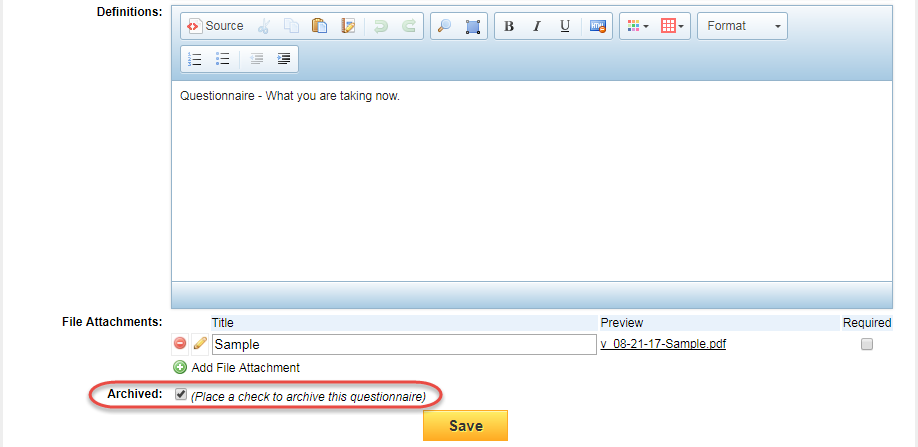
- Click the checkbox beside the 'Archived' field and save the questionnaire (Archived questionnaires may still be reviewed by using a filter on the 'Current List' page)
Related articles
-
Page:
-
Page:
-
Page:
-
Page:
-
Page:
