Test a Questionnaire
Use the recommendations on this page to test your completed questionnaire design, and to make revisions as necessary until you are ready for live participation.
Step-by-step guide
Show Me How to Create a Test Participant
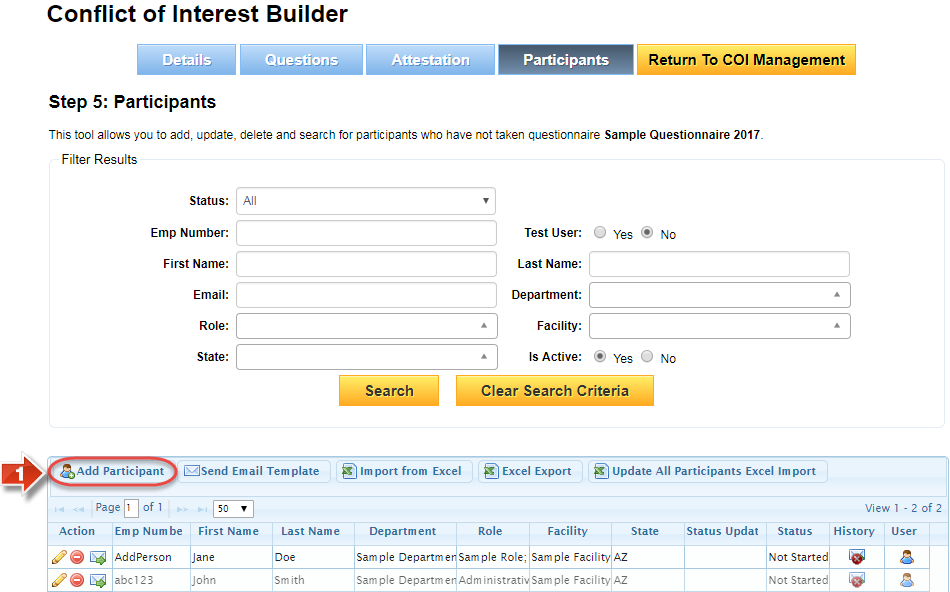
- On the 'Participants' tab of the questionnaire, click the 'Add Participant' button
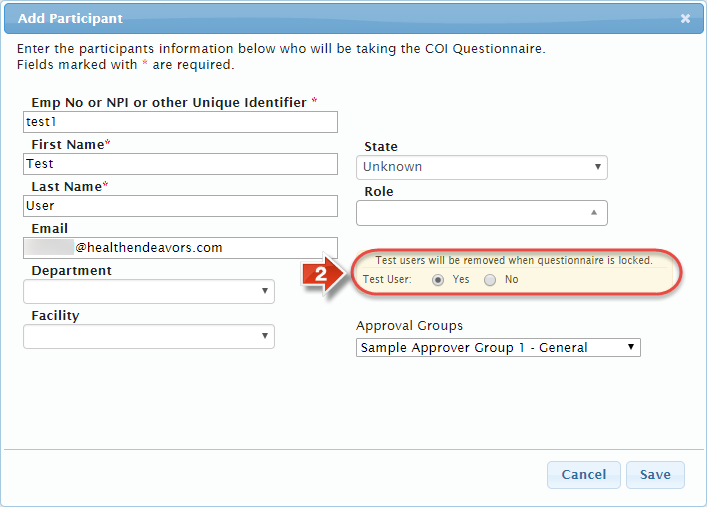
- Fill in the details of the participant's profile however you wish, as this participant will be permanently deleted when the questionnaire is locked. However, make sure to indicate 'Yes' under the 'Test User' field on the right side of the window
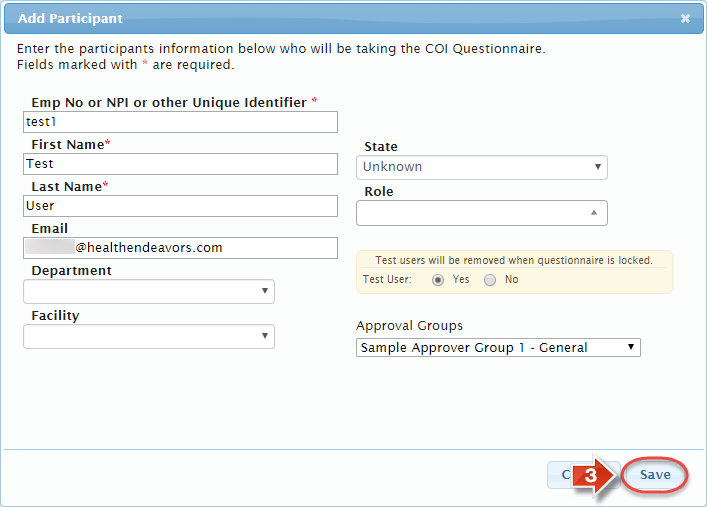
- Click the 'Save' button to create the test user
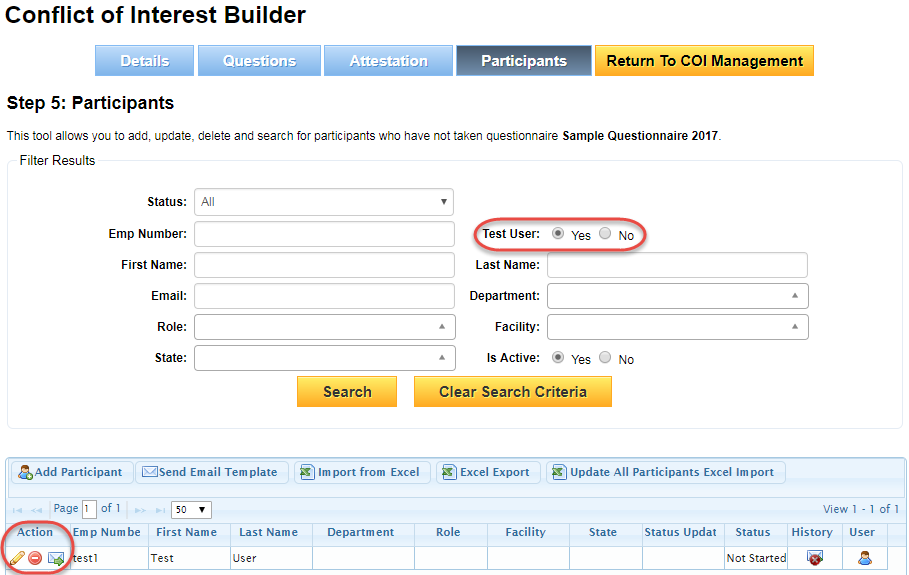
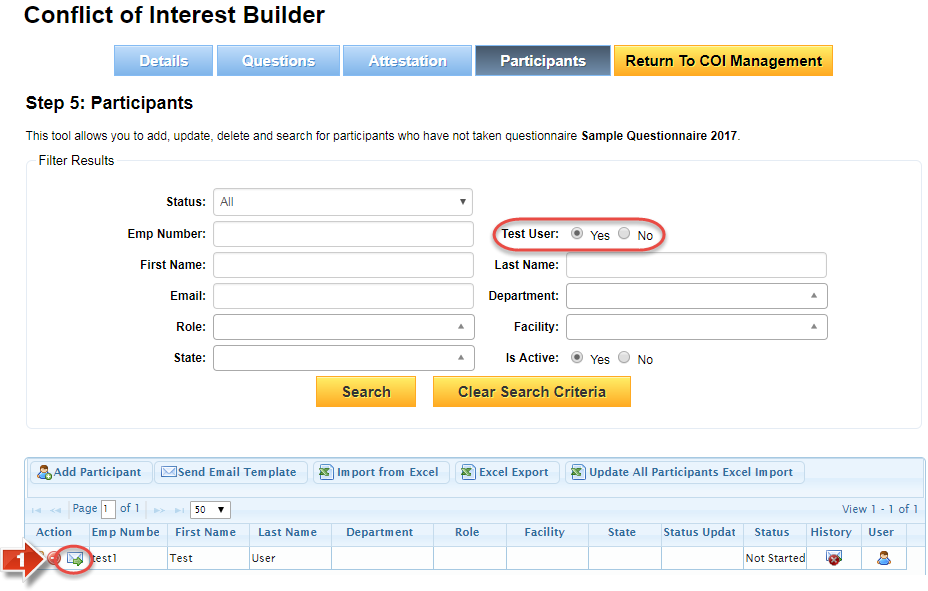
- Use the 'Test User' filter to switch over to the test participant list, where you may edit, archive, and individually Email test participants using the buttons under the 'Action' column (All changes that can be made on a regular participant may be made on a test participant, but the test participant's data and questionnaire results will be permanently wiped out after the questionnaire is locked)
Show Me How to Invite a Test Participant to the Questionnaire
- On the Participants page of the questionnaire, use the 'Test User' filter to change to the test participant table, then click the envelope icon under the 'Action' column for the test participant's row
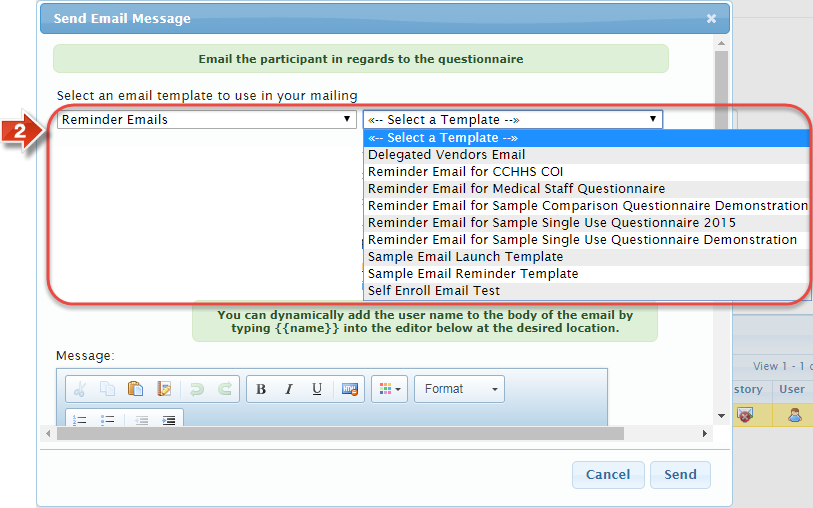
- Select the template category (General Purpose/Reminder Emails) and the Template using the dropdown menus at the top of the Email Message window
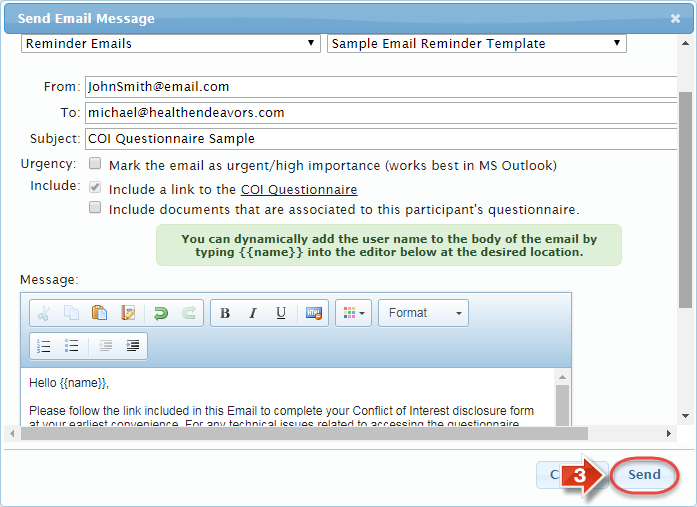
- The rest of the fields will populate with Email Template information, and should require little change for a test run. However, you may make changes in any of these fields before sending out the test Email. Once the reminder is ready, click the 'Send' button
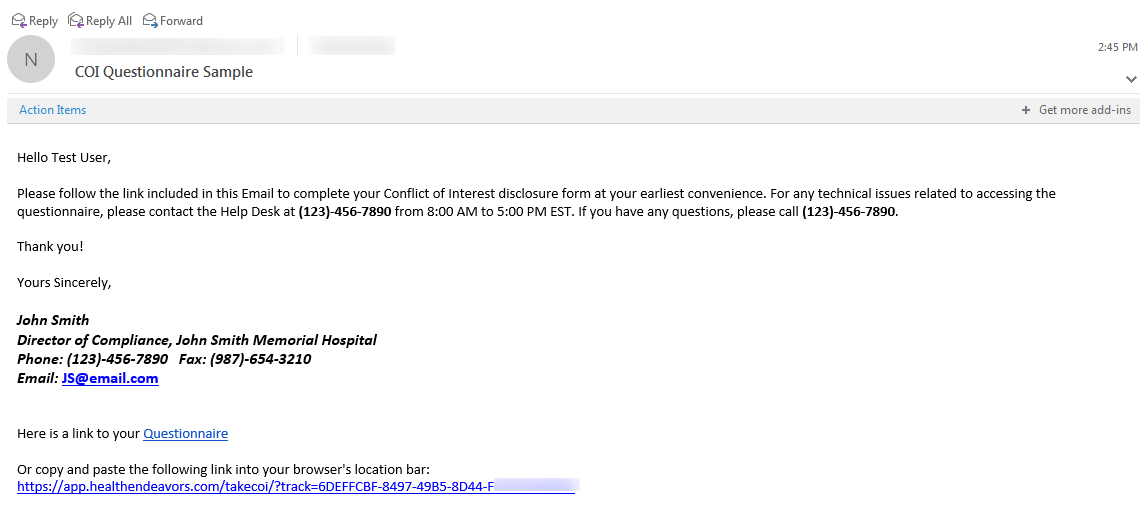
- The Email will be sent to the indicated Email address, with links to take the questionnaire
Show Me How to Take a Questionnaire as a Test Participant
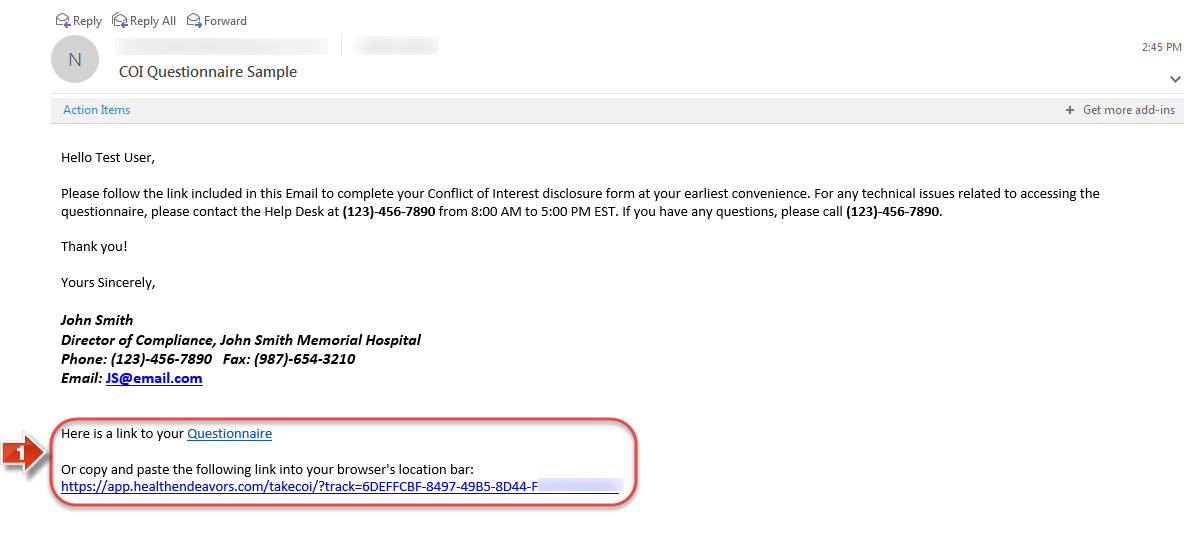
- Using the Email from the previous set of steps, click the link (Or copy and paste the URL into your address bar) to access the questionnaire
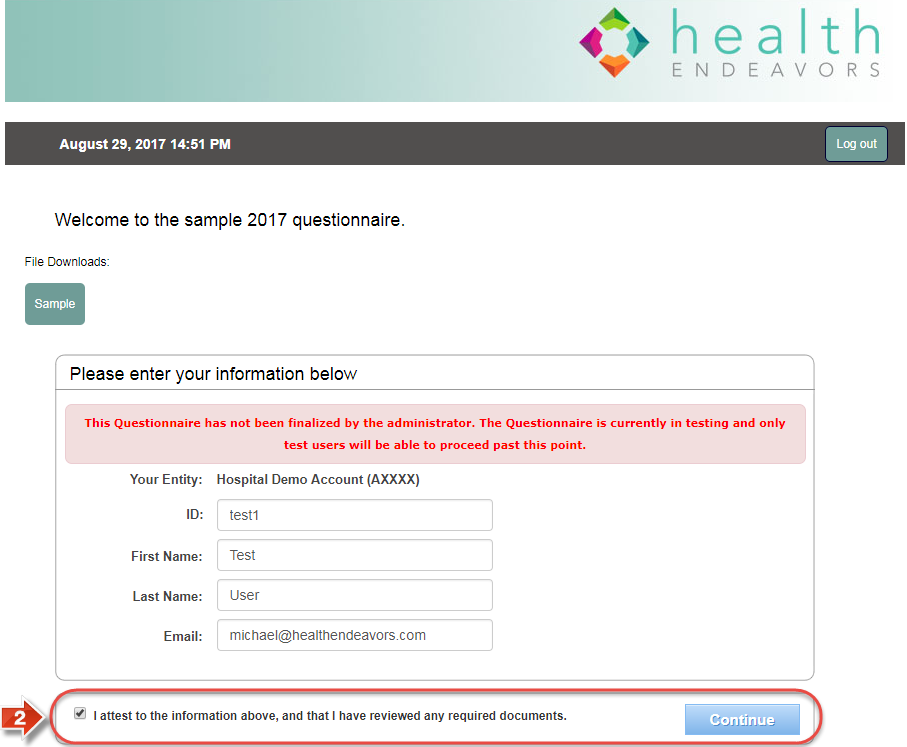
- Upon entering the questionnaire page, all participant profile data will automatically be entered into the system. The only necessary steps to move forward into the questionnaire itself are to click the checkbox to confirm the details are correct, then to click the 'Continue' button (The message in red is for regular participants who see the questionnaire while it is unlocked; test participants may enter the questionnaire regardless of this message appearing)
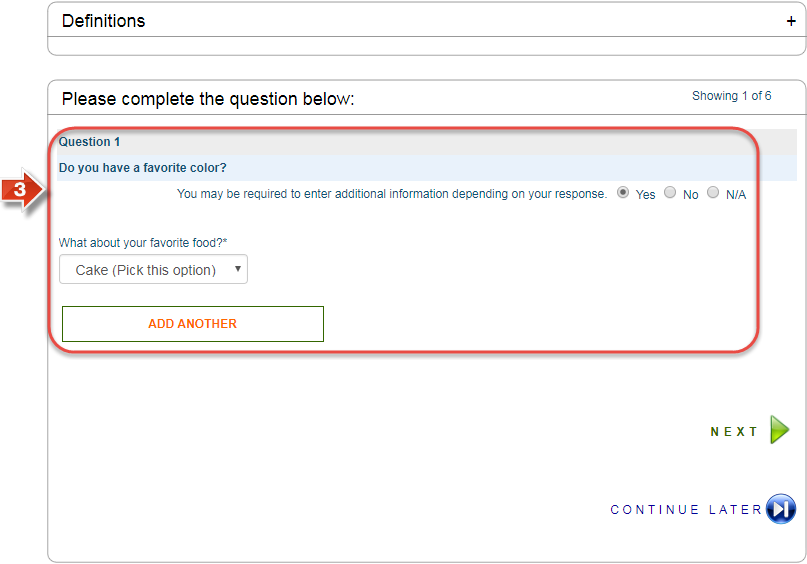
- As you go through the questionnaire, be sure to test each question carefully. If your question has multiple responses, test each response in turn to make sure that it flows properly. If you're using skip logic, make sure that it works the way you expect it to, Go through each question in the questionnaire like this, moving on from one to the next in turn
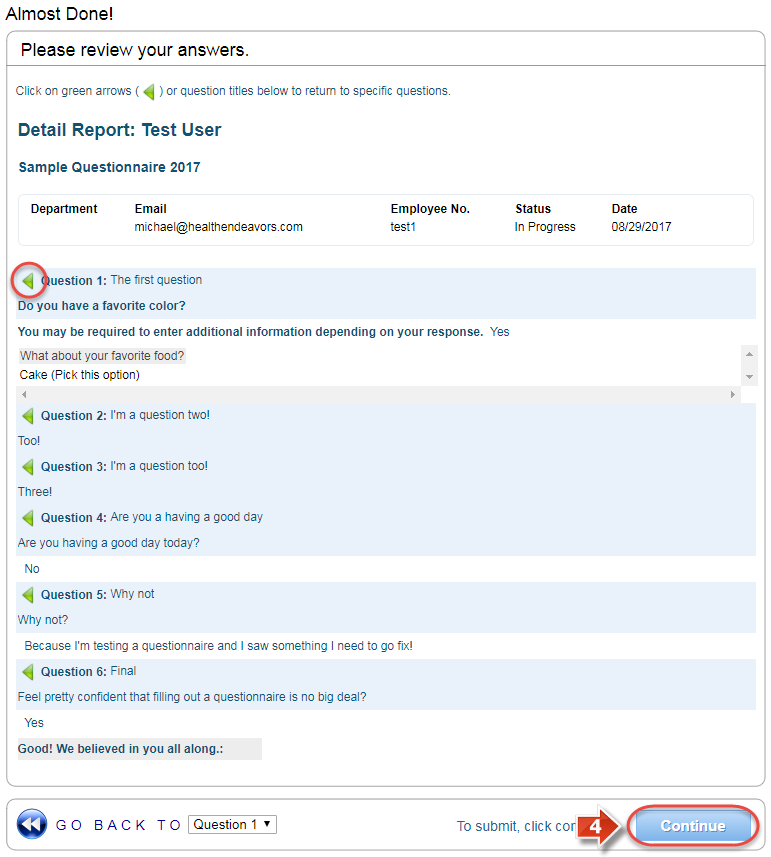
- Once you get to the review page, click the 'Continue' button to test the attestation(s) you created for the questionnaire (You can also click the green arrows beside each question if you would like to go back and re-test one of the questions)
- The attestation page is the final page before the questionnaire is submitted for review. If you would like to test your auto approval logic for accuracy, feel free to submit now; you can retake the questionnaire with the test participant as many times as needed. If, however, you would like to make changes to the questionnaire, it may be best to go back to the questionnaire instead and revise as needed
Show Me How to Test a Report on a Test Participant
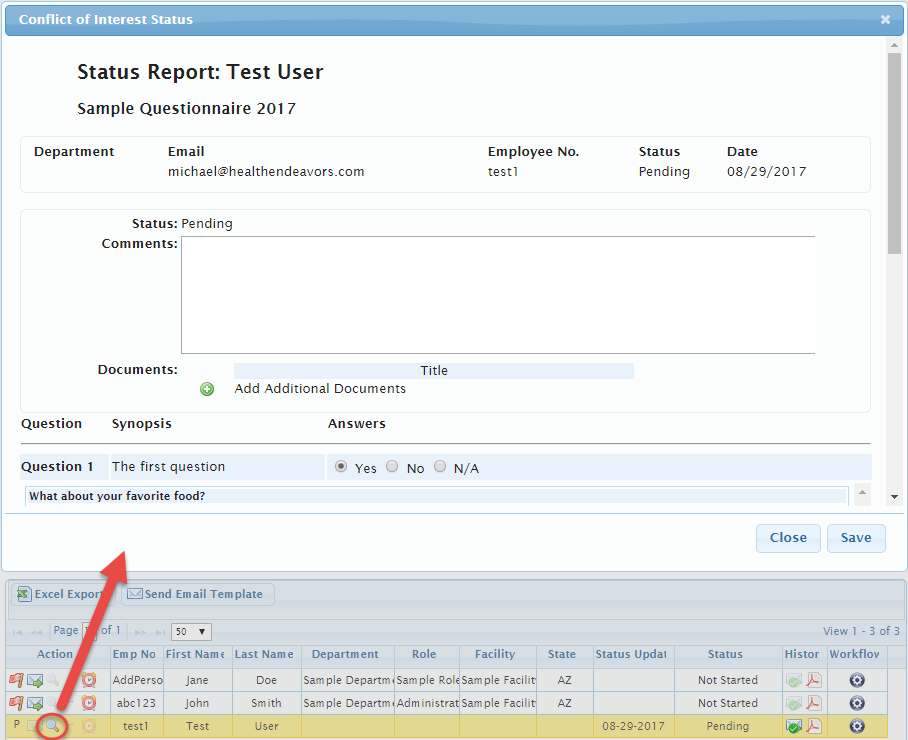
- Go to the 'Status Report' tab and run the report. Look for your test participant(s) and check their information to ensure you are getting everything you need out of the current questionnaire (In particular, we recommend using the magnifying glass for detailed information about a participant)
Magnifying glass?
The magnifying glass icon opens the status window, where you can view detailed information about a participant and their questionnaire submission. Does the status window tell you everything you might need to know about an actual participant based on what you are seeing with the test participant? If not, it may be a good idea to revise the questionnaire so that it is capturing the correct information about the participant.
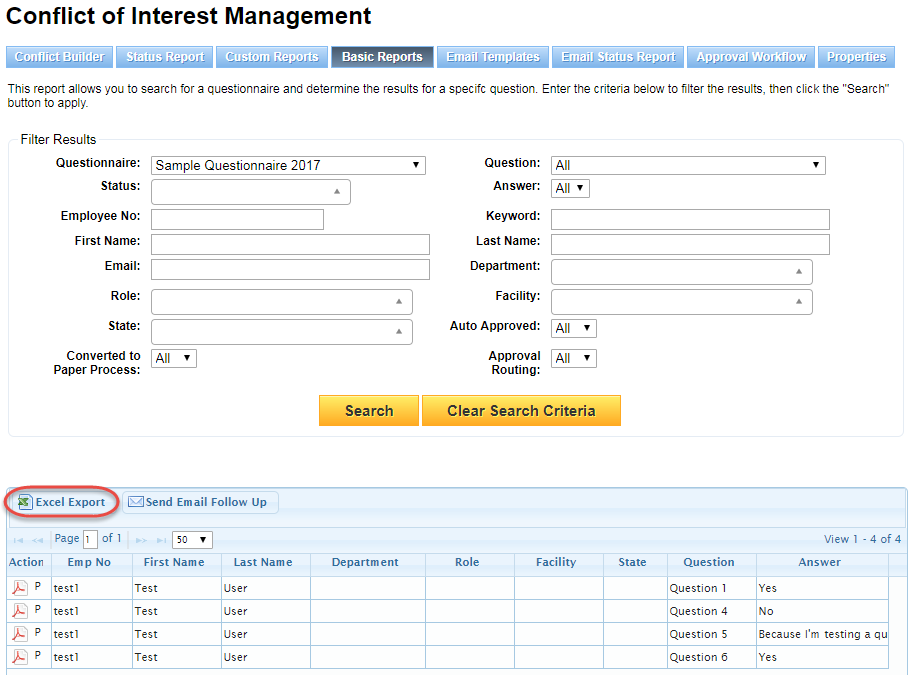
- Go to the 'Basic Report' and run the report. Look for your test participant(s) and check the response data to ensure you are getting all the necessary information about disclosures (Make sure to test the Excel Export if you want to have this information in a portable spreadsheet file)
Basic Report?
The Basic Report captures information about a participant's answers, and is particularly useful for breaking down data based on specific questions and responses.
Excel Export?
The Excel Export option seen on each of the report pages takes all of the information on the current report and places it in a portable Excel spreadsheet file. If you need to review this information over a long period of time or want to filter based on Excel functions, it's very handy to make sure you can understand the data you are seeing in this file as well as the report page itself.

Show Me How to Run a Test Custom Report
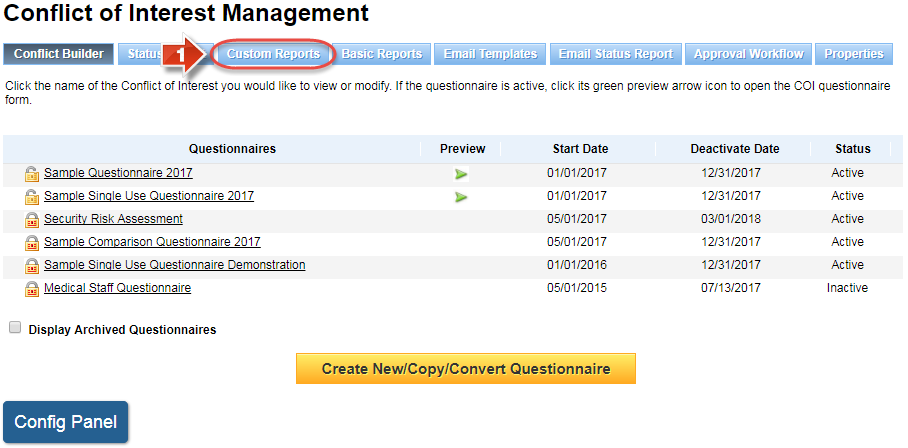
- Click the 'Custom Reports' tab
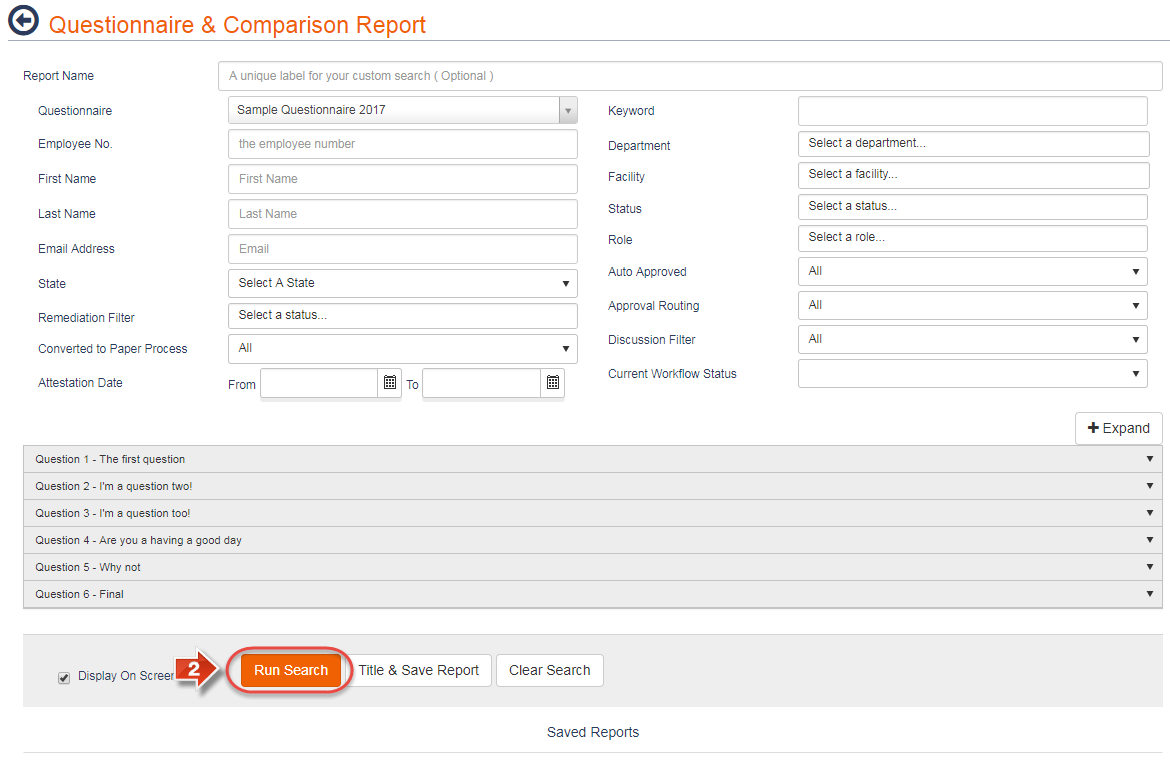
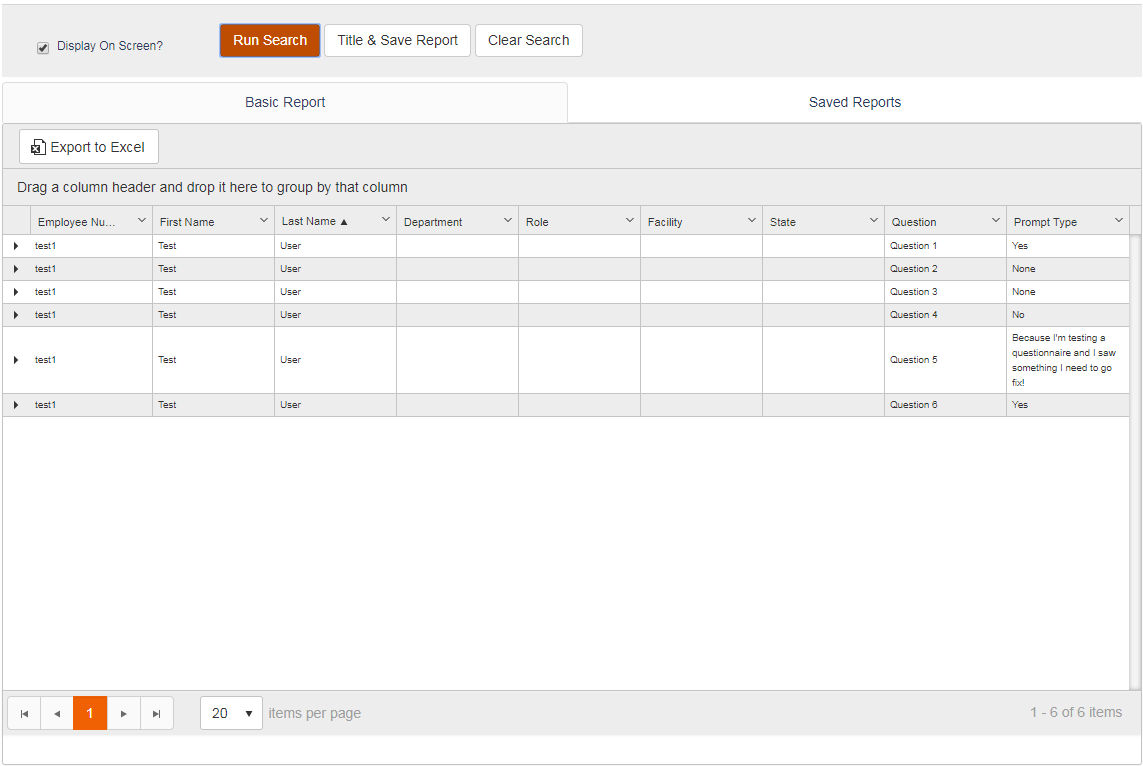
- Click the 'Run Search' button to run the custom report
- Since the custom report combines much of the data and functionality seen in the status report and the basic report, you should be able to get a comprehensive idea of how well the questionnaire flows. Still, it's handy to get a feel for the other two reports for their specialized information. In particular, the custom report should be used to test filtering by individual question, as this is a particularly handy feature.
Combination?
Take a look at the example below. Do you notice elements of the status report and basic report tables here? The custom reports are designed to centralize data found in both of these reports and give you a faster option for getting more information out of a participant's profile and their questionnaire submission. One thing to note: You may see some data missing from a test participant's report data, since test participant attestations are not saved in the system due to these profiles being removed when the questionnaire is locked.
Filtering by question?
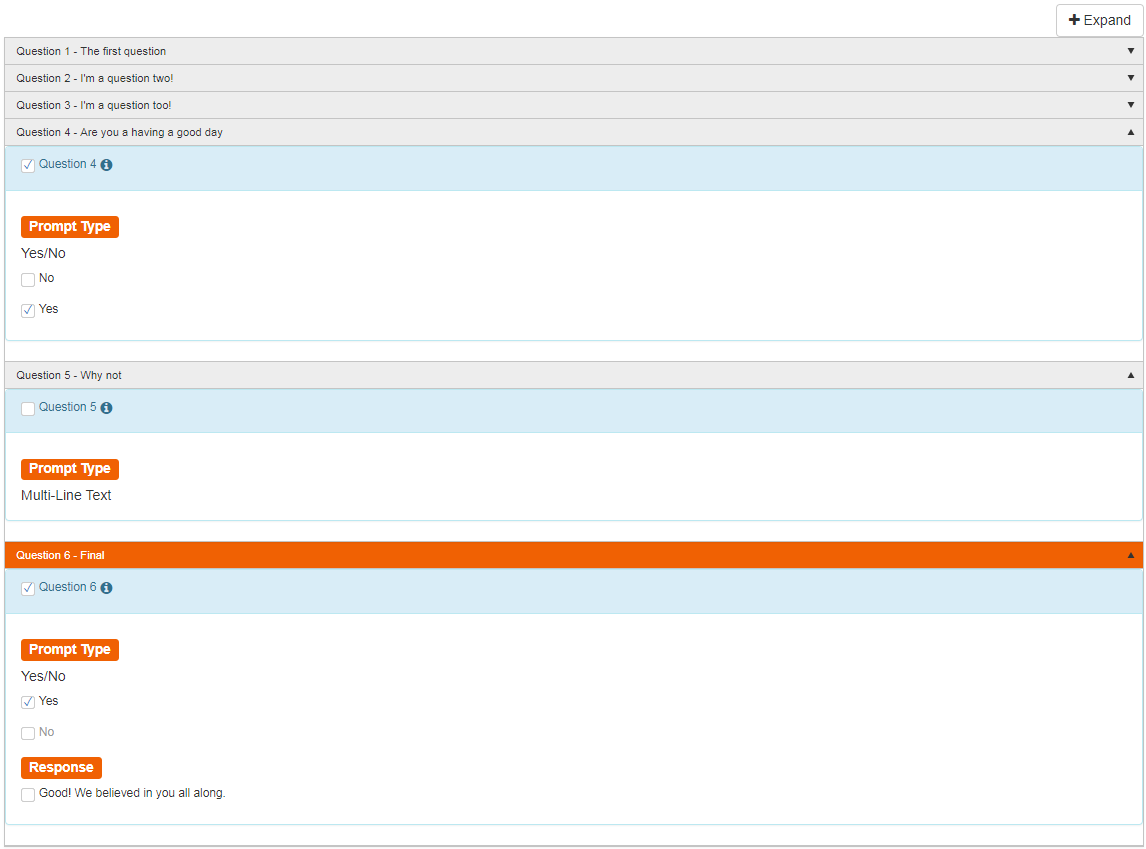
The basic report can filter by question and response, but this is limited to one question and one response only per search. The custom report, on the other hand, can search by multiple questions and responses at the same time. Very handy if you want to find only participants who answered Yes to a question, for example!
Related articles
-
Page:
-
Page:
-
Page:
-
Page:
-
Page:
