Create Questions
Use the steps outlined in this article to create a new question, edit an existing question, or configure additional response fields for questions.
Step-by-step guide
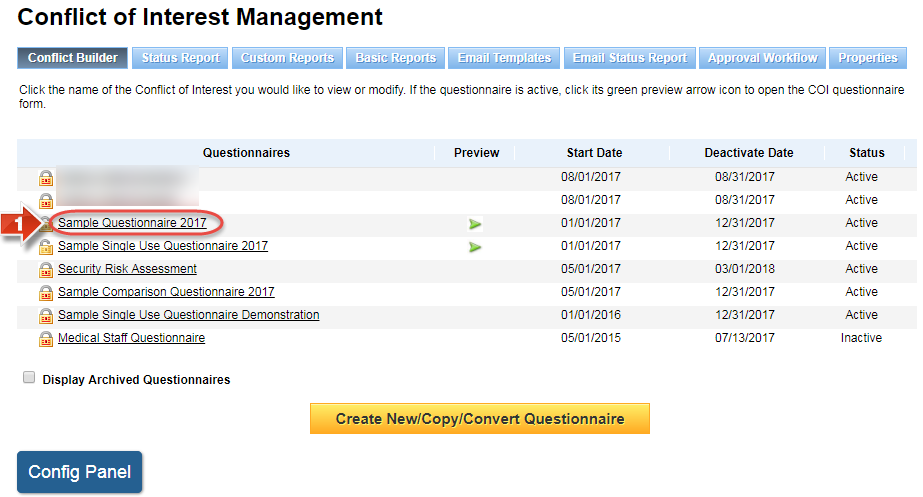
- Click the title of the questionnaire
- Show Me
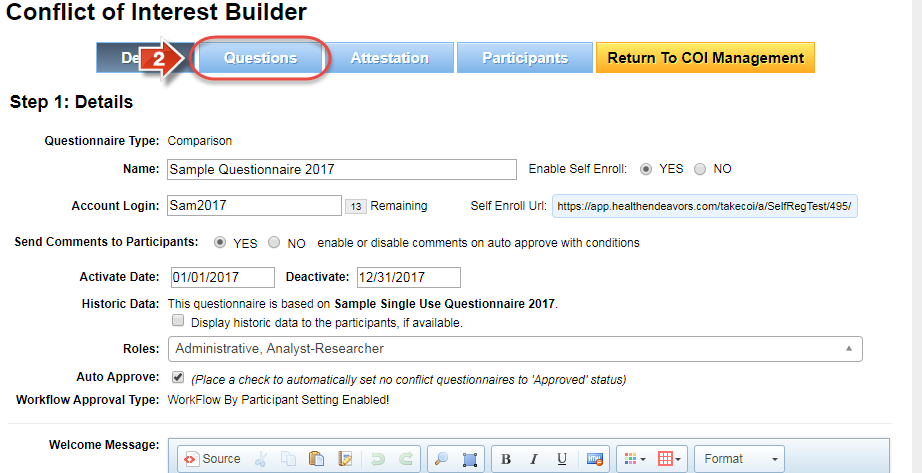
- Click the 'Questions' tab
- Show Me
- Click the 'Add Question' button
- Show Me

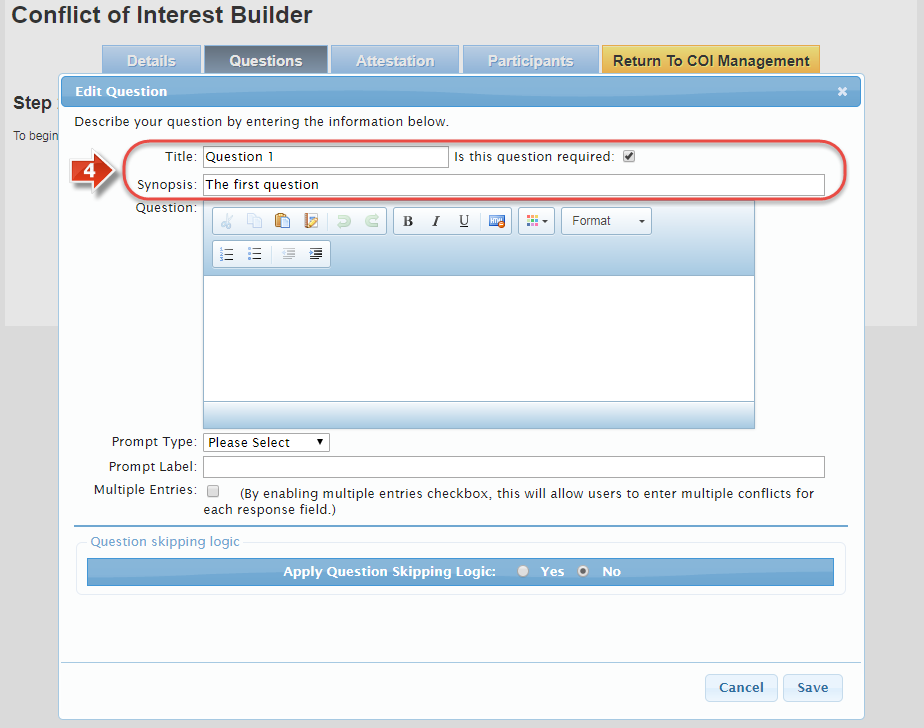
- Enter the 'Title' of the question, as well as a brief 'Synopsis' describing the question, and indicate with the checkbox whether or not the question is 'Required' to proceed through the questionnaire (Questions are set to required by default)
- Show Me
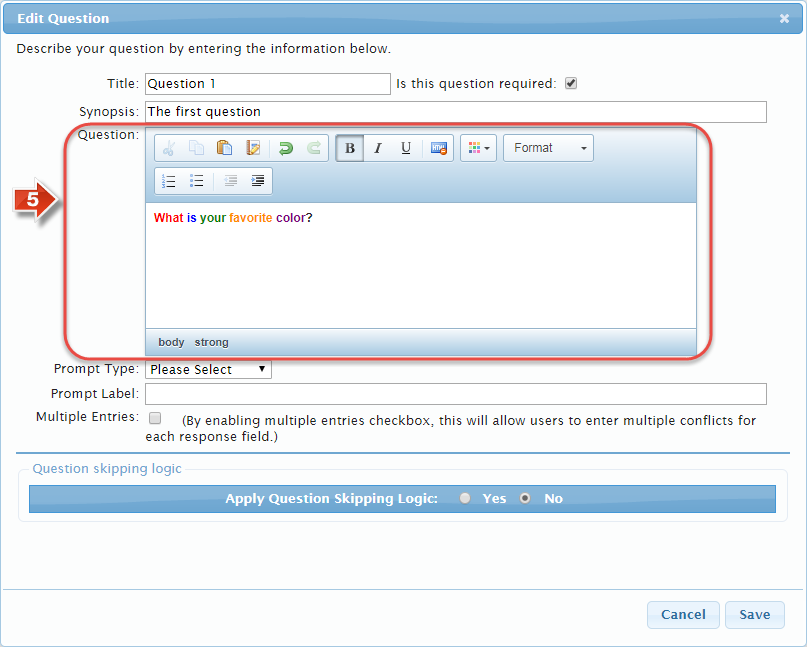
- Enter the question itself in the 'Question' text field (You may also use the buttons in the text box to make formatting changing, such as font size, color, etc.)
- Show Me
- Select the format of the answer to this question by choosing an option from the 'Prompt Type' dropdown menu
- Show Me
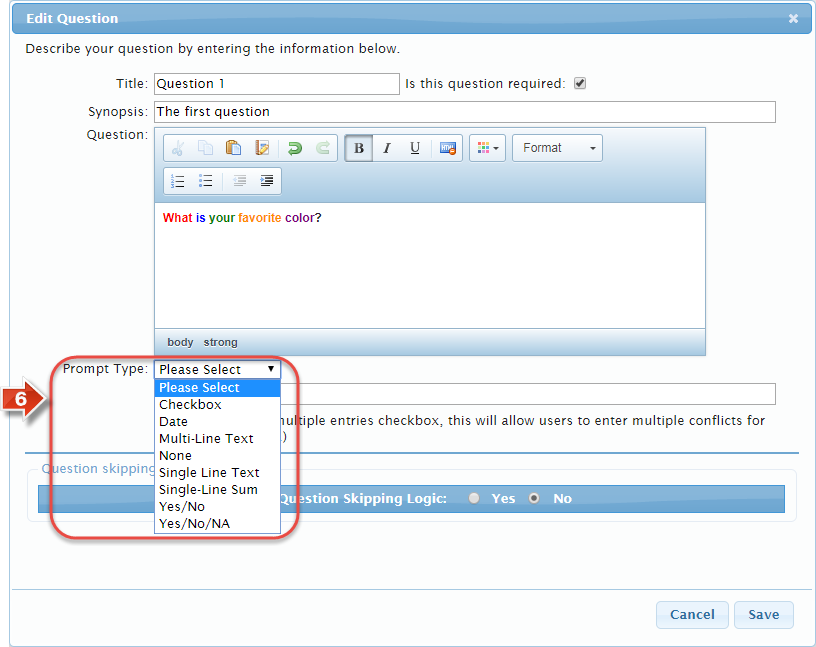
- Tell me more about these prompt types!
Checkbox - The participant has the option to fill a checkbox as a response (Auto Approval Logic may be configured)
Date - The participant may select a specific date from a calendar pop-up
Multi-Line Text - The participant may enter free-form text to answer (Limit of 250 characters)
None - The participant may not directly answer this question
Single Line Text - The participant may enter free-form text to answer (Limit of 50 characters)
Single-Line Sum - The participant may enter a numerical value to answer (Can be configured to check against another value, such as not allowing any number greater than 99 to be entered)
Yes/No - The participant may select from one of two radio buttons (Auto Approval Logic may be configured)
Yes/No/NA - The participant may select from one of three radio buttons (Auto Approval Logic may be configured)
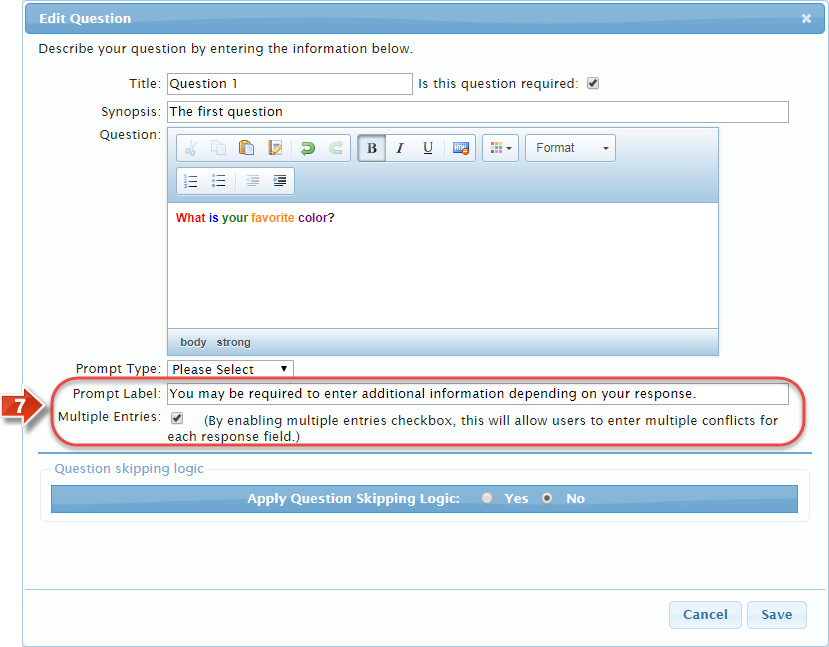
- Enter any supporting instructions under the 'Prompt Label' and use the 'Multiple Entries' checkbox to indicate if the participant can add more than one response to a question
- Show Me
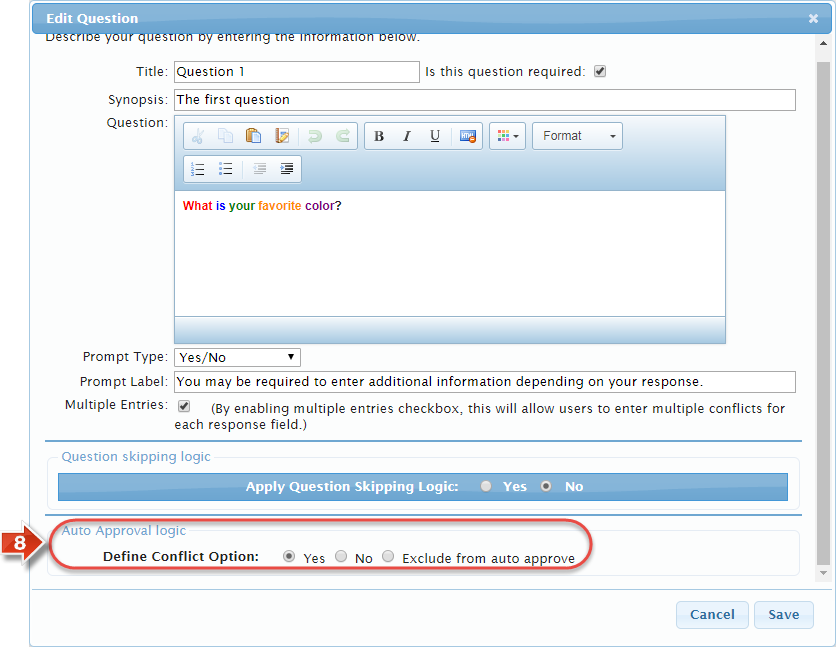
- If you are using auto approval, configure the 'Auto Approval Logic' for eligible response types by picking the response that will cause the participant to not be approved automatically
- Show Me
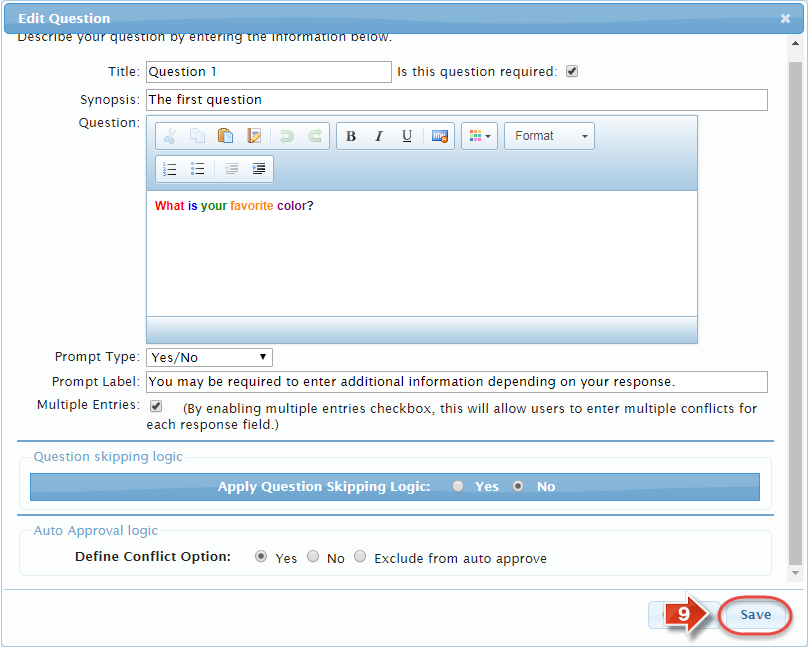
- Click the 'Save' button to create the question
- Show Me
- After you have created a question, you may go back and edit or delete the question at any time while the questionnaire is unlocked.
- Show Me
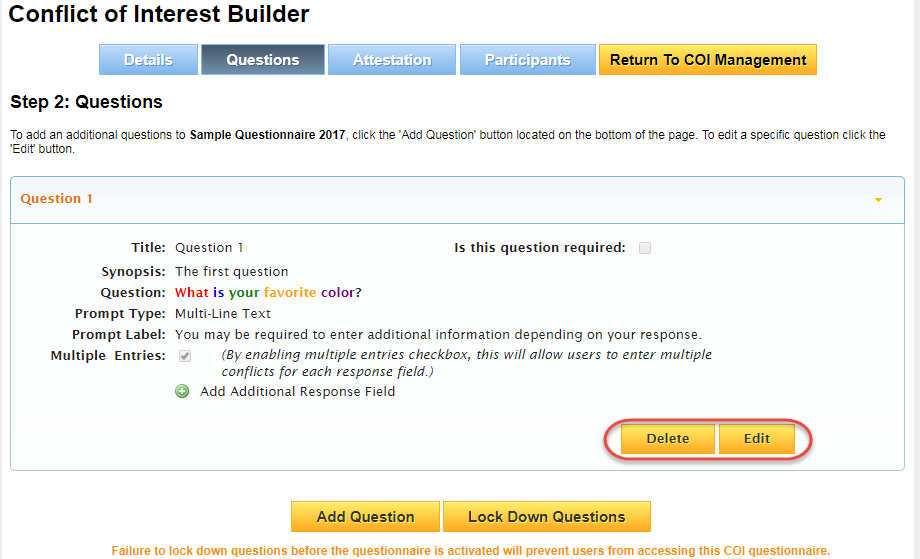
- Under an existing question, click the 'Add Additional Response Field' button
- Show Me
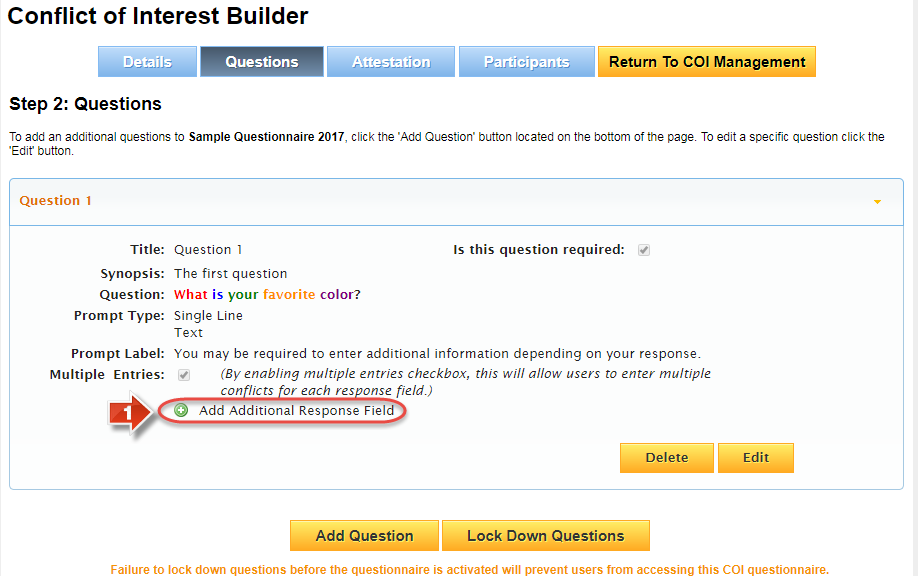
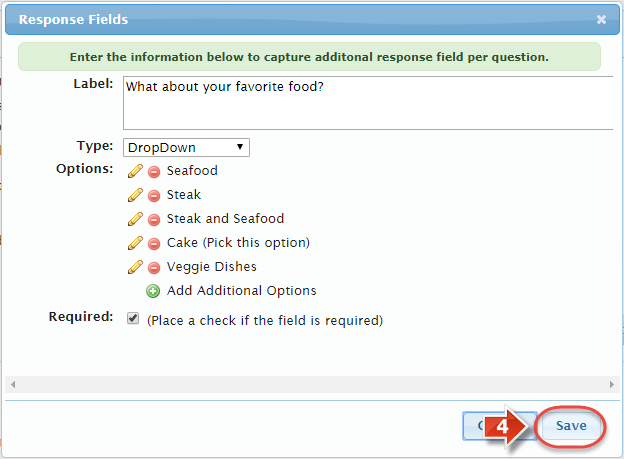
- Fill in the 'Label' with the additional clarification you are asking, and use the checkbox to indicate whether or not the field is 'Required' to move forward in the questionnaire
- Show Me
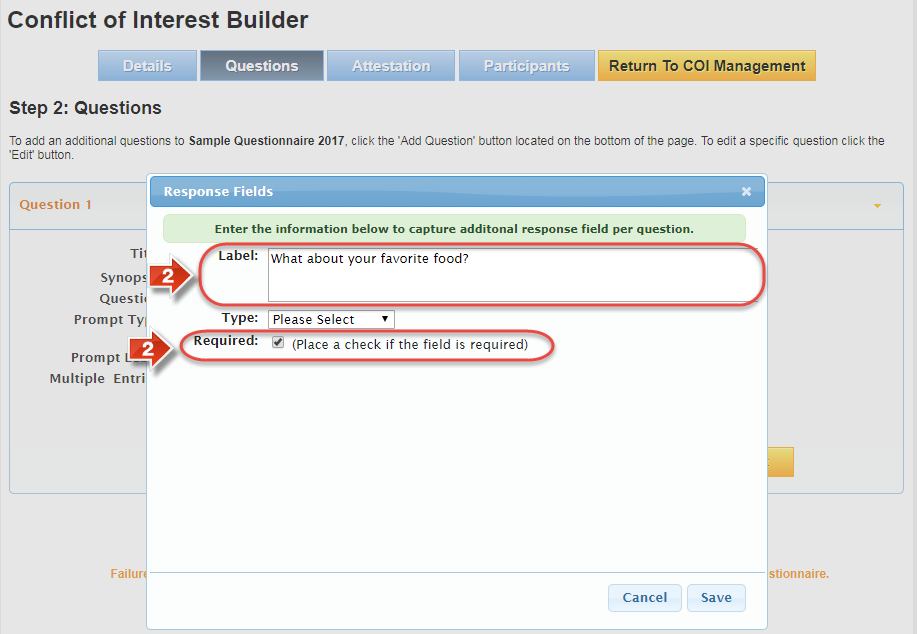
- Select a response 'Type' for this field (The options available are the same, with the addition of 'Dropdown' for creating a dropdown selection menu)
- Show Me
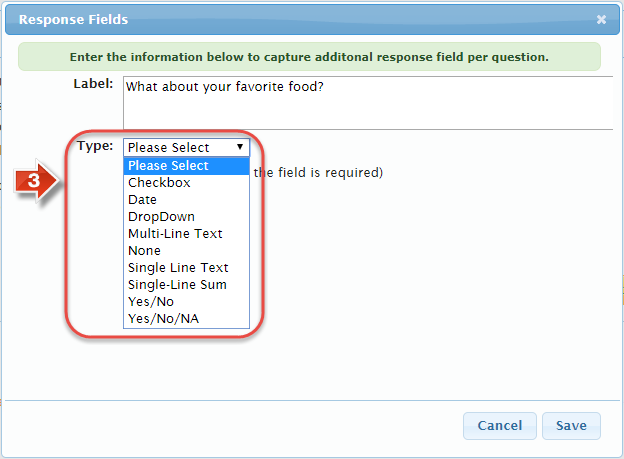
- Click the 'Save' button to create the additional response field
- Show Me
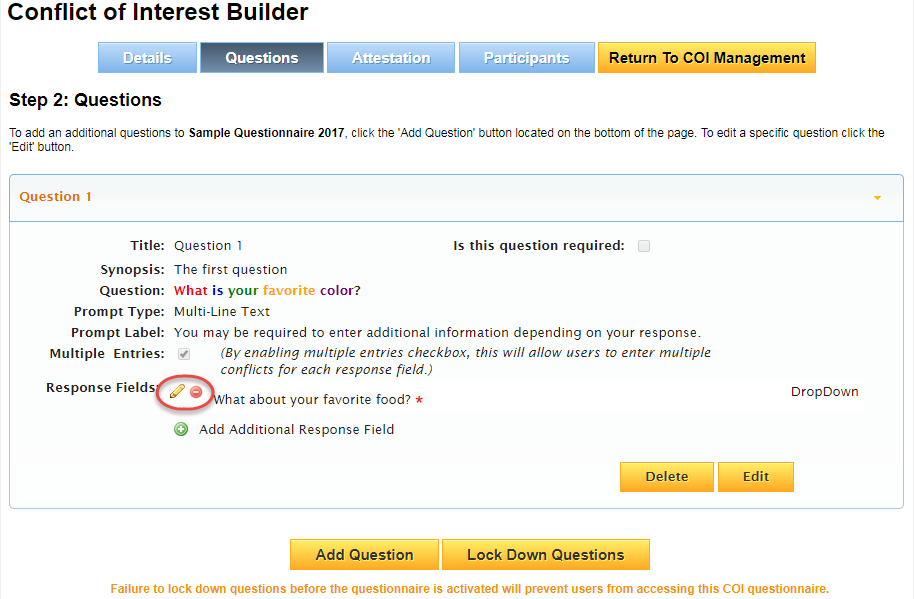
- After you have created an additional response field, you may go back and edit or delete the question at any time while the questionnaire is unlocked.
- Show Me
- Click on the question you wish to move, and drag the window to the desired place in the questionnaire
- Show Me
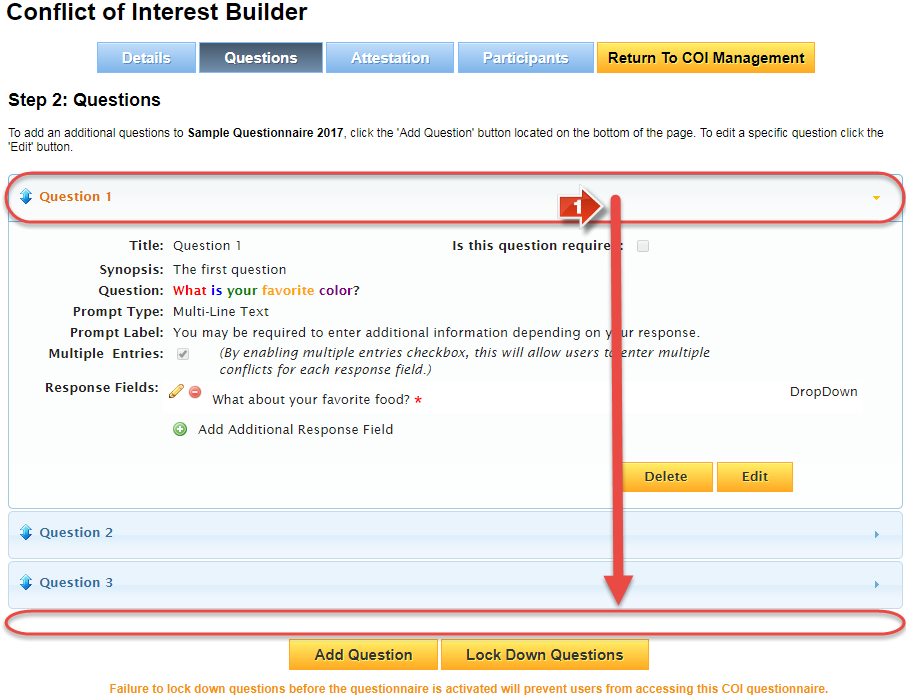
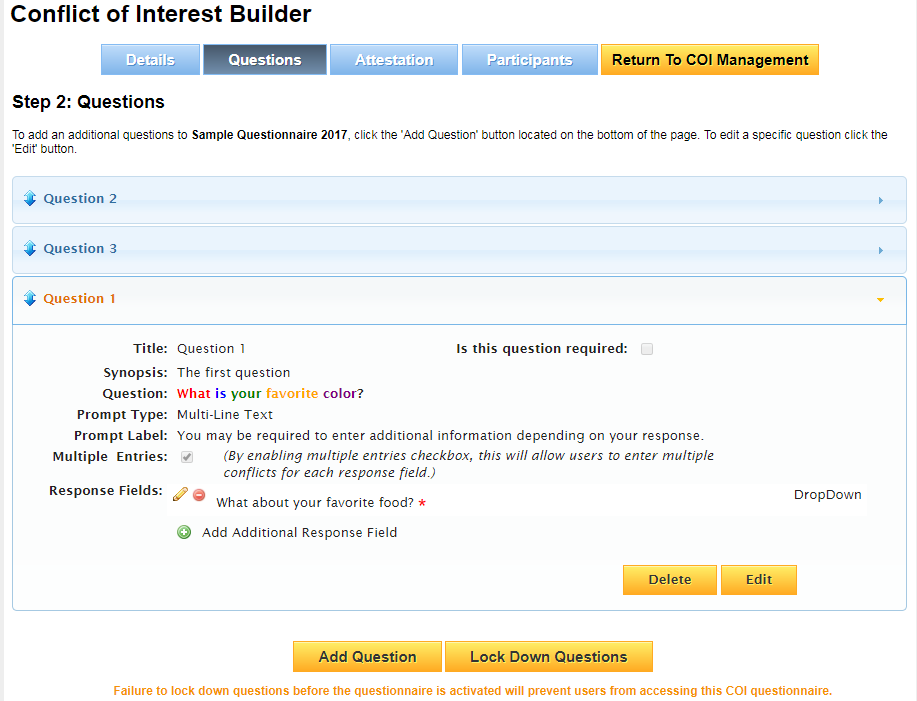
- Let go of the question, and it will be moved to its new place in the questionnaire (If you use Skip Logic, you will need to turn it off before rearranging questions, then reactivate it)
- Show Me
Want to learn more about response types? Read on!
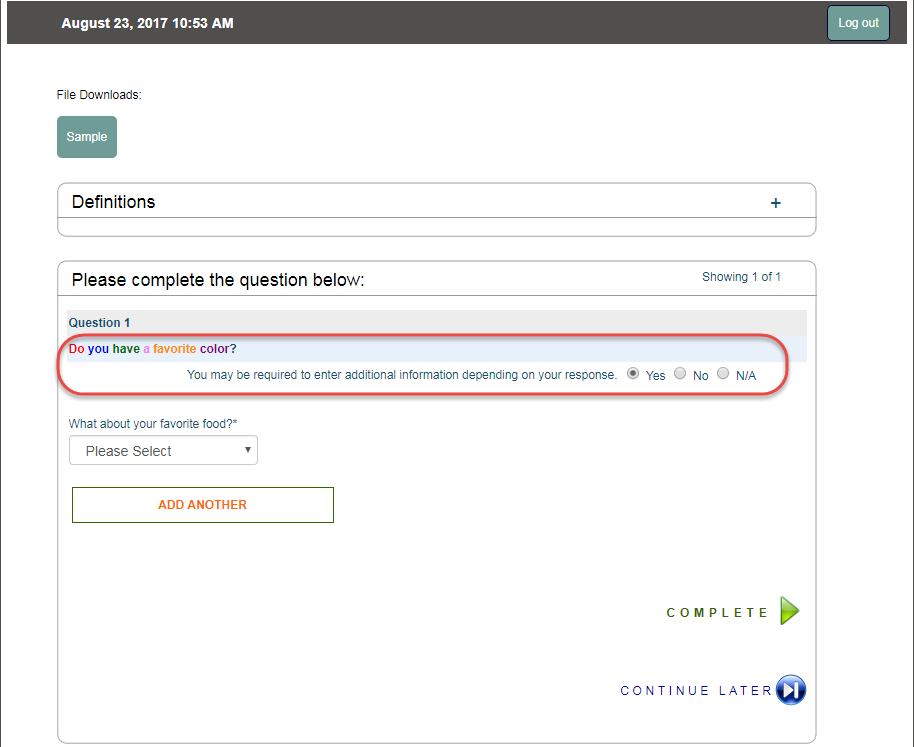
These are very popular response types. The participant may choose from radio buttons, two if using Yes/No, three if using Yes/No/NA. These response types are very easy to set up and report on.
If you're using auto approve logic, and your question uses Yes/No or Yes/No/NA for a response type, you can map one or more responses to the logic. If a participant chooses one of the mapped responses, they will be taken out of automatic approval and go into Pending status instead once their questionnaire is submitted for review. You can also specifically exclude a question that uses one of these response types from auto approve logic. If you choose to do so, the participant's auto approval will not be affected one way or the other by this question.
One more thing: If your question uses one of these response types and has additional response fields, the fields will only appear if a participant answers Yes to the main question. If they answer No or NA then the additional response fields are suppressed.
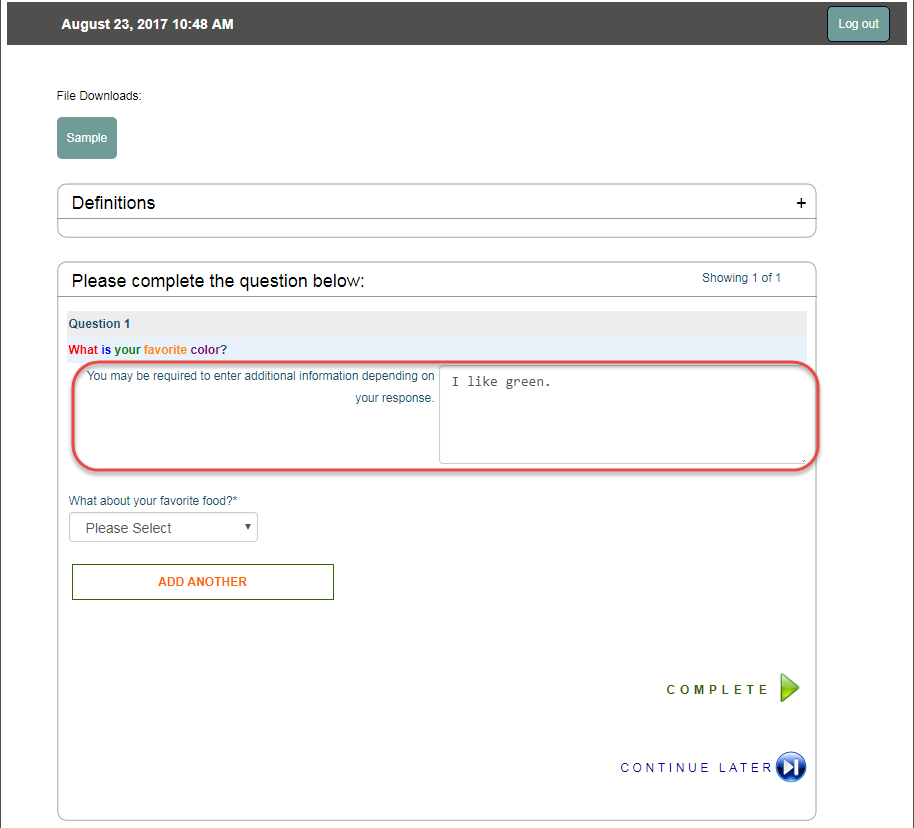
These free-form text responses are very useful when you can't readily define how the participant will answer your question or response field. Single Line allows up to 50 characters, while Mutli Line allows up to 250 - A brief sentence versus a paragraph.
If you're using auto approve logic, and your question uses Single Line or Multi Line Text for a response type, the participant's auto approval will not be affected one way or the other by this question, as it cannot be mapped in auto approval logic.
Okay:
Easy, right?
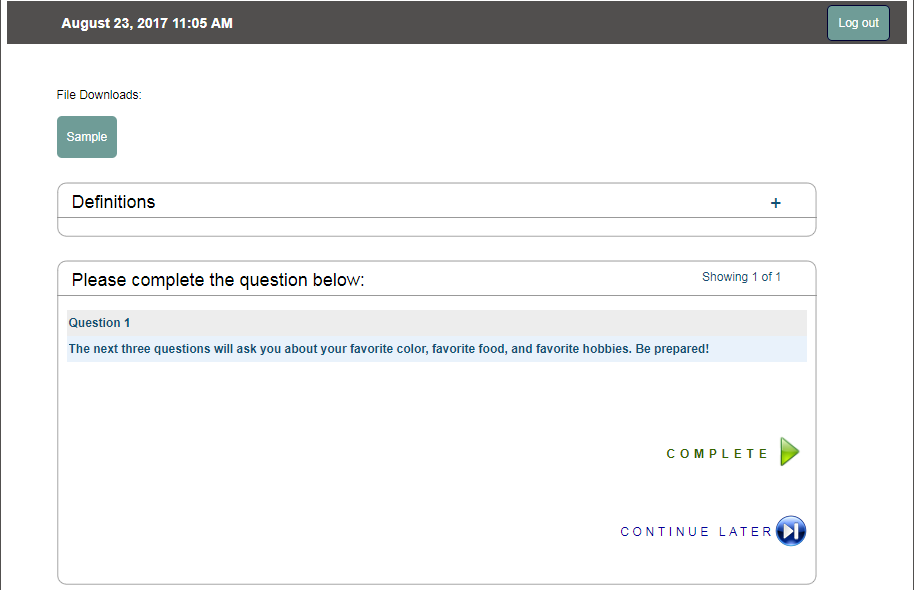
Anyway: The None response type does not present a way for a participant to answer the question or field for which it is used. Naturally, auto approve logic can't do anything one way or the other with this response type either. So what's it for? Typically, you'll want to use None if your question does not require a response (For example, if you are instructing a participant on how to answer upcoming questions, you could create a "Question" that uses this response type with guidelines or instructions). You can also use the None prompt type if your question is multi-segmented and relies on answering additional response fields (For example, if you want to know the participant's job position, time with the company, and supervisor, you could set up a question with a None response and instead create three additional response fields asking for this information).
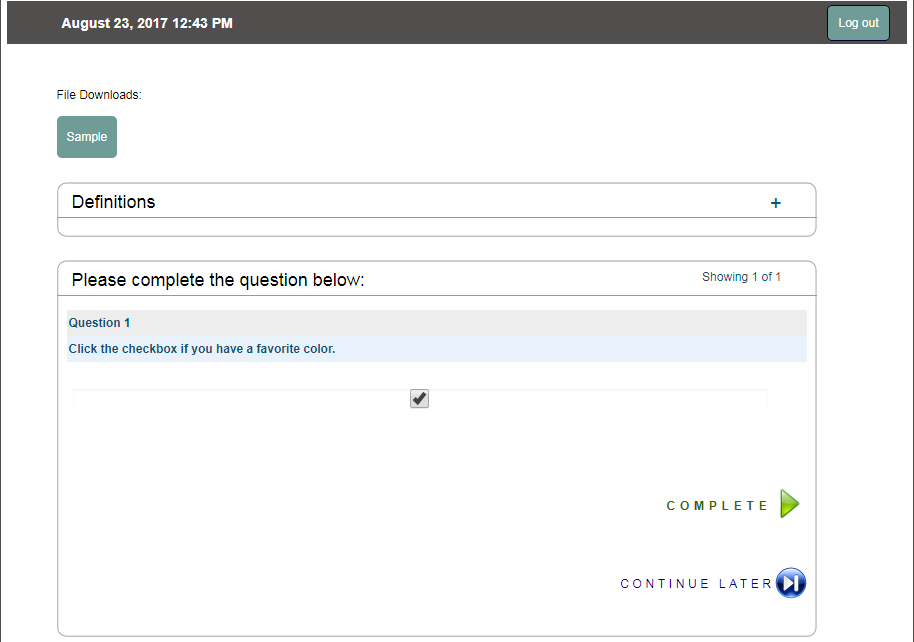
The Checkbox response type presents a clickable checkbox, which may be checked or left unchecked. If you decide to use this for a question or an additional response field, it's a good idea to make sure the question or field is not marked as 'Required' unless you want all participants to click the checkbox before continuing forward.
If you're using auto approve logic, and your question uses the Checkbox response type, you can map out the auto approval logic to either checked or unchecked. If a participant chooses one of the mapped responses, they will be taken out of automatic approval and go into Pending status instead once their questionnaire is submitted for review. You can also specifically exclude a question that uses this response type from auto approve logic. If you choose to do so, the participant's auto approval will not be affected one way or the other by this question.
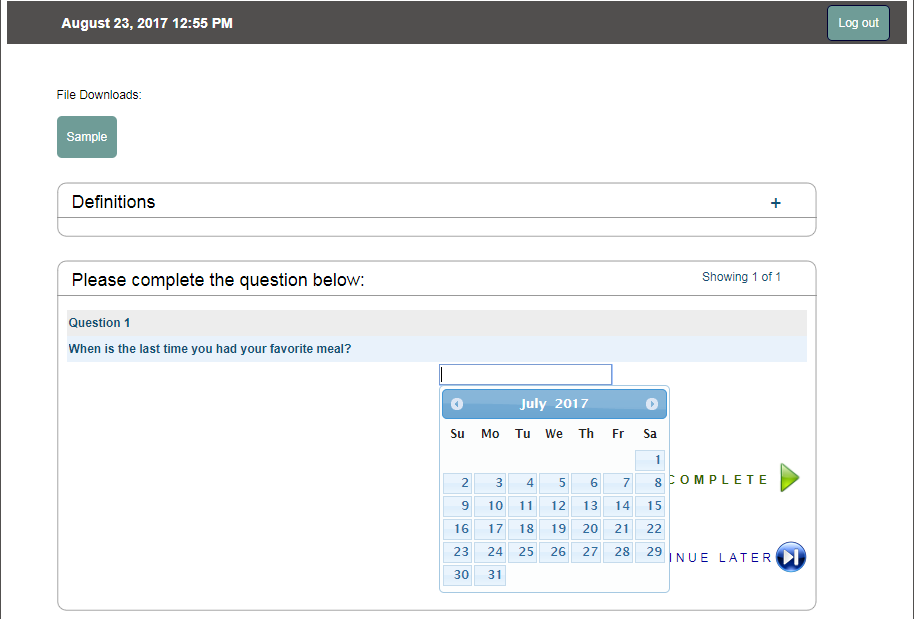
The Date response type pops up a calendar from which a participant may select a specific date. Pretty straightforward, and tends to be more useful as part of a set of additional response fields.
If you're using auto approve logic, and your question uses Date for a response type, the participant's auto approval will not be affected one way or the other by this question, as it cannot be mapped in auto approval logic.
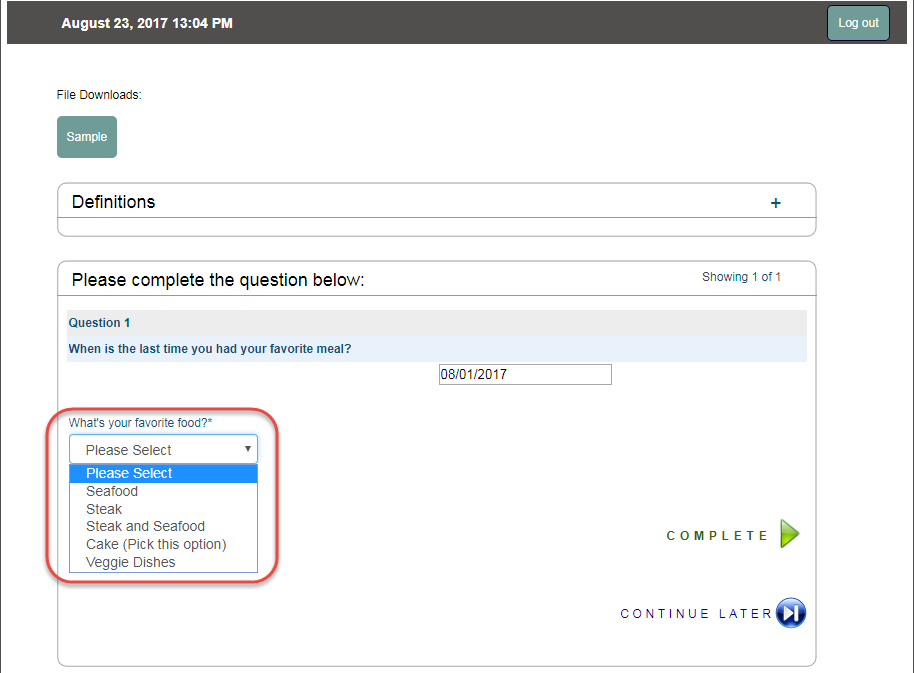
The Dropdown response type creates a customizable selection menu from which a participant may choose one option. Very useful for a limited selection of multiple choice responses, particularly if you need something besides Yes and No.
If you're using auto approve logic, and your question uses Dropdown for a response type, the participant's auto approval will not be affected one way or the other by this question, as it cannot be mapped in auto approval logic.
Dropdown response types may only be selected for an additional response field.
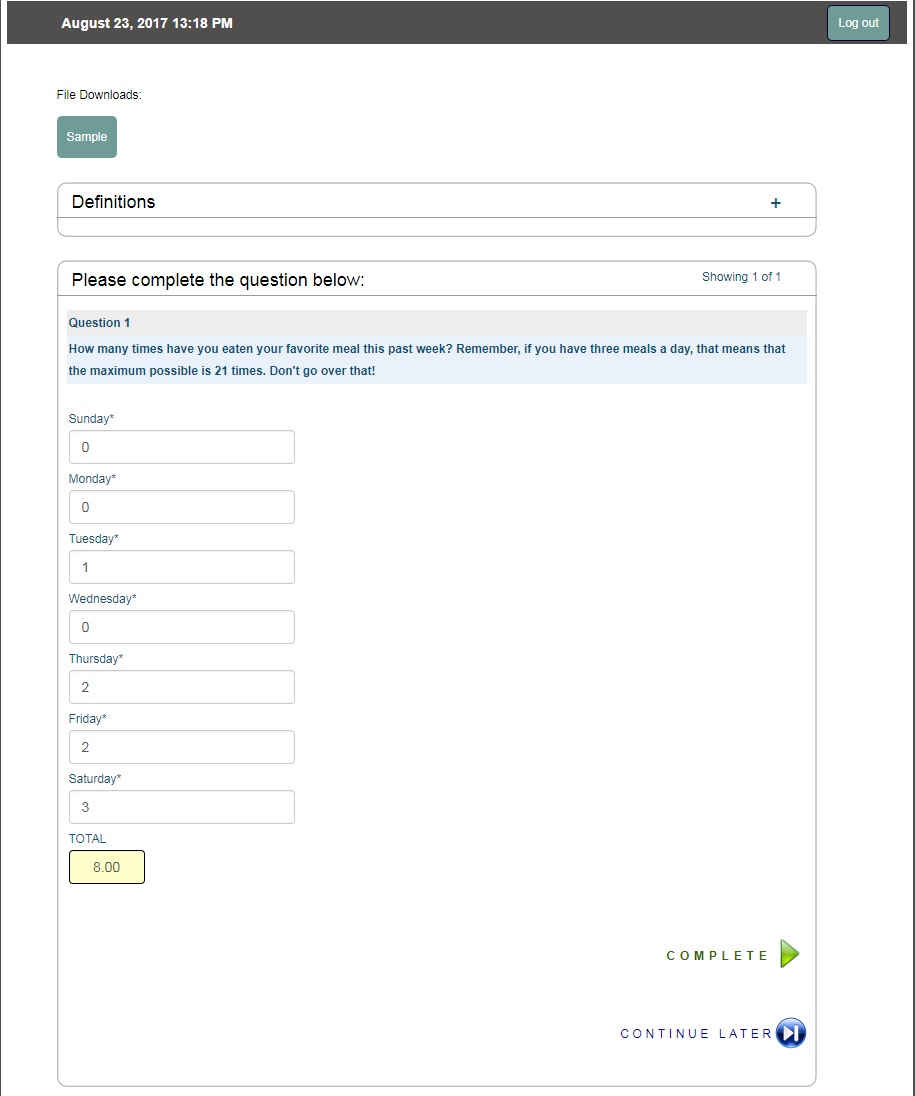
The Single-Line Sum response type is one of the more complicated types that can be used.Let's get the basics out of the way first: It may be chosen for either a question or an additional response field, and it can't be mapped by auto approval logic.
So how does it work? First, as the name implies, this response type should be used multiple times in the same question, so this would mean additional response fields. When you use this response type, you must pick a number that the total from all responses cannot be greater than, cannot be less than, or cannot equal the number picked. Then, create enough additional response fields to encompass the information being requested, making sure the number and condition you picked are the same in all fields. When the participant enters numerical values in these fields, they will add up, and the participant may either proceed if the limit was obeyed or will be held back if the limit was broken.
Let's talk about the example in the screenshot below. Seven additional response fields with this response type were created, each with the rule that the sum of all seven fields cannot be greater than 21.
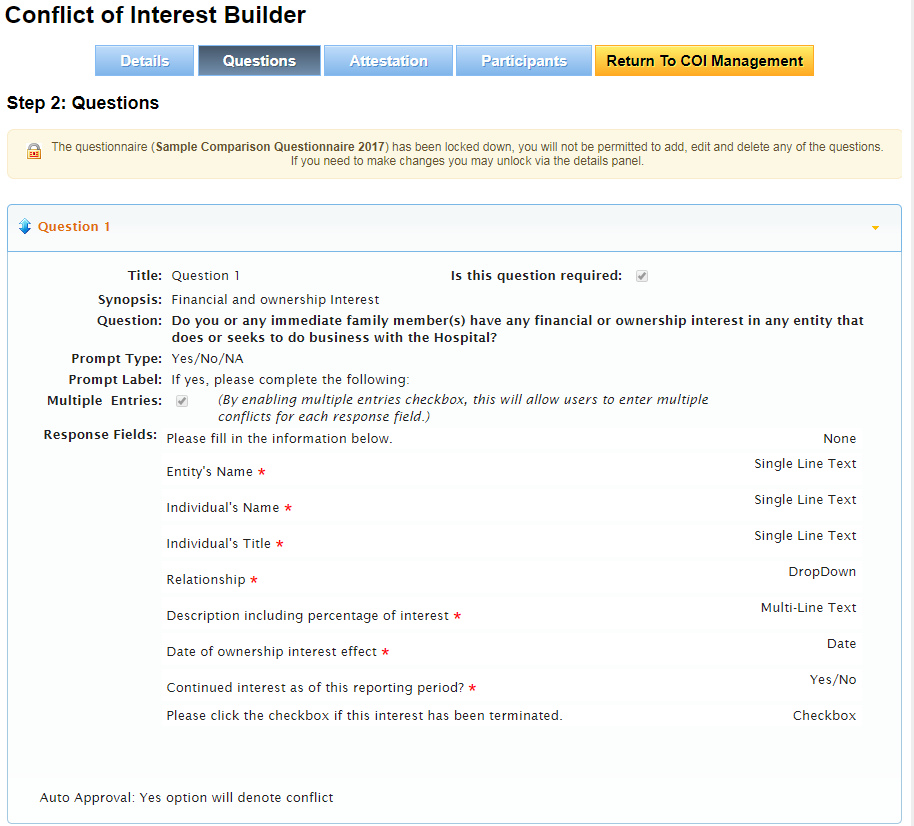
Did you know: The Questions page is completely locked after you have locked down a questionnaire. If you want to make changes to a question, first unlock the questionnaire from the Details page. This will also stop participants from answering questions while you make changes.
Related articles
-
Page:
-
Page:
-
Page:
-
Page:
-
Page: