How to Use My Team - PHM Products
Use these My Team processes for managing PHM (Population Health Management) users within the Care, Quality and Analytics products.
Step-by-step guide
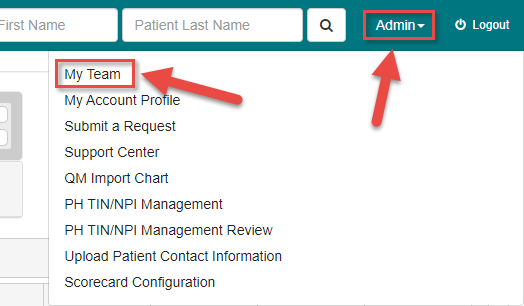
- To access My Team, begin by hovering the mouse cursor over the menu heading labeled 'Admin'. From there, click on 'My Team'.
The My Team page lists all Current Members in the system by default. The dropdown menu allows you to select a specific practice, and narrows down the member list to users assigned to that practice. You may also switch between the Pending Members and Archived Members lists by clicking the corresponding tab. To create a new user, click the 'Add New Team Member' button.
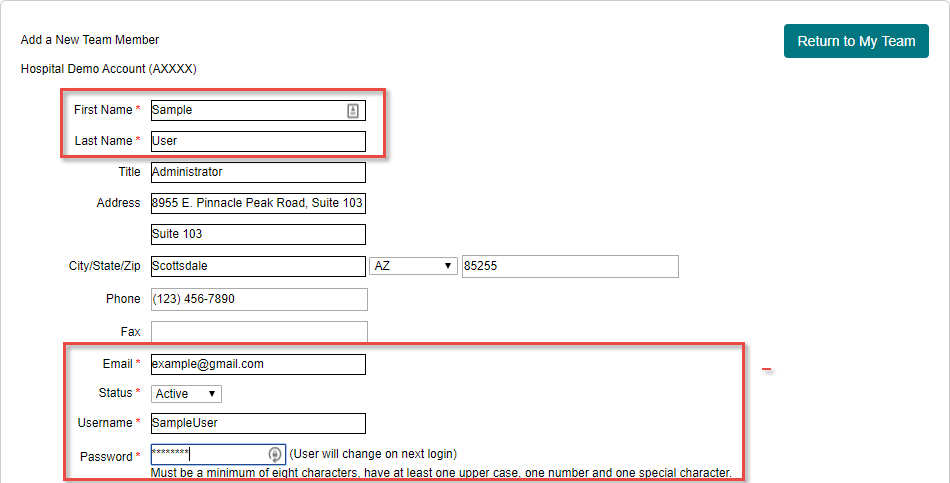
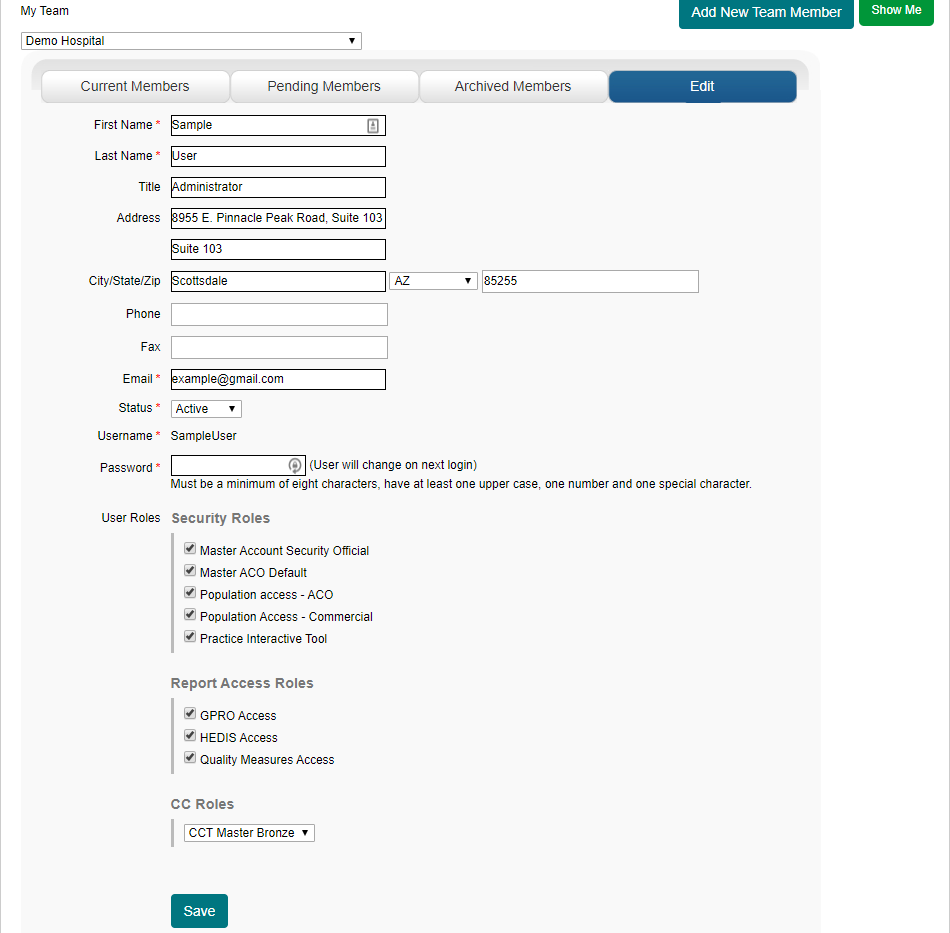
NOTE: The dropdown menu for selecting a practice is also used if the user you are adding should only have access to a particular practice or division.- On the Add a New Team Member page, required fields are indicated with a red asterisk *. Every user must have a 'First Name', 'Last Name', 'Email address', 'Username', 'Password', and 'Status'. The Status determines what list the user appears in on the My Team page, and should be set to 'Active' if you wish for the user to have immediate access to the system.
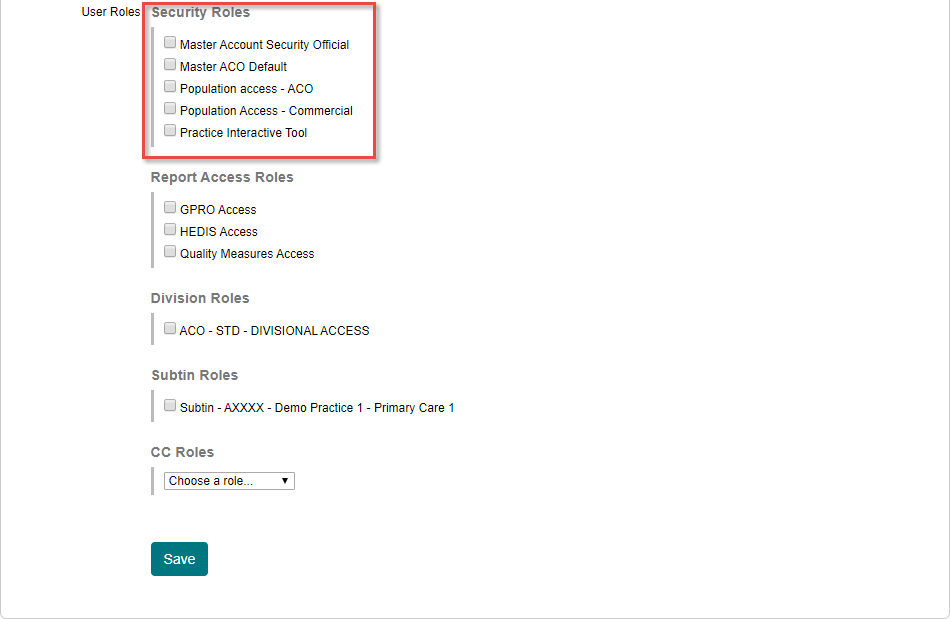
NOTE: The Email address must be unused in our system in order for the registration to be successful. The User Roles section has options depending on one of three user setup situations. If the user you are creating does not need to be restricted to a single practice or division, the only required role to decide on is whether or not to give the user a role of Security Official. All users with the Master Account Security Official role checked may access and use My Team. If you would prefer that the user you are creating not have access to My Team, leave this option unchecked. In addition, you should select one of the following based on the type of patient population your organization serves: Population Access - ACO (For Medicare) or Population Access - Commercial (For non-Medicare). If your organization serves multiple patient populations, you may select one or both depending on the patient population(s) and related tools you would like this user to have access to. If you would like the user to have the ability to access Interactive Tools, such as the Quick Data Tools and the drill-down built into the Provider Executive Dashboard, fill in the checkbox for the permission labeled Practice Interactive Tool.
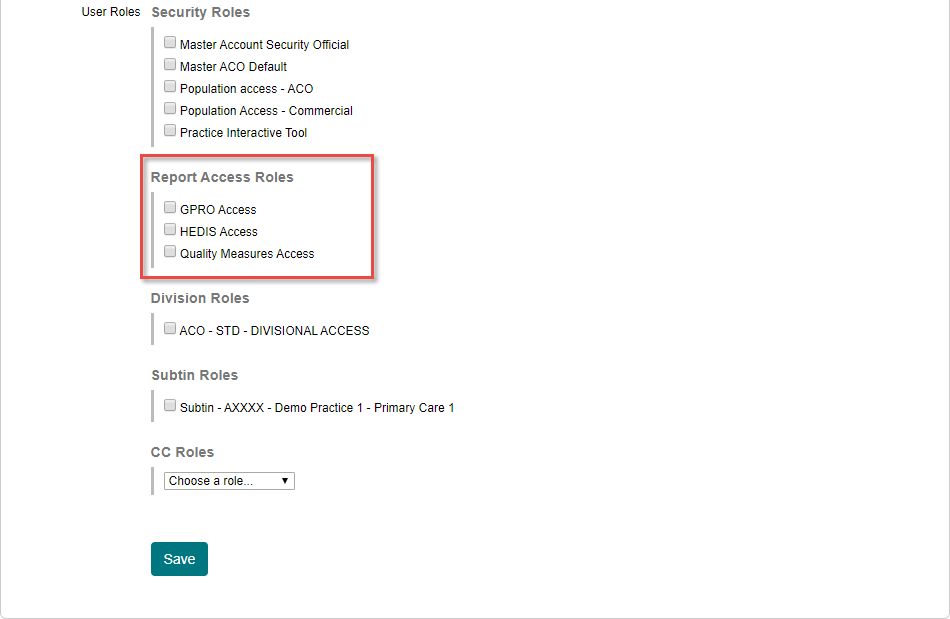
- If the user you are creating needs access to Quality Measure reporting, like GPRO or HEDIS, the next section, Report Access Roles, gives you the option to choose what type of report the user will have permissions for.
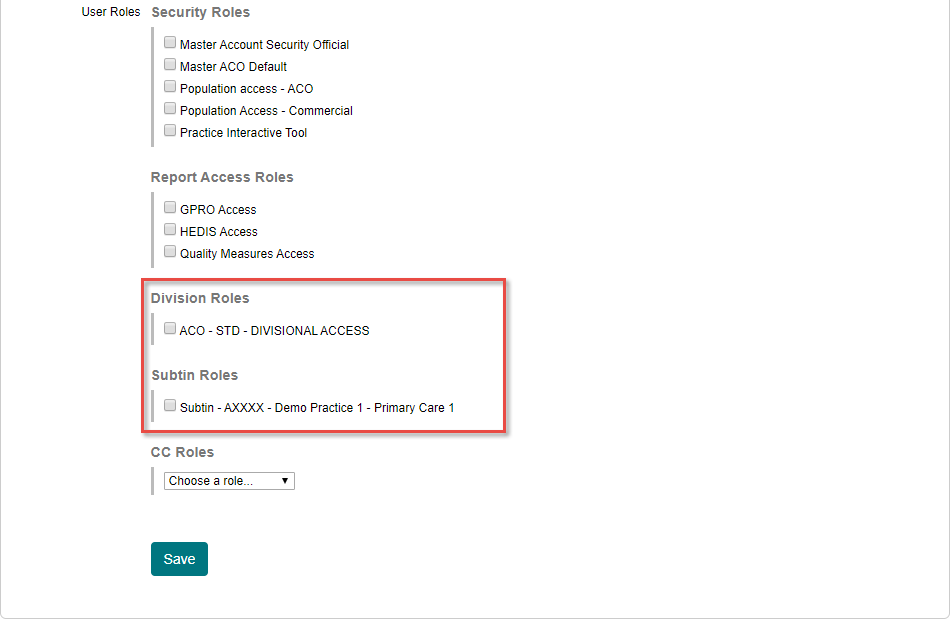
- If the user you are creating does require restriction to a single practice, division, or sub-TIN, pick out that particular practice in the dropdown menu (Shown on step 2) before accessing the Add a New Team Member page. In addition to the Security Official role, you may designate whether or not this user should have access to the Division that this particular practice belongs to, as well as any Sub-TINs that are associated with an NPI under this practice. If you decide to give the user divisional access, they will be able to access patient data for any practice under that division. If you decide to give the user sub-TIN access, they will be able to access patient data only for NPIs that are associated with the selected sub-TIN(s).
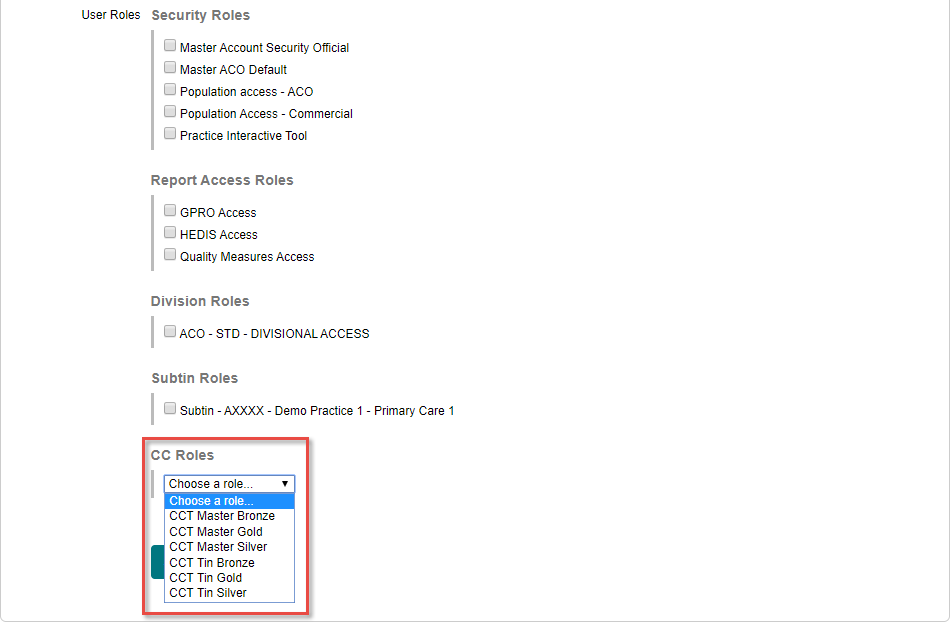
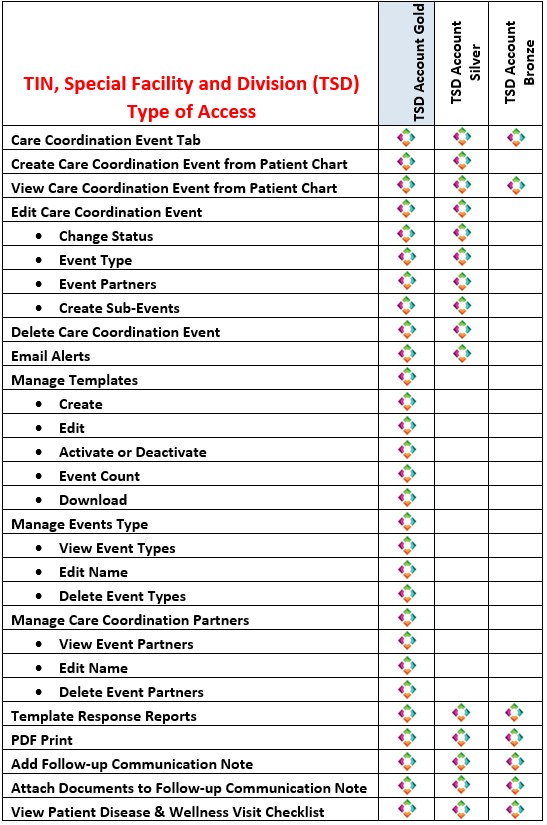
- If the user you are creating also requires access to the Care Coordination Tool, you may use the dropdown to indicate the access role this user will have.
CCT Roles
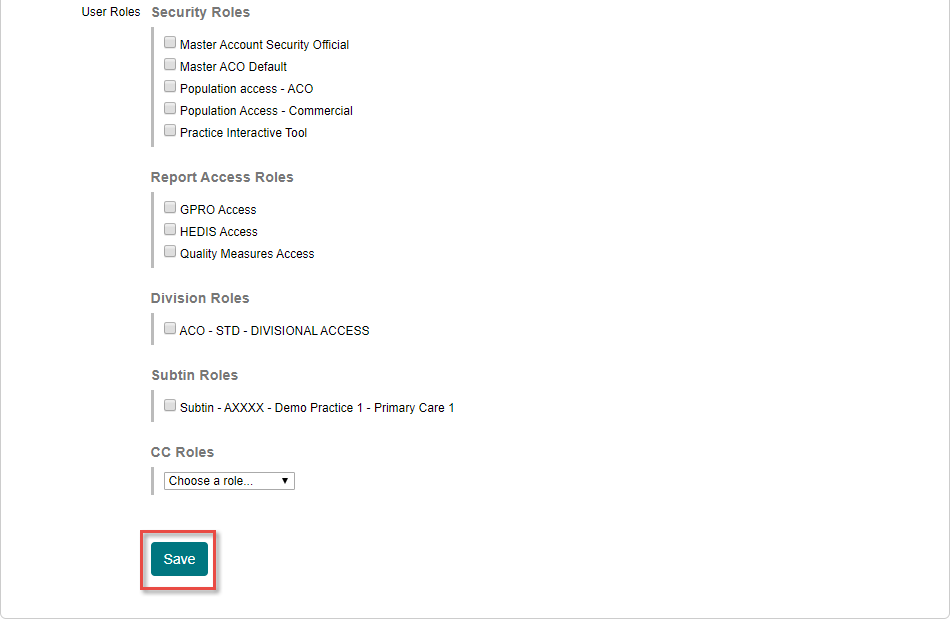
Once the user is set up as desired, click the 'Save' button to confirm user creation. (If the page does not return to the My Team Current Members page after attempting to save, the user has not been created yet. This is typically because the user’s Email address or Username are already in use.)
Upon returning to the Current Members page, the newly created user can be found based on their name in the member list. At this time, the user may log in with the Username and Password that you assigned to them.
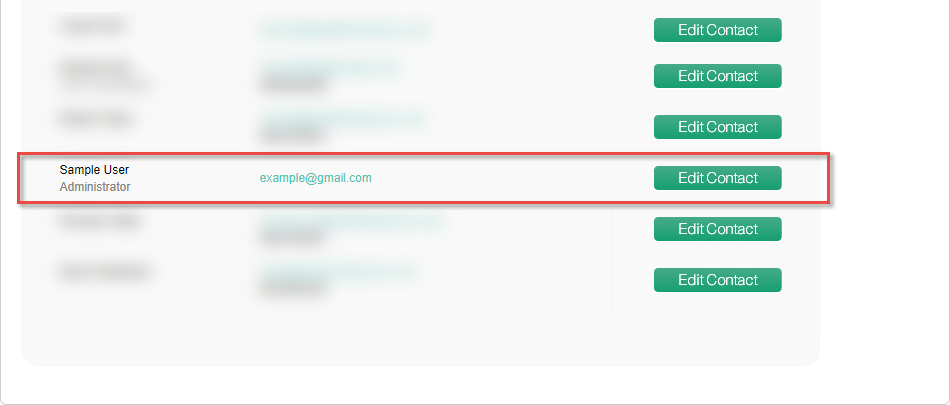
- Once a user is in the member list, you may click Edit Contact. The Edit page looks identical to the Add a New Team Member page, but can be used to change the user’s existing user roles or to manually set their Password. You may also change the Status from the edit page if you would like to Archive a user.
Did you know:
Under the Admin dropdown, there is a section that may be accessed by all users named My Account Profile. Using the options in this section, you may view and edit your user profile information. And, using the Password tab, you may change your password.
