Use Spec File Import
Use the process outlined in this article to navigate and utilize the Spec File Import tool.
Step-by-step guide
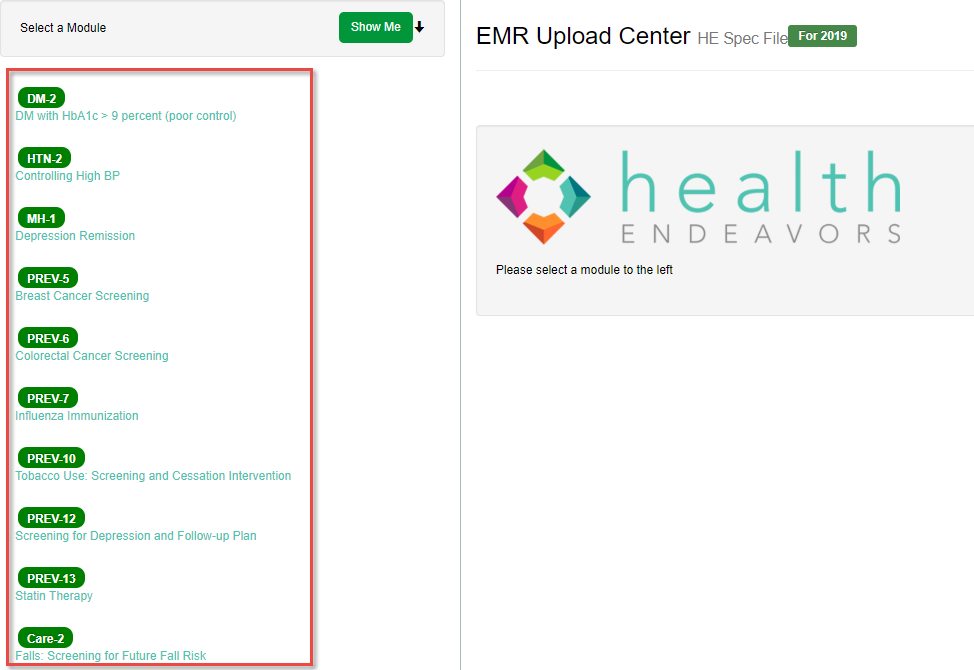
The Spec File Import page is designed to mass import response data based on response data within an import spreadsheet. In order to import this spreadsheet into the system, each available module has a separate processing screen that must be navigated into and reviewed before proceeding to upload a file. To begin, select a module from the menu on the left side of the Spec File Import page.
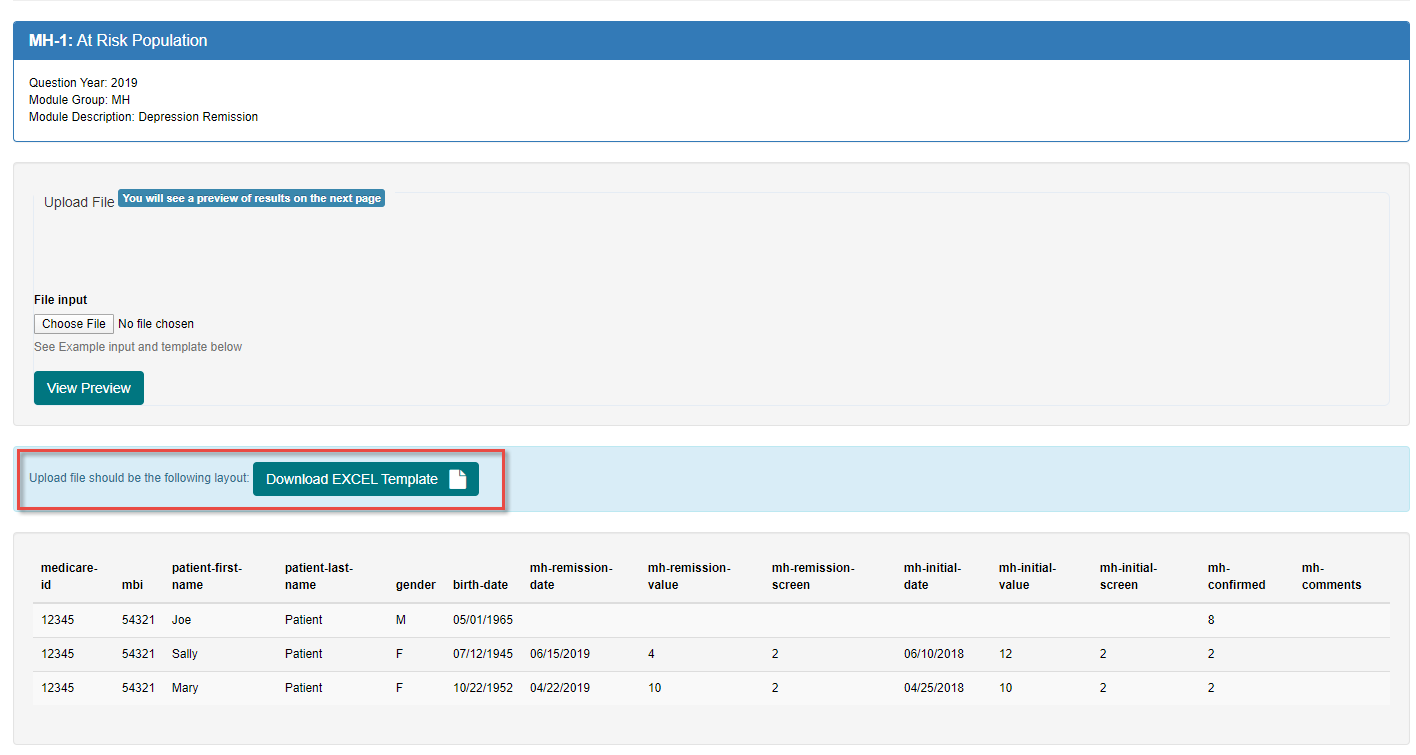
Once a module is selected, the center of the Spec File Import page will populate related answer keys and a link to an import template. To work with an import spreadsheet for this module, use the Download EXCEL Template button to download a template file.
In order to better understand the template, it is useful to look between the two screenshots below. On the spreadsheet, the first five columns are always the same basic patient health information: HICN (Health Insurance Claim Number), First Name, Last Name, Gender, and Birth Date. The columns after the first five relate to response data for each quality measure. Once you have selected a module on the Spec File Import page, an Answer Legend appears for that specific measure. Typically, the measure itself will have at least two possible responses for the required answer column: 2 (yes) and 1 (no). These relate to the performance and non-performance answers for the measure.
As an example, PREV-7 (Influenza Vaccine) is presented below:
pcflushot-date – The date the patient received the influenza vaccine. This field is optional, but if an invalid or out of range date is entered then the measure will not import the patient’s response.
pcflushot-comment – Each of the measures has an optional Comments field, and this is available when importing via Spec File as an optional column.
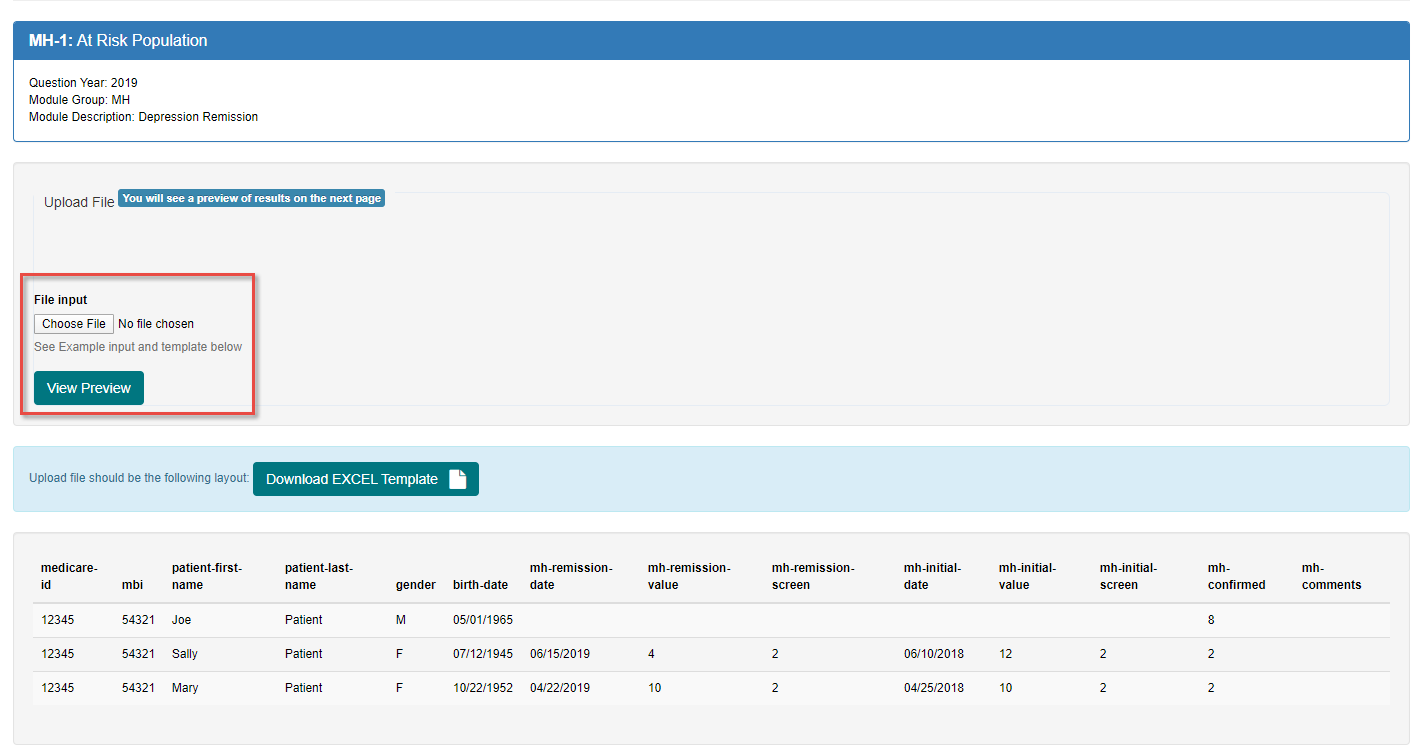
Pcflushot – This required column indicates whether or not the patient received the influenza vaccine. In addition to 2 and 1, there are also 4 and 5 (Declined for medical/patient reasons).Once the template is ready to be imported, click the Choose File button to select the template from your computer, and then click View Preview to continue.
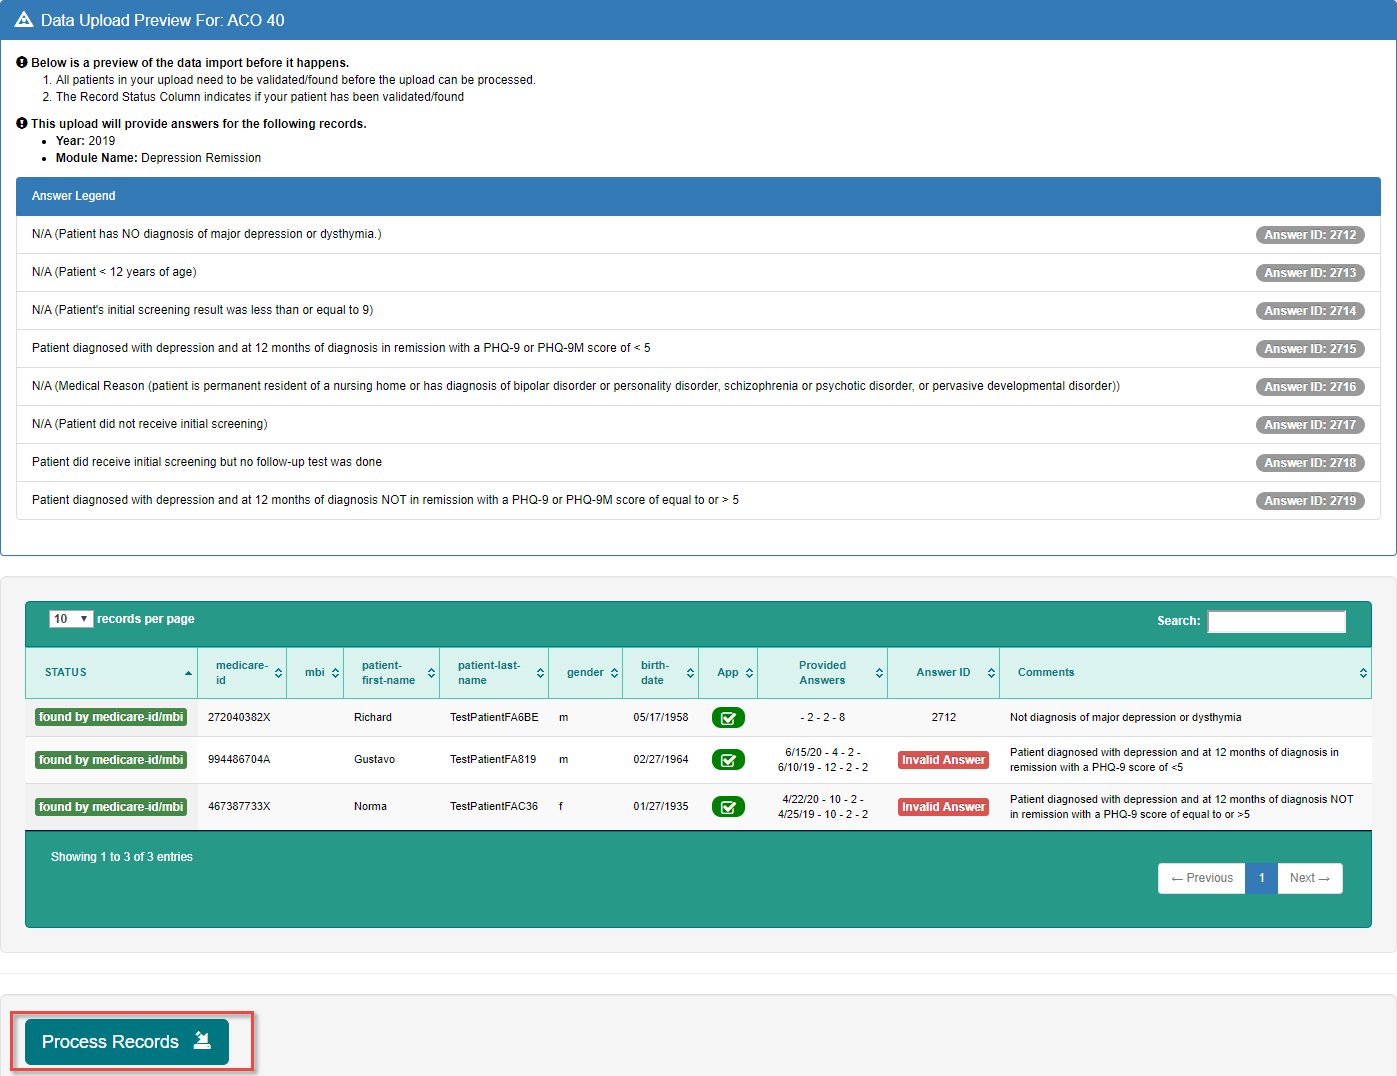
On the preview screen, valid answers and combinations are listed. The green table shows the response data pulled from the import spreadsheet, and validates each answer before the import is completed. At this point, you may cancel the import and make changes to the spreadsheet, particularly if a patient was not found or their response was in an invalid format. If the import is ready to continue, click the Process Records button to confirm the import.
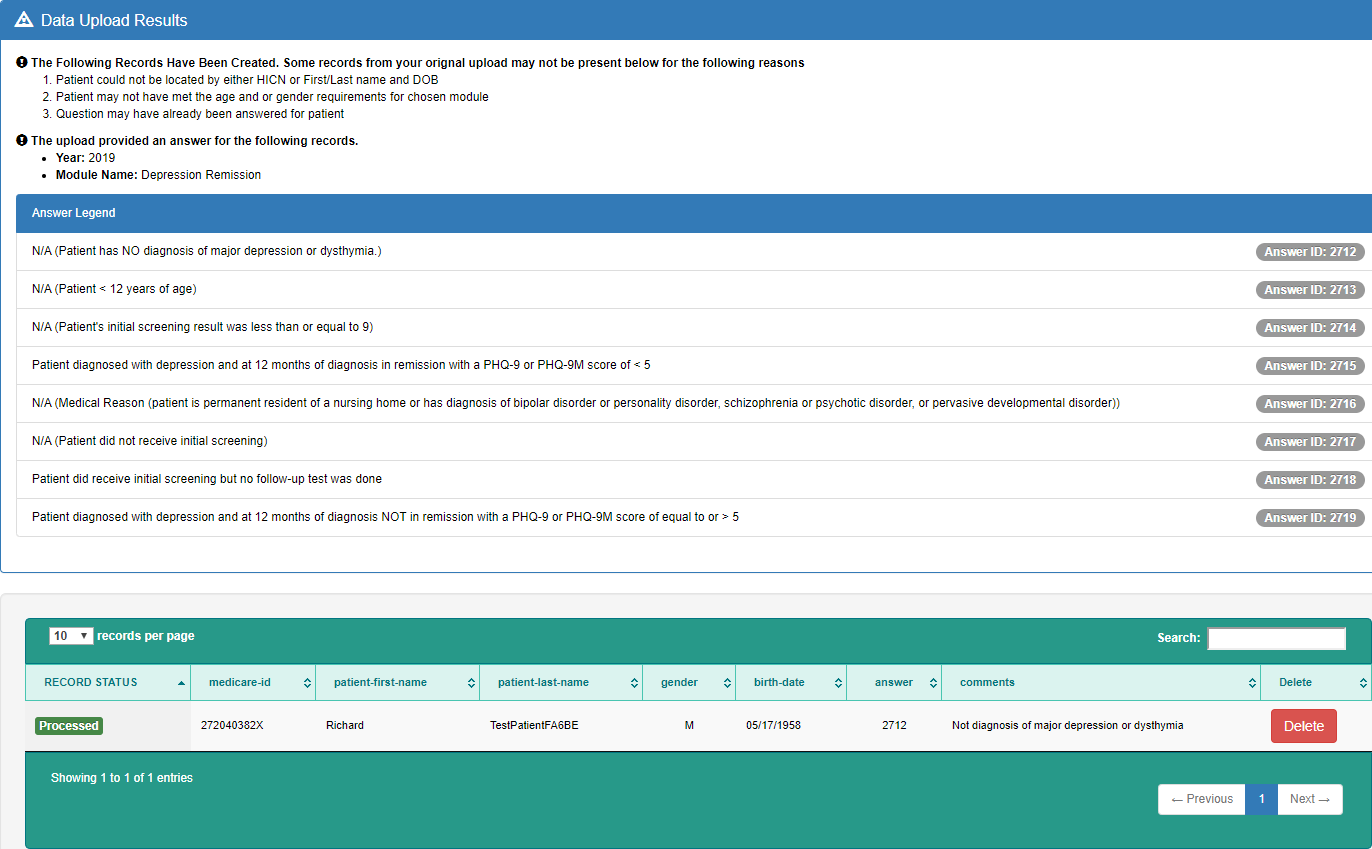
Note: The spec file import process can take a few minutes to complete. Please do not close the browser or navigate away from this page until the import has been confirmed as completed.When the import is complete, the green table will confirm the results of each response data import. If the import failed, a possible list of reasons is displayed at the top of the page. In addition, if you would like to undo an individual response data import, click the Delete button in the far right portion of the table. This will remove the individual response and return the patient’s measure data to the way it was before the spec file import occurred.
Did you know:
1. Spec File Import enables multiple patients with varying responses to be imported into the QM database at the same time
2. To use this tool, it is necessary to choose a quality measure and download the Excel Template to fill out
3. Once the import spreadsheet is filled out, you must Preview the results before confirming by clicking Process Records
4. After the import is completed, you may review the results list to see if any responses were not imported successfully. You may also delete individual response imports to revert them to how they were before the import occurred
