Use Single File Import
Use the process outlined in this guide to utilize the Single File Import tool. This feature allows an entire spreadsheet full of patients with the same response to be imported into a quality measure at the same time. This greatly reduces the processing time required to manually enter module data for one patient at a time.
Step-by-step guide
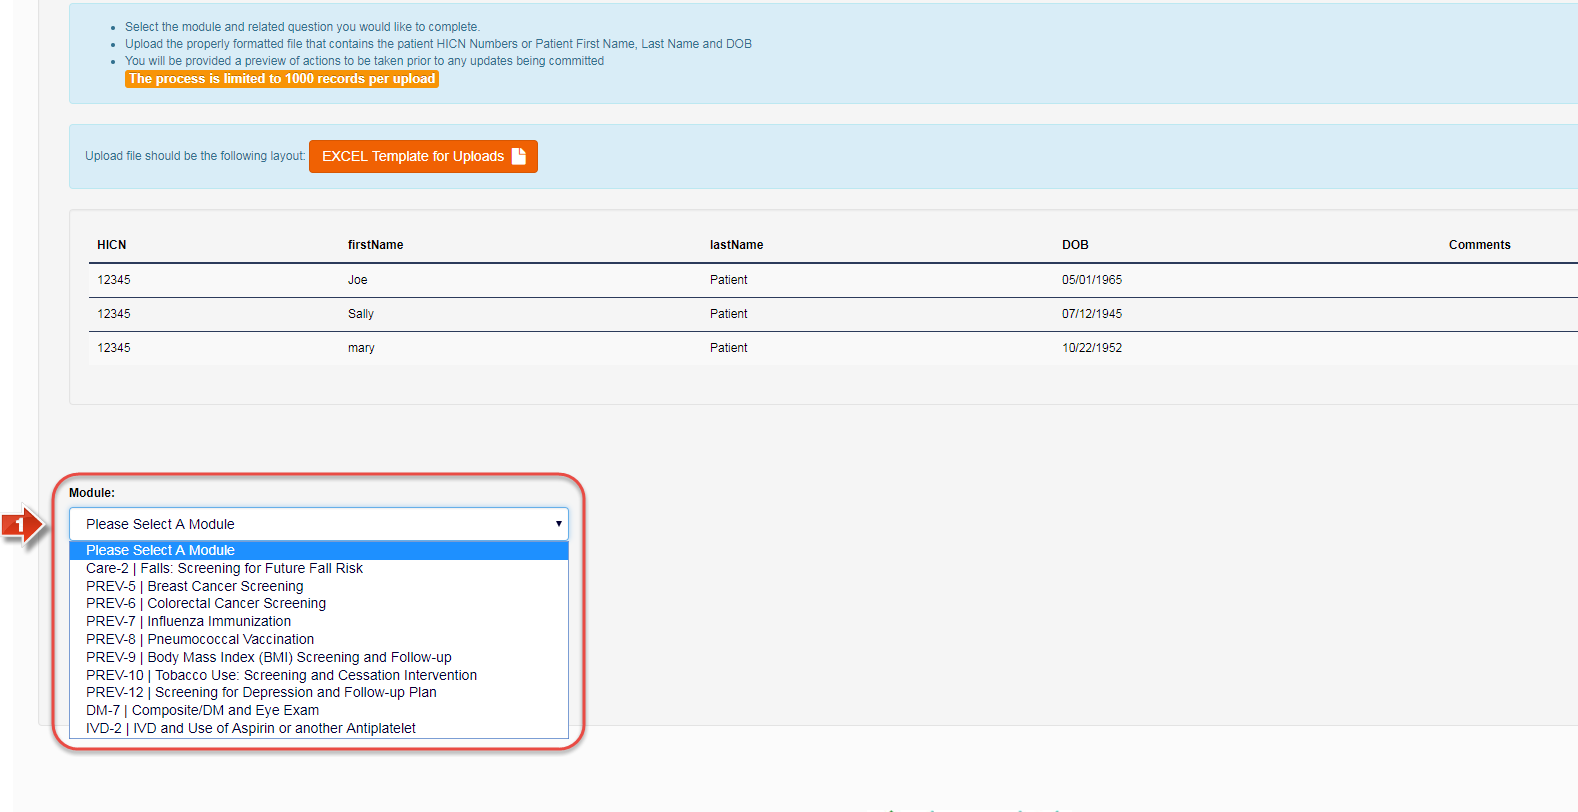
The Single File Import page is designed to mass import response data based on response data within an import spreadsheet. To begin, select a measure from the Module dropdown menu.
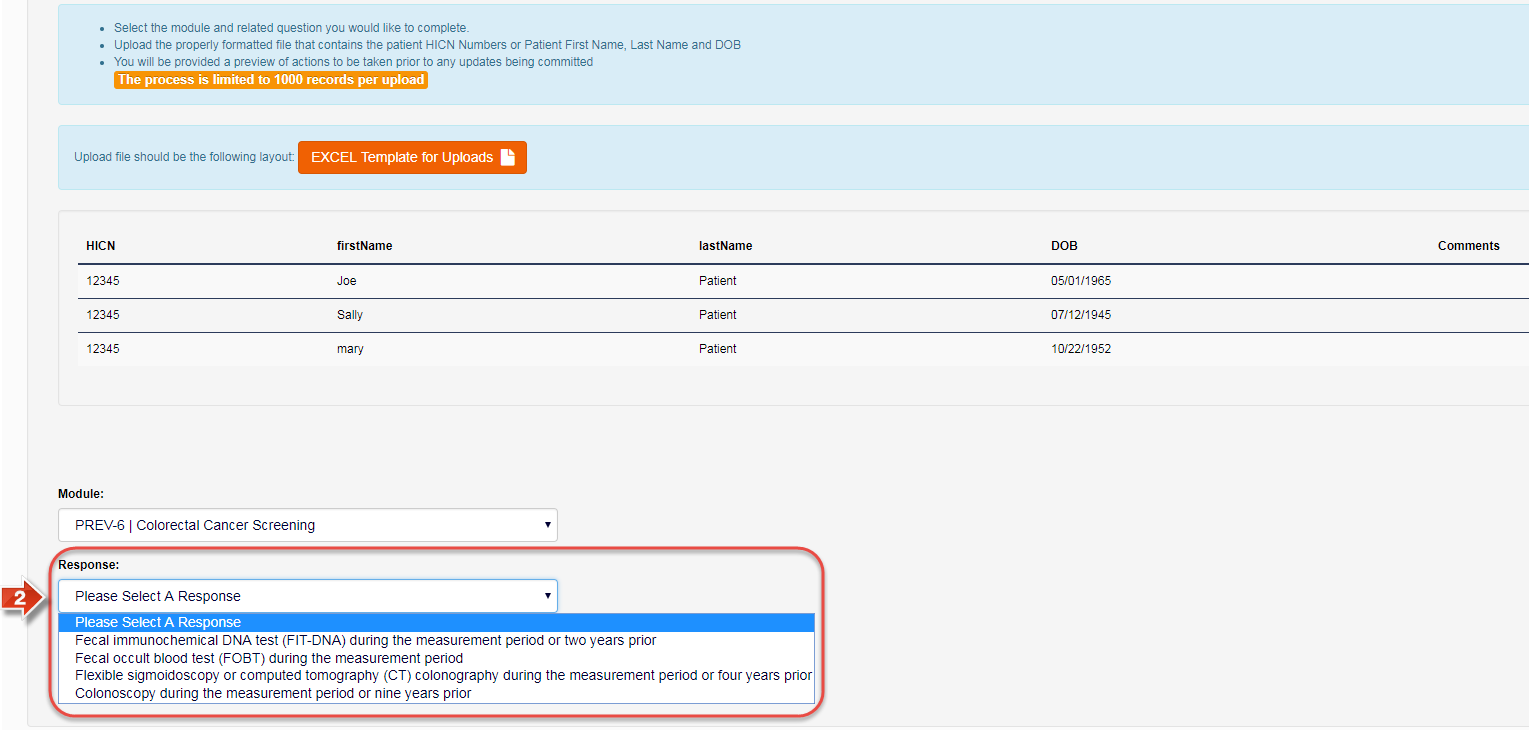
Note: Not all GPRO quality measures are supported by this import method. Incompatible measures will not be displayed in this dropdown menu.Once a module is selected, use the Response dropdown menu to select the response that applies to all participants being uploaded through the import.
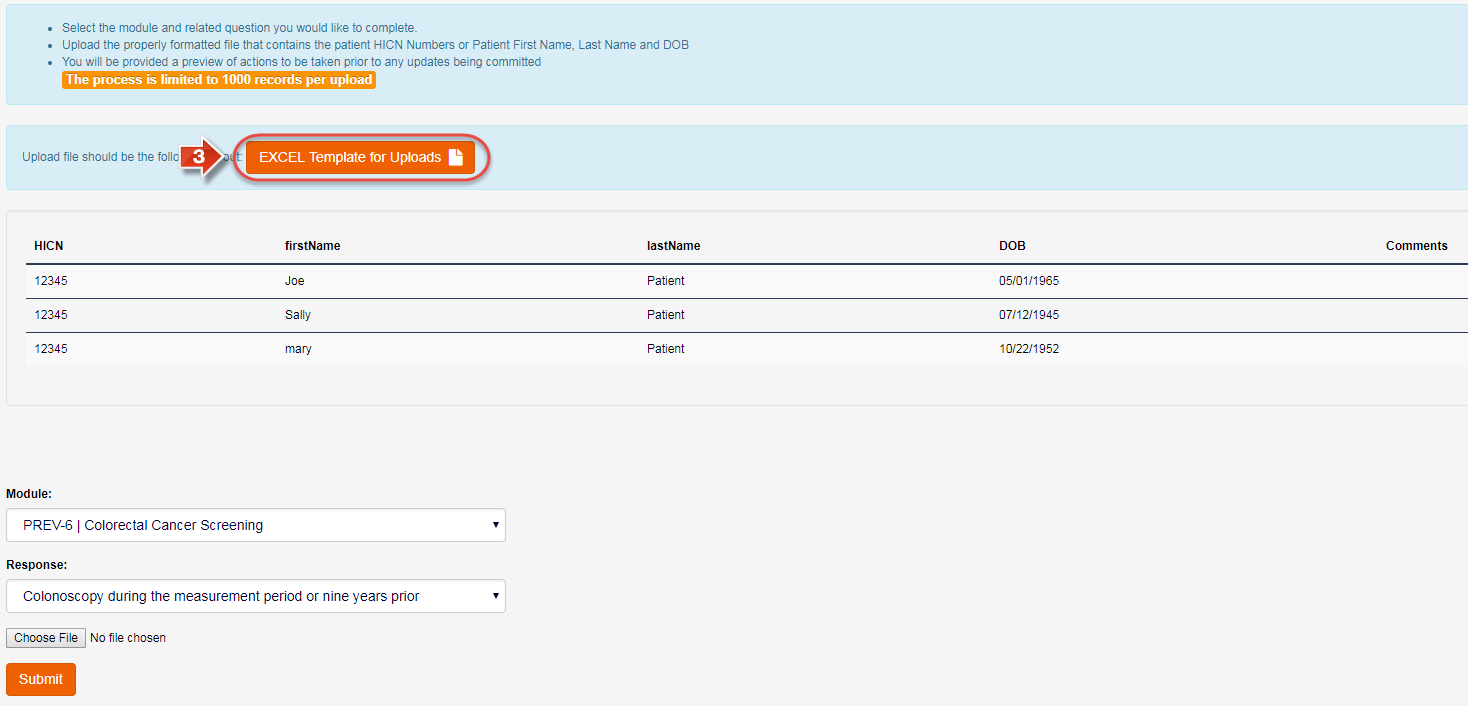
Note: Not all measure responses are supported by this import method. Typically, only performance answers may be selected in this dropdown menu.Once you have selected the Module and the Response, click the EXCEL Template for Uploads button to download an import spreadsheet. All imports in this section use the same spreadsheet format. The first four columns are all used to help identify patients: HICN, First Name, Last Name, and Date of Birth. The fifth column, Comments, is used to add any comments that should go with the response for the chosen module.
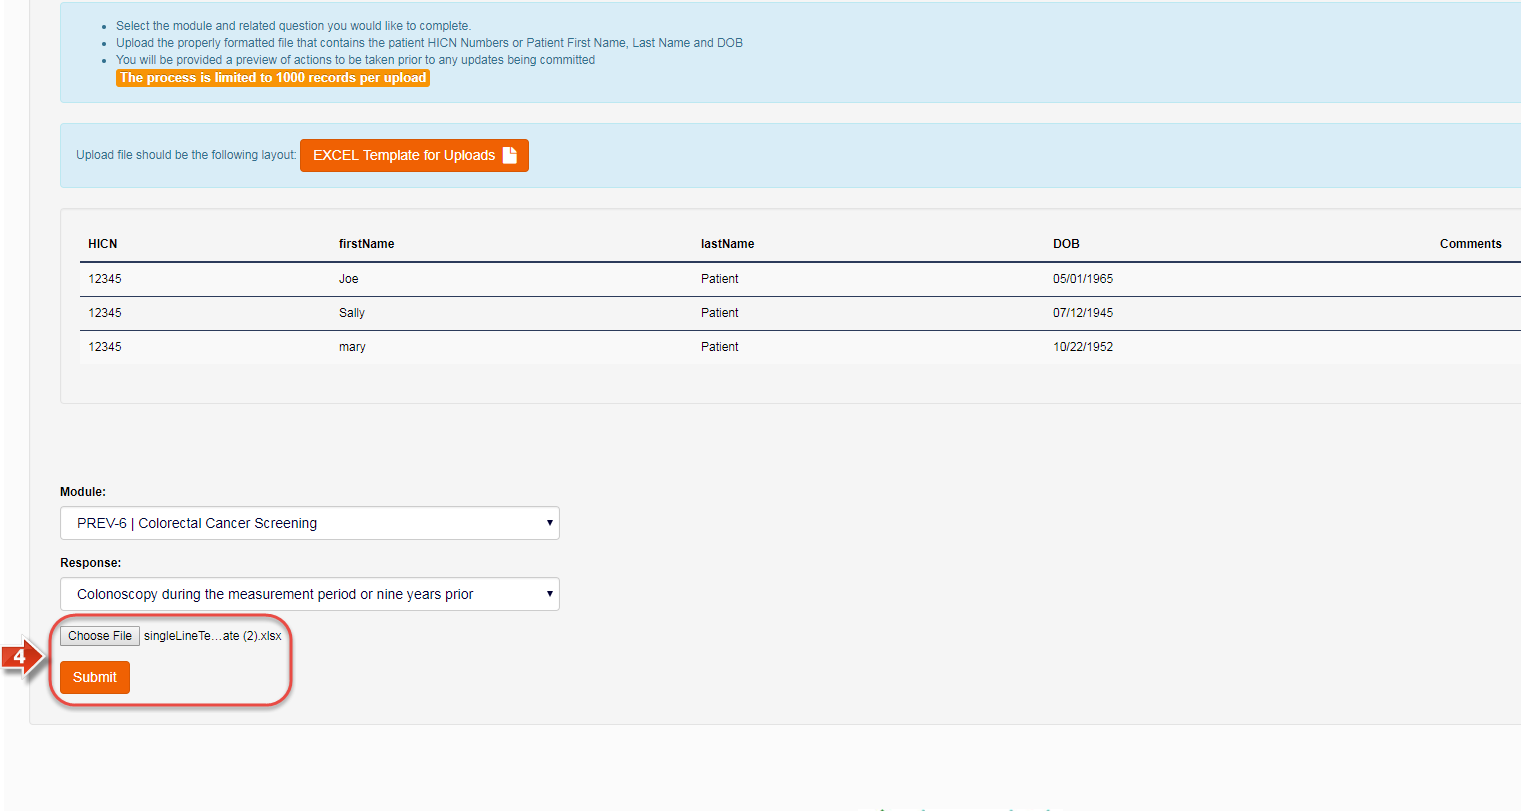
Important Note: Each import spreadsheet may have a maximum of 1000 patient records.Once the template is ready to be imported, click the Choose File button to select the template from your computer, and then click Submit to continue.
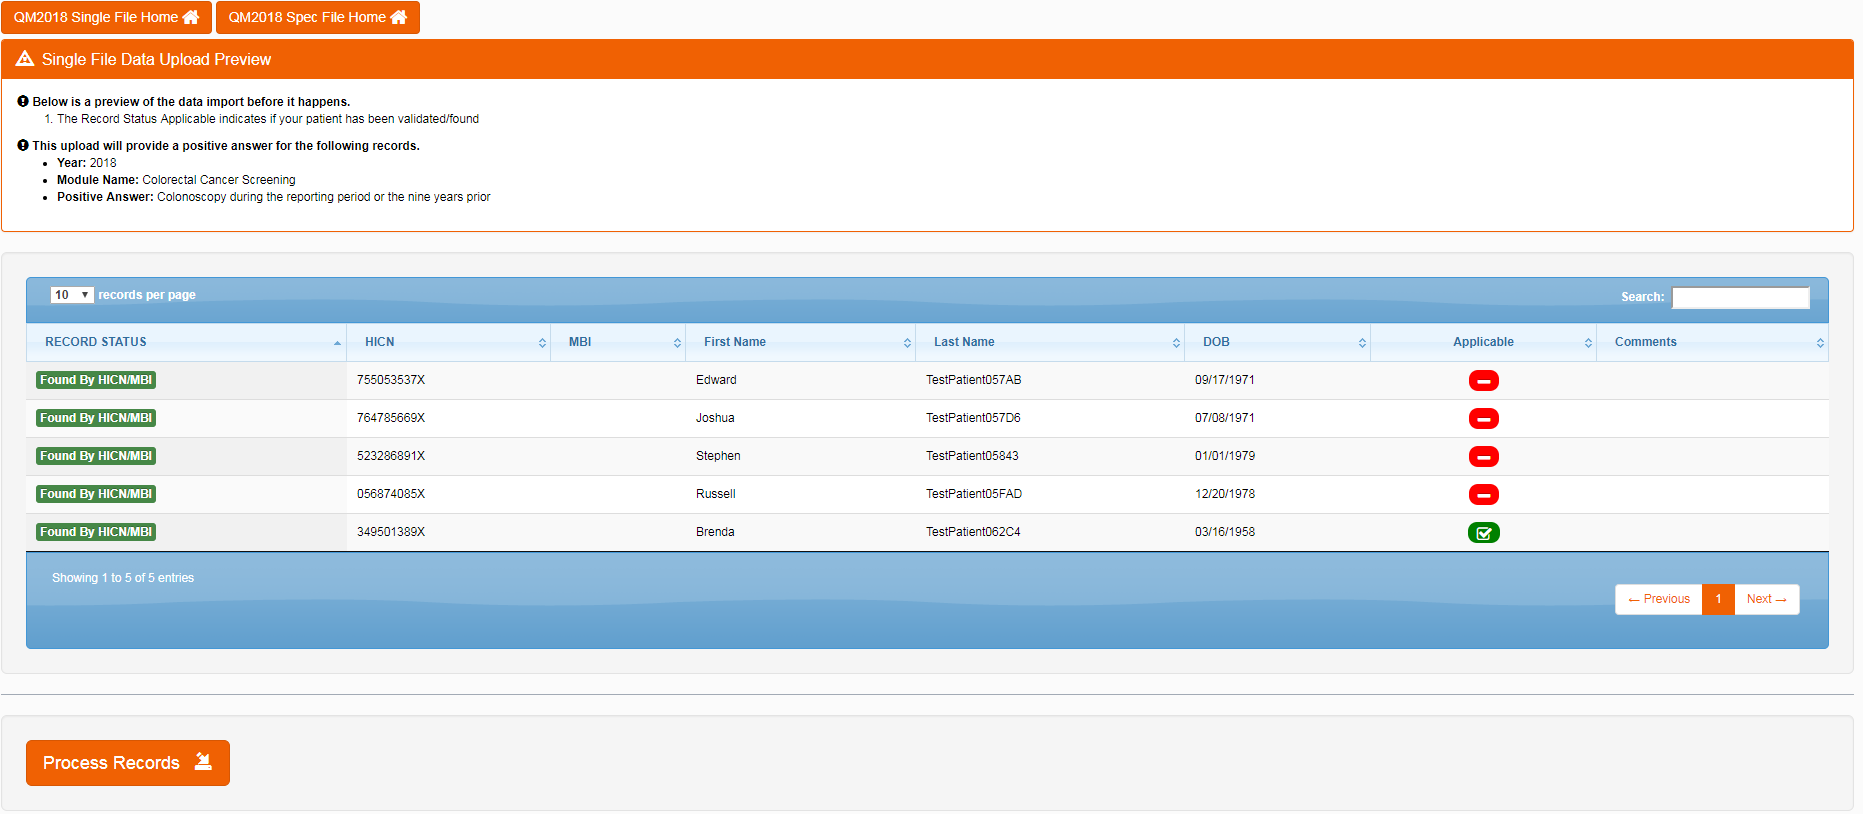
On the preview screen, the blue table shows the patients pulled from the import spreadsheet, and validates each patient before the import is completed. At this point, you may cancel the import and make changes to the spreadsheet, particularly if a patient was not found. If the import is ready to continue, click the Process Records button to confirm the import.
Note: The Single file import process can a few minutes to complete. Please do not close the browser or navigate away from this page until the import has been confirmed as completed.When the import is complete, the blue table will confirm the results of each response data import. If the import failed, a possible list of reasons is displayed at the top of the page. In addition, if you would like to undo an individual response data import, click the Delete button in the far right portion of the table. This will remove the individual response and return the patient’s measure data to the way it was before the Single file import occurred.
Did you know:
- Single File Import enables multiple patients with the same quality measure response to be imported into the QM database at the same time.
- To use this tool, it is necessary to choose a quality measure, a performance response, and download the Excel Template to fill out.
- Once the import spreadsheet is filled out, you must Preview the results before confirming by clicking Process Records.
- After the import is completed, you may review the results list to see if any responses were not imported successfully. You may also delete individual response imports to revert them to how they were before the import occurred.
