Create and View an Event
Use this process to create a new event in the Health Endeavors system.
Step-by-step guide
To create a new event, perform the following steps:
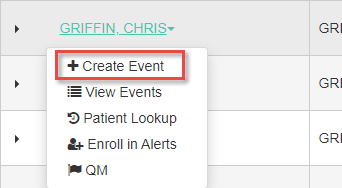
- After generating a list of patients in the Patient Master Dashboard, click the drop down arrow next to the desired patient. From the pop-up list, click "Create Event".
- As you work on the event, a timer will display. This indicates how long you have been working on the patient. You may use the Pause button to stop this timer, or the Reset Timer button to set this back to zero.
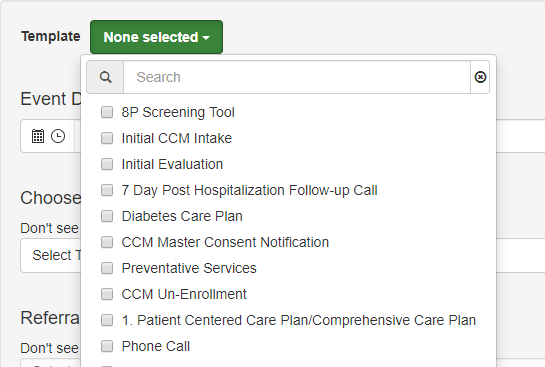
- Directly below the timer, the 'Template' dropdown is available for selecting documentation and intervention templates. By choosing the appropriate templates for the type of event you are reporting, you will be able to add relevant details and set the flow for resolving the event. If you select a template, it will appear at the bottom of the event form. The next two steps will skip down to the bottom of the form to explain the two different types of templates that may appear when selected.
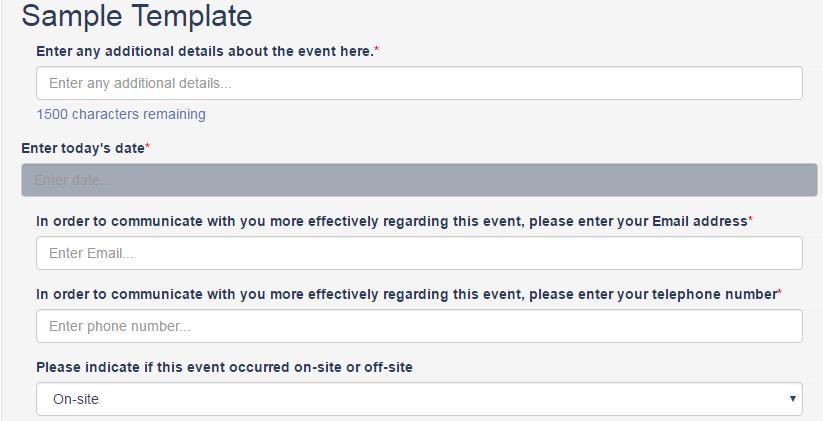
- If you selected at least one Documentation Template, it will be displayed here after the Program Types menu. There are numerous potential response formats within documentation templates. Fields accompanied by a red asterisk (*) are required to continue with event creation.
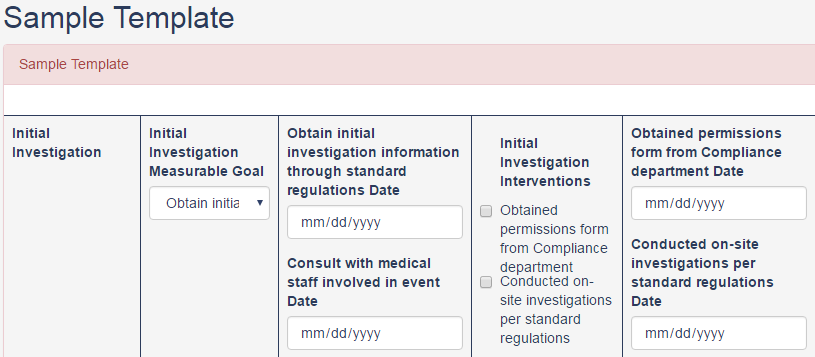
- If you selected at least one Intervention Template, it will be displayed after documentation templates. Unlike documentation templates, intervention templates focus on the investigation and resolution of events. With that in mind, none of the fields are required to be filled out during event creation. This is because many steps may not have been performed or even been available yet at the time of event creation. If portions of the intervention template have already been completed, however, you may fill them out here and the template will be saved along with the event. The main template label is on the left side, followed by a listing of 'Measurable Goals' for the template to the right. Each measurable goal has a 'Date' of accomplishment that should be filled in once that goal has been completed. Each measurable goal also has 'Interventions,' which are actions that are taken in order to accomplish each goal. Each intervention also has a Date of accomplishment, which is filled in when the intervention has been completed. To the right side of the template, the 'Outcome Status' of the template, as well as any accompanying 'Comments/Notes' are displayed. The status should remain as Ongoing/Revised until completed, at which point it should be changed to resolved.
- In summary, the form should be filled out as follows:The intervention template is completed once the Outcome Status is changed to Resolved. This is accomplished when all Measurable Goals are completed. In turn, Measurable Goals are completed once all Interventions that comprise those goals are accomplished.
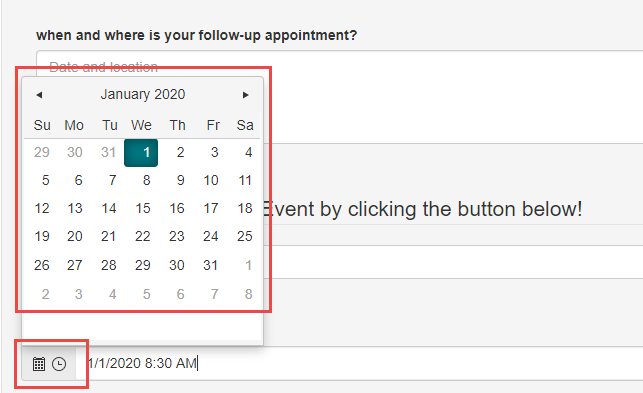
- Assign the 'Event Date' and 'Follow up Date'. The Event Date is typically the date on which the event occurred. The Follow up Date is the scheduled date for checking on the event, and is automatically set to the day after the Event Date.
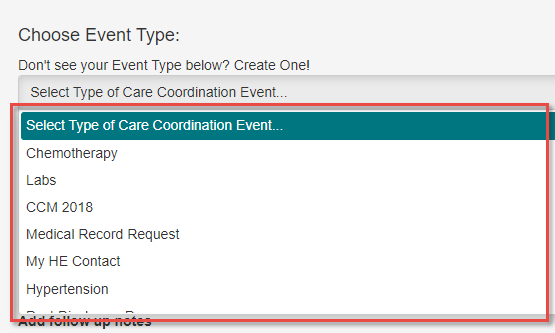
- Next, select the 'Type of Care Coordination Event' using the dropdown menu. This is the Event Type category to which the event can be identified. (If the correct event type does not exist, you may use the Create One link to name a new type and make it available for use immediately.)
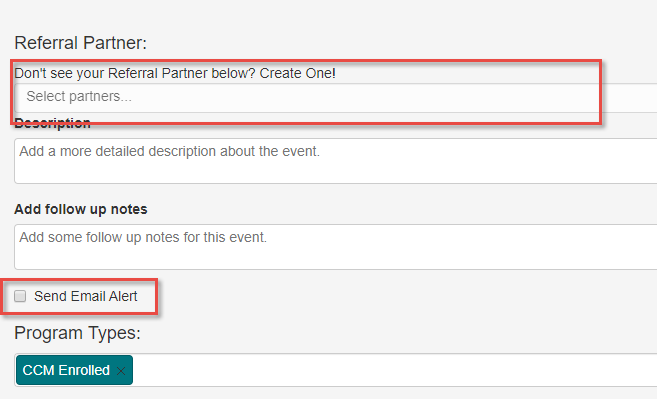
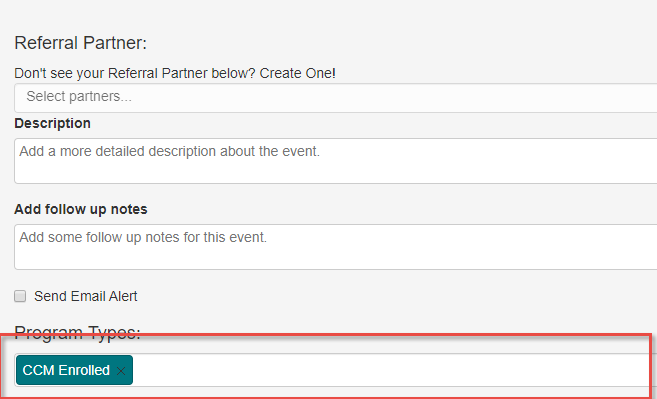
- After selecting an event type, a list of available 'Care Coordination Event Partners' will be generated based on the available choices for that event type. Choose the event partner from the dropdown list, or use the 'Create One' link to add a new partner for this type. You may select more than one event partner for this field. Check the checkbox for 'Send Email Alert.' Once the event has been successfully created, an Email will be sent out automatically to these event partners.
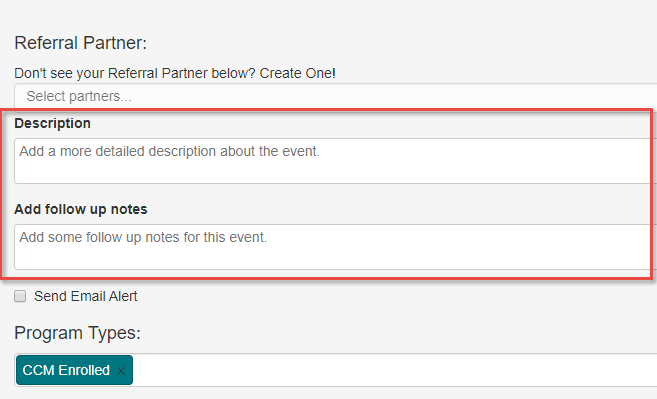
- Fill in a 'Description' that describes the event in detail. Use Add follow up notes to add details related to the follow up for this event.
- Select the 'Program Types' for this event. As with the event partners, more than one program type label may be selected.
- Attach documents to the event by clicking the upload button. These are uploaded directly from your computer, and are typically supporting documents related to the event.
- At the bottom of the event creation form, you may save the event in the system. Once you have selected one option on how you would like to save your event, select the 'Create' option.
- Save Event – Will save the event and route the user back to the event’s page of that current patient
- Close Event – Will close the current event created and route the use back to the event’s page of that current patient
- Copy Event – Will close and copy the current event & it’s information to a new/open event.
- Mark as Done – Will close the current event and open a new event to edit.
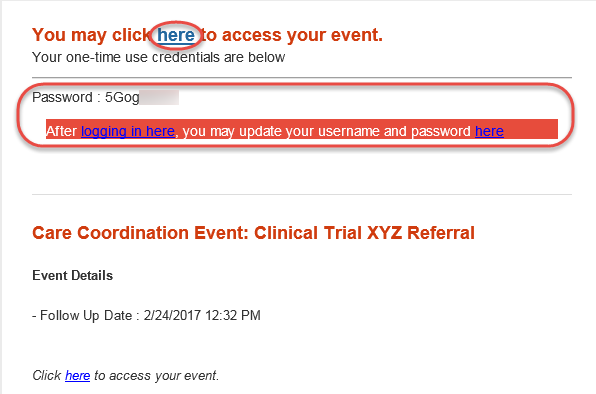
- After creating an event, it will be visible under the patient’s event listings to users with access to the patient’s records. If an event partner was selected for an Email alert, each selected event partner will receive an Email like the one shown below. If the partner is not a user in the system, they will be prompted to register a Username and Password before continuing to view the event. If the partner is already a user in the system, the link will take them to a login page, then to the event page after they have logged in.
